Create Reactive Job - Wizard View
To create a Reactive Job using the Wizard View, simply click the “Create Job” tab then the "Create Reactive Job" button and follows these steps:
1. Clicking the "Create Reactive Job" button will display the first step of the Create Reactive Job process: the Building tab. This will do one of two things depending on the number of Building available to the User. If the User has one Building, the "Your Building" field will be automatically filled in with that Building. If they have more than one, then the User will have the option to either type the Building in the text box or choose the desired Building from the drop down. There is also the option to select whether an Asset is available or not but this is described later on (see the Create Job - Asset Available page).

Note: The Summary section to the right will get updated with the information chosen in each tab and provides Users the option to change any information they have entered previously from any point, if the need arises.
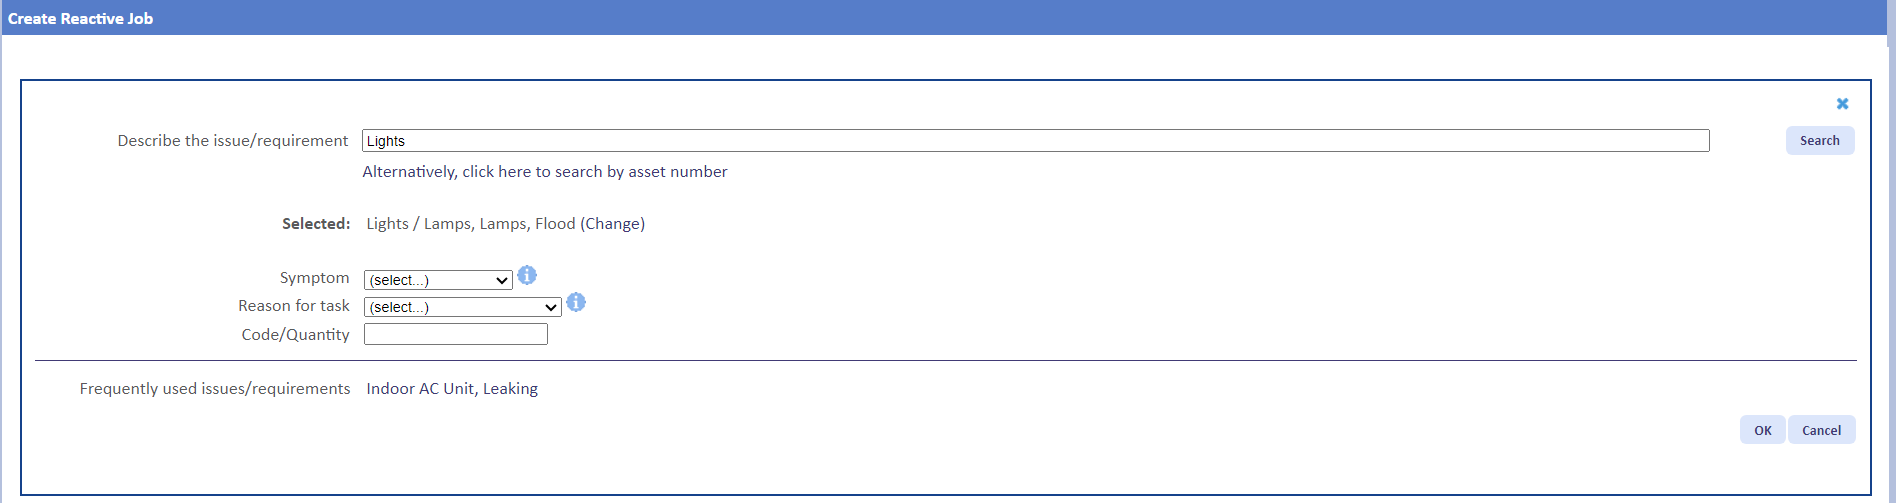
2. The next tab is the Task tab. In the "Task Search" field, enter the item that needs attending to and click the "Search" button. This will display a list of faults/issues relating to the search criteria in which the User must select the correct fault/issue that is causing a problem. If the User selects a fault/issue that is not maintained, a message is displayed next to the task and will not allow the User to select it (this is permission based).

Once the fault/issue has been selected, the "Symptom" and "Reason for task" need to be determined. Both the "Symptom" and "Reason for task" fields are drop downs which the User can select from. Explanatory text may appear in relation to the "Reason for task" chosen (if configured by the System Administrator) providing detail on what each Reason should be used for. Also, if necessary, it is possible for the User to enter a "Quantity" (for example if there are multiple light bulbs blown) or a Code relating to the issue in the "Code/Quantity" field.
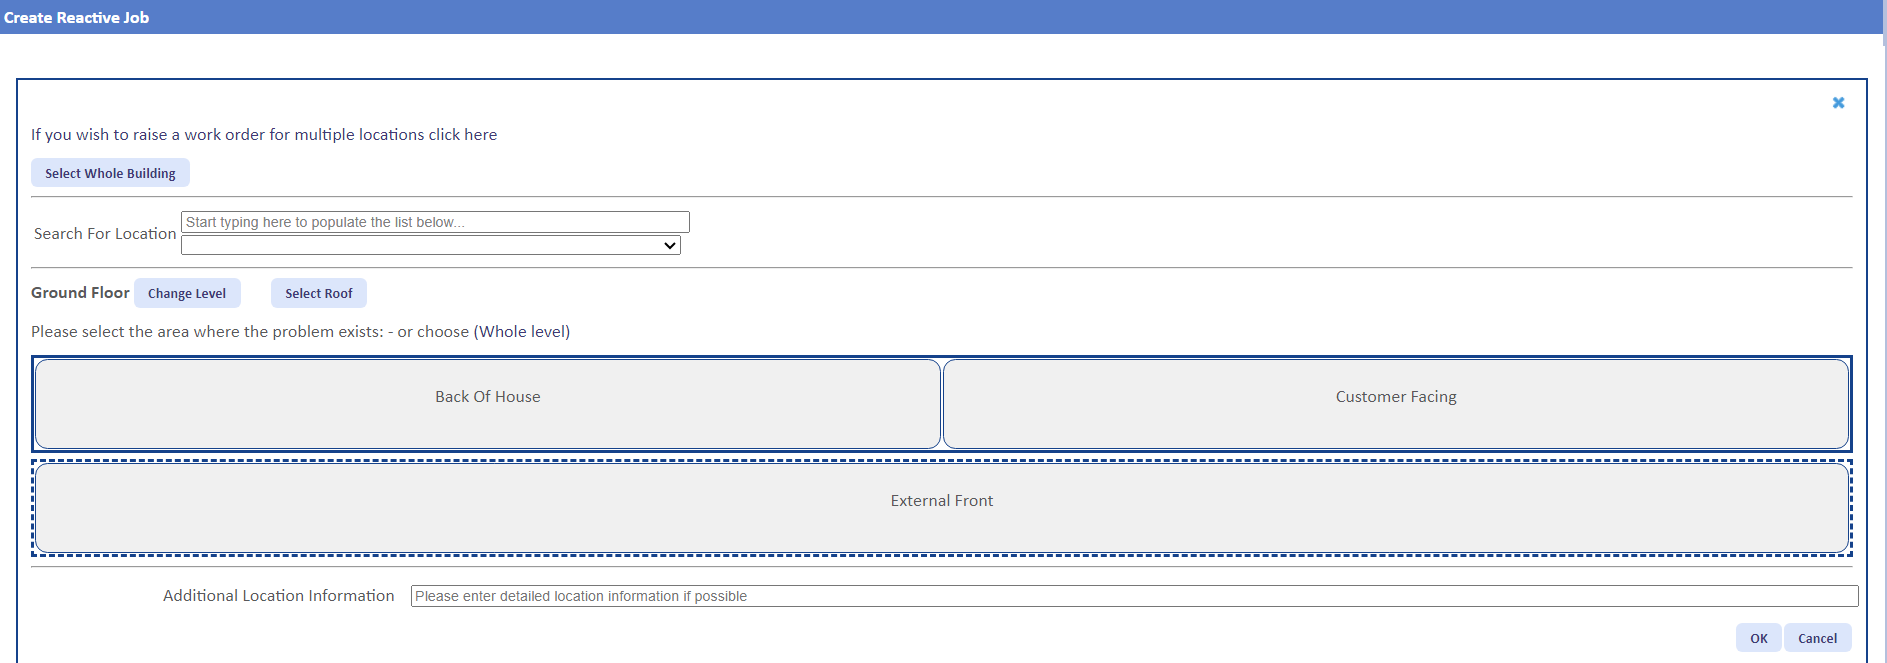
3. Next is the Location tab. This is where the location of the issue is entered. Start off by checking if the Level is correct by checking the Level located on the left. If this is incorrect, click the "Change Level" from the left hand side and this will display a number of Levels available at the Building. Choose the appropriate Level and the Level will be changed (if the desired Level is the "Roof", clicking "Select Roof" will automatically choose the location as Roof, Roof, Roof and will progress to the next section of the Create Job process).
Next, select an Area and a set of Location will appear (if the issue is across the entire Level, select the "Whole Level" button instead). If any further information about location can be provided then this can be added to the "Additional Information" field.
If there are many locations at the Building and the desired site is already known, the User can search for the Location using the "Search For Location" field. Searching in this field will display a list of locations as the User types. Select the desired Location from here to be progressed to the next step. If the issue happens to be round the entire Building, then the "Whole Building" button should be selected. This will also progress to the next step when selected.
Once the location has been provided, click the "Next" button to proceed.
4. The next tab is the Contact tab. The person or team that will be the contact for this job is selected here. When this tab is displayed, by default the details of the User creating the job automatically populate the fields a list of contacts to select from is displayed. Each Contact in the list has a Name, Job Title and Telephone Number. Select one of these by clicking the contact name and the "Contact Type", "Contact Name" & "Contact Telephone" fields are populated with the contacts details.
Once the contact information has been provided, click the "Next" button to proceed.
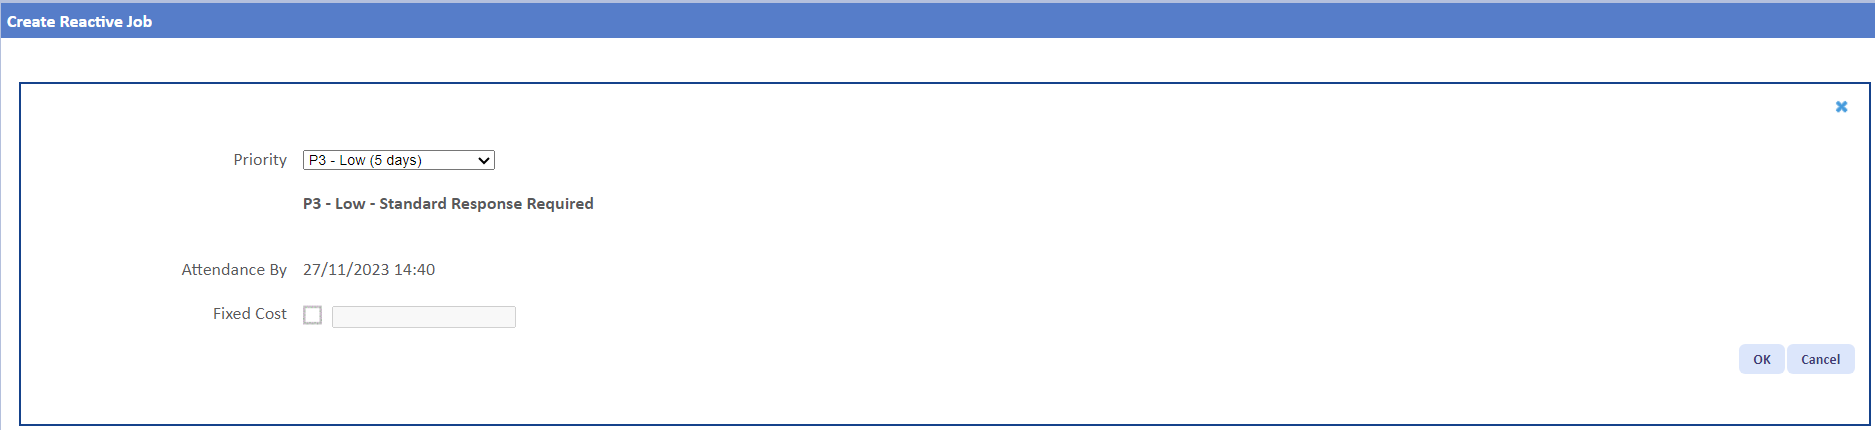
5. Once the contact is selected, the Response tab is displayed. This is where the User details the time the job needs to be completed by. They can determine whether a temporary fix is in place (using the "Is there a temporary solution in place?" tick box) and the priority of the job. The priority can be selected using the "Priority" drop down.
Note: Some priorities will display a Date/Time picker. When these are chosen, all the User needs to do is select the Date/Time accordingly. Other priorities will show the calculation of what the calculated SLA (based on the Contract) will be.
Note: The summary is also updated at this point. The Resource who will be assigned to the job and the Agreed SLA will now be shown if they have the correct permissions to do. It is possible for a User to be able to choose the Resource they wish for the job to be assigned to but this also requires the correct permission. Please see the Create Job - Resource Selection page for more details.

6. The next tab is the Notes tab. Here, the User can enter any extra details relating the job that don't fit in the other tabs. All that is shown here is the Additional Information field in which detail can be entered. Once entered, click the "Next" button to proceed.
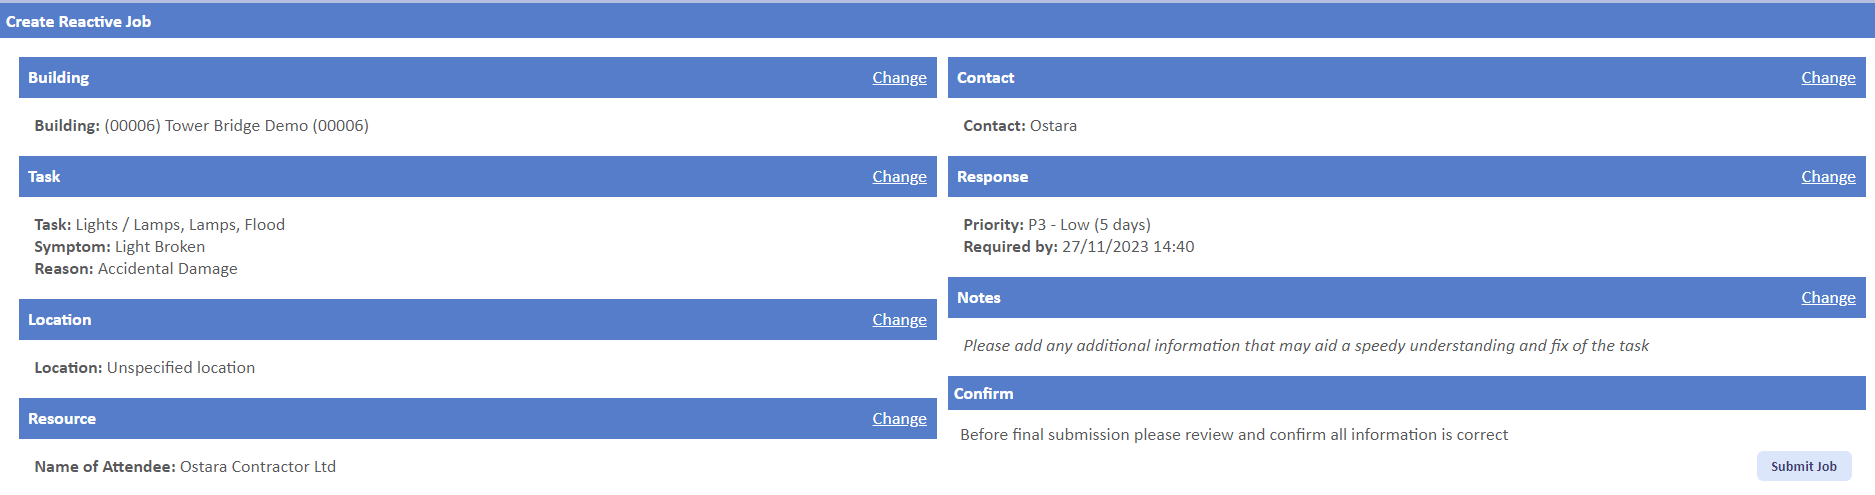
When ready to create the Reactive job, click the "Submit Job" button.