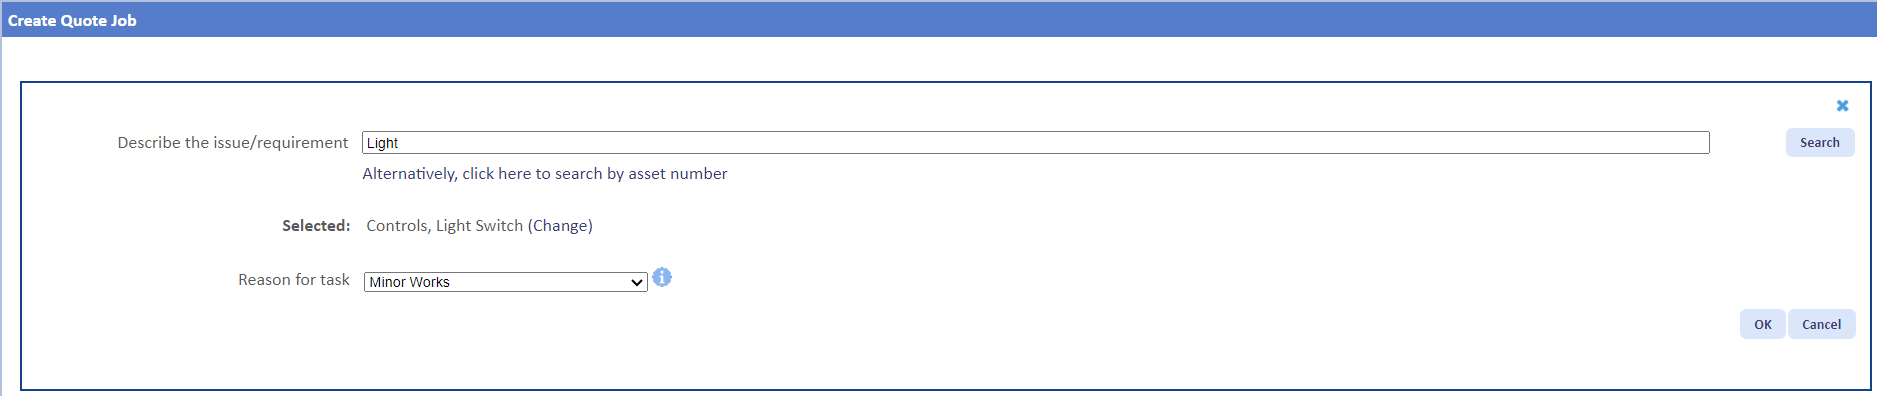
Create Quote Job Tab - Wizard View

Note: The Summary section to the right will get updated with the information chosen in each tab and provides Users the option to change any information they have entered previously from any point, if the need arises.

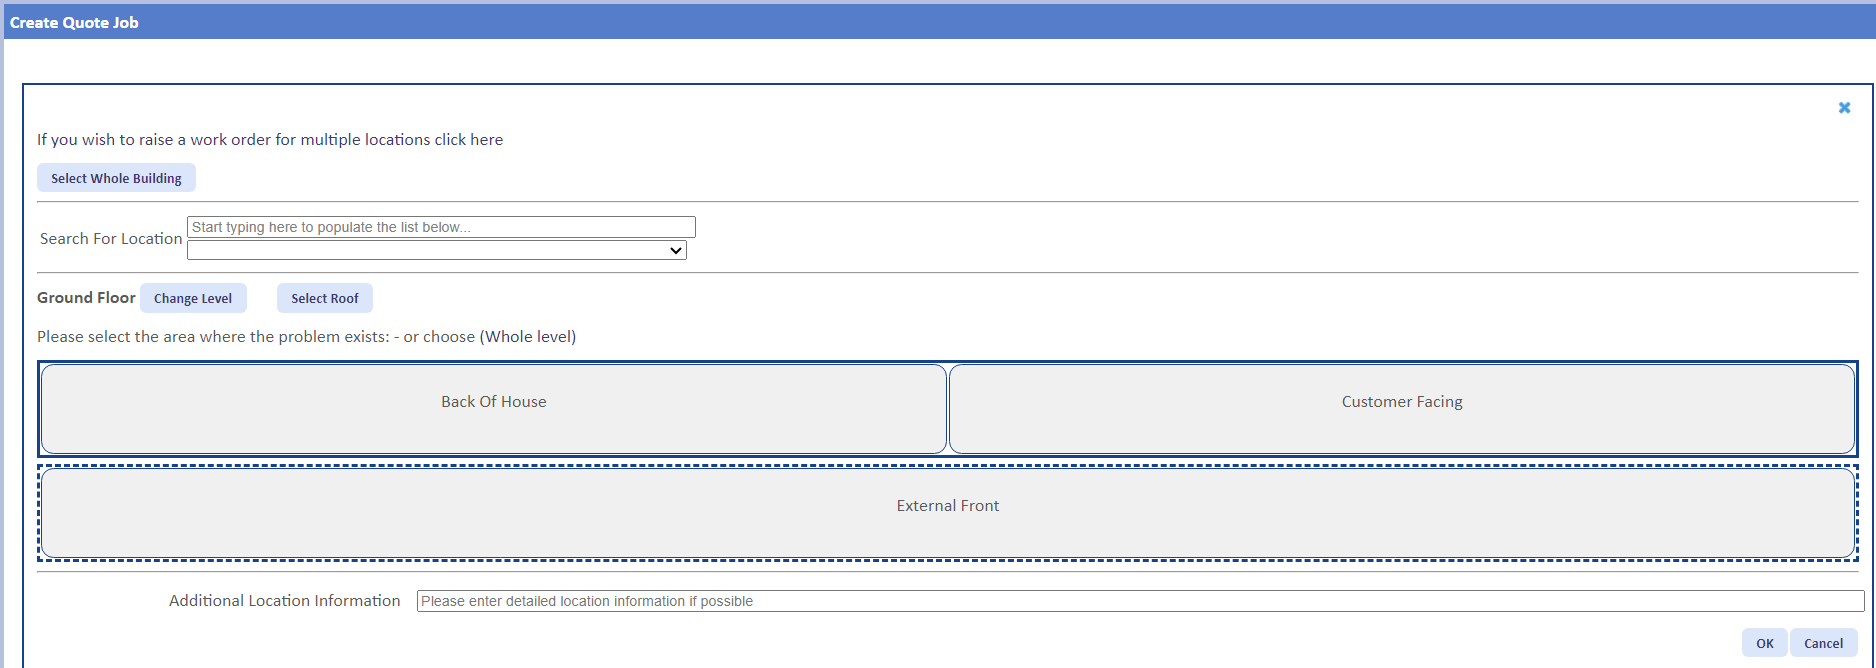 Once the location has been provided, click the "Next" button to proceed.
4. The next tab is the Contact tab. The person or team that will be the contact for this job is selected here. When this tab is displayed, by default the details of the User creating the job automatically populate the fields at the bottom of the screen. A list of contacts to select from is also displayed. Each Contact in the list has a Name, Job Title and Telephone Number. Select one of these by clicking the contact name and the "Job Title", "Name" & "Telephone" fields are populated with the contacts details.
Once the contact information has been provided, click the "Next" button to proceed.
5. Once the contact is selected, the Response tab is displayed. This is where the User details the time the job needs to be completed by. They can determine whether a temporary fix is in place (using the "Is there a temporary solution in place?" tick box) and the priority of the job. The priority can be selected using the "Priority" drop down.
Note: Some priorities will display a Date/Time picker. When these are chosen, the User should select the Date/Time accordingly. Other priorities will show the calculation of what the calculated SLA (based on the Contract) will be.
Note: The summary is also updated at this point. The Resource who will be assigned to the job and the Agreed SLA will now be shown if they have the correct permissions to do. It is possible for a User to be able to choose the Resource they wish for the job to be assigned to but this also requires the correct permission. Please see the Create Job - Resource Selection page for more details.

Once the priority information has been provided, click the "Next" button to proceed.
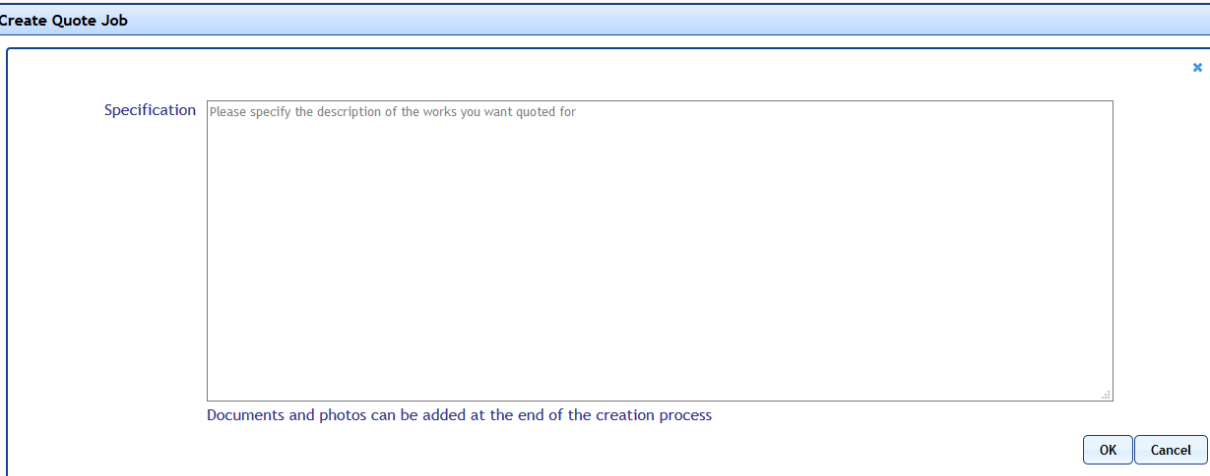
6. The next tab is the Notes tab. Here, the User can enter any extra details relating to the job that don't fit in the other tabs. All that is shown here is the Additional Information field in which detail can be entered. Once entered, click the "Next" button to proceed.
7. Before the job is created, the Confirm tab is displayed. This tab shows a complete summary of the job and allows the User one final chance to review before submitting the job. Clicking any of the previous tabs or the "(Change)" buttons will take the User to the correct tab to amend that piece of information, if needed. This can also be achieved by selecting the "Back" button.
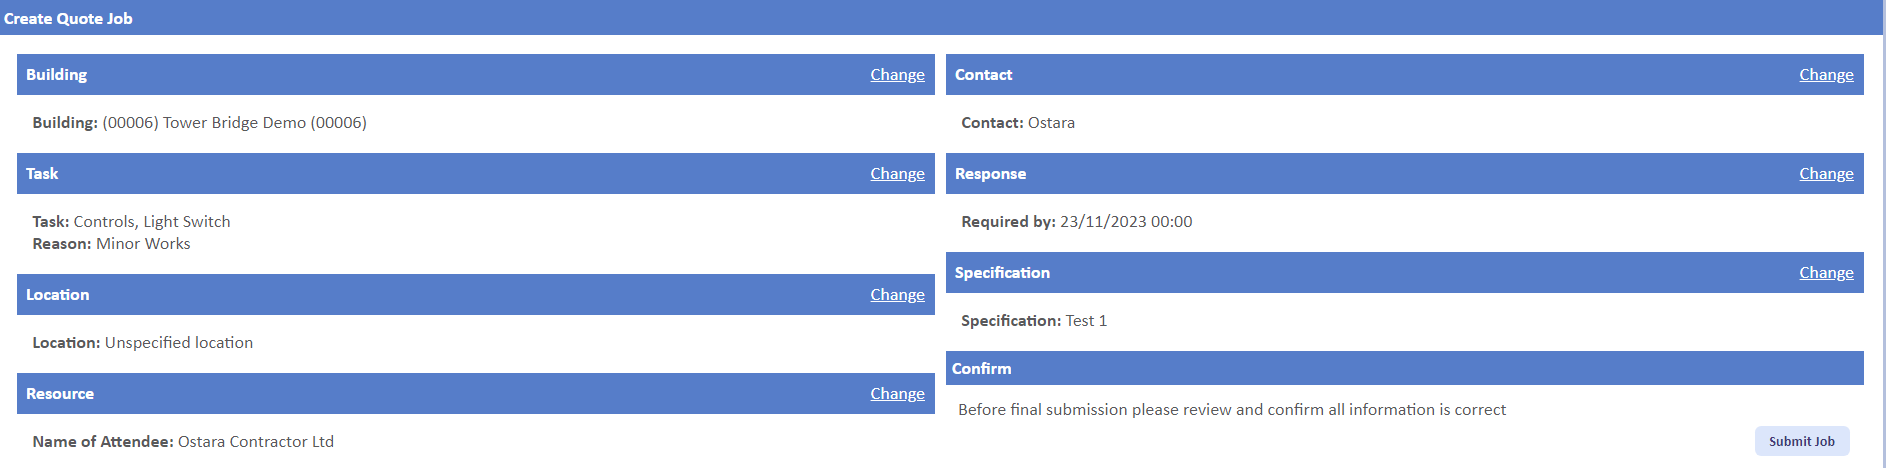
When ready to create the Quote job, click the "Submit Job" button.