Create Quote Job - Single Screen View
To create a Quote Job using the Single Screen View, simply click the “Create Job” tab then the "Create Quote Job" button and follows these steps:
1. Upon clicking the "Create Quote Job" button, the first screen in the create Quote job process will begin. This will do one of two things, depending on whether the User is a single site user, or a multiple site user. For single site users it will automatically populate the "Your Building" textbox with the building assigned to the Users profile. Multiple site Users will be able to type in the textbox, which will populate a list for the User to choose the desired building. After selecting the applicable building the "Do you have an asset number to hand for this job?" button should become available, if applicable please tick the box before clicking the "OK" button

Note: If the "Do you have an asset number to hand for this job?" tick box is ticked, please see the Create Job - Asset Available page.
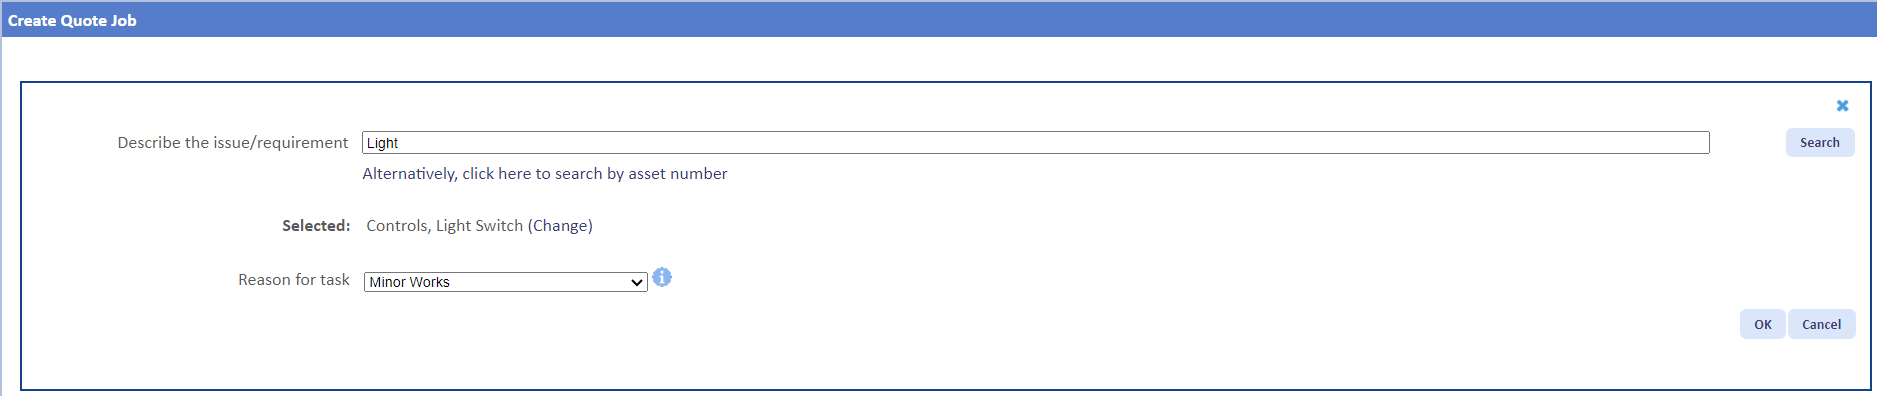
2. Next is the the Task Search page. In the "Task Search" field, enter the item that needs attending to and click the "Search" button. This will display a list of faults/issues relating to the search criteria in which the User must select the correct fault/issue that is causing a problem. If the User selects a fault/issue that is not maintained, a message is displayed next to the task and will not allow the User to select it (this is permission based).
Once the fault/issue has been selected, the "Reason for task" needs to be determined. The "Reason for task" field is a drop down which the User can select the correct reasons from. Explanatory text may appear in relation to the "Reason for task" chosen (if configured by the System Administrator) providing detail on what each Reason should be used for.

Once the Task has been selected, click the "OK" button to proceed.
Note: If there are Assets relating to the Task selected but the "Do you have an asset number to hand for this job?" tick box was not ticked, any available Assets will be shown. Please see the Create Job - Asset Available page for further details.
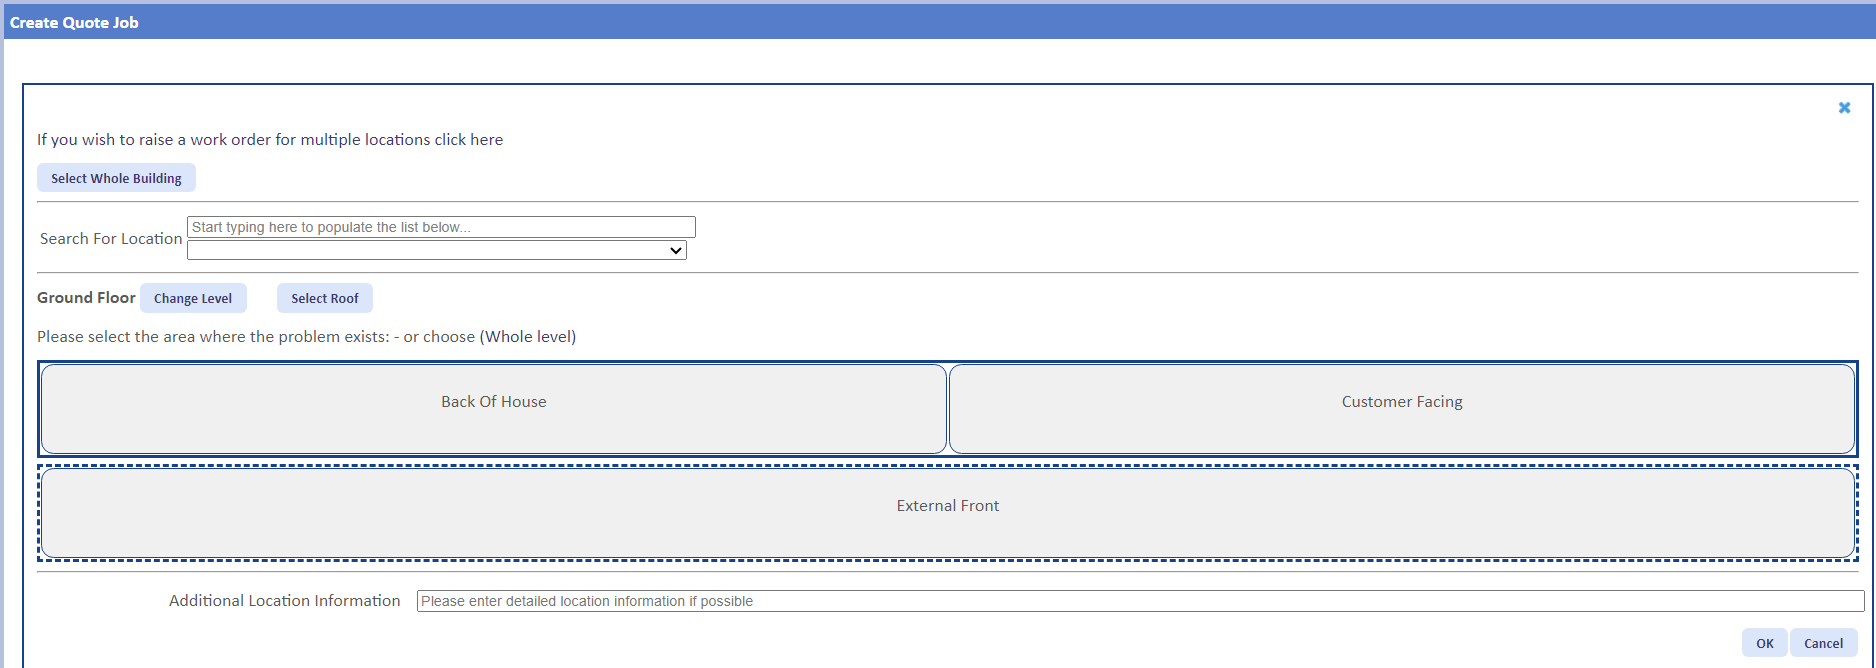
3. The next section is the Location section. This is where the location of the issue is entered. Start off by checking if the Level is correct by viewing the Level located on the left. If this is incorrect, click the "Change Level" from the left hand side and this will display a number of Levels available at the Building. Choose the appropriate Level and the Level will be changed (if the desired Level is the "Roof", clicking "Select Roof" will automatically choose the location as Roof, Roof, Roof and will progress to the next section of the Create Job process).
Next, select an Area and a set of Location will appear (if the issue is across the entire Level, select the "Whole Level" button instead). If any further information about location can be provided then this can be added to the "Additional Information" field.
If many locations exist at the Building and the location is already known, the User can search for the Location directly using the "Search For Location" field. Searching in this field will display a list of locations as the User types. Select the desired Location from here to be progressed to the next step. If the issue happens to be round the entire Building, then the "Whole Building" button should be selected. This will also progress to the next step when selected.
If many locations exist at the Building and the location is already known, the User can search for the Location directly using the "Search For Location" field. Searching in this field will display a list of locations as the User types. Select the desired Location from here to be progressed to the next step. If the issue happens to be round the entire Building, then the "Whole Building" button should be selected. This will also progress to the next step when selected.
Once the Location has been selected, click the "OK" button to proceed.
4. Depending on the permissions of the User, the next step will be the Resource Selection section. This is where the Resources that are required to provide a quote are selected. Each Resource Name is shown but there may also be other details such as the Agreed SLA if there is one, the Call Out Fee, Hourly Rate and Cost (per 1.5hr). To select the desired Resources, tick the tick box next the Resource.
Note: If there are Quote Only SRAs then, assuming the User has the permissions to do so, the Resources on the Quote Only SRAs will be automatically sent a Quote Request without any User interaction when creating the job. This will not happen if there are no valid Quote Only SRAs.
Note: If the Work Order is Asset based the Resource that covers the Warranty for the Asset is present, it will be shown with a yellow background.
Once the Resources have been chosen, click the "OK" button to proceed.
5. Next is the Contact Details page. This page is used to supply the contact details, should someone need to be contacted about the work. When this page is displayed, by default the details of the User creating the job automatically populate the fields along with a list of contacts to select from. Each Contact in the list has a Name, Job Title and Telephone Number. Select one of these by clicking the contact name and the "Contact Type", "Contact Name" & " Contact Telephone" fields are populated with the contacts details.
6. Once a contact has been chosen, the Response section is shown. From here, the User must select the date they wish to have the work completed by. Clicking the date field, the User can select the date and time from the Date/Time picker and click OK to set the Date and Time.

Once complete, click "OK" to progress to the next step.
7. Next is the Specification section. In here, the User needs to enter the details of the work required. This works in the same way to the Notes section in the Create Reactive Job process.

8. Once all necessary sections have been completed, a summary of the job is displayed. From here, it is possible to check and change any details of the job to ensure they are correct. This is done by selecting the relevant section and clicking the "Change" button. Once all details are correct, select the "Submit Job" button to create the job.
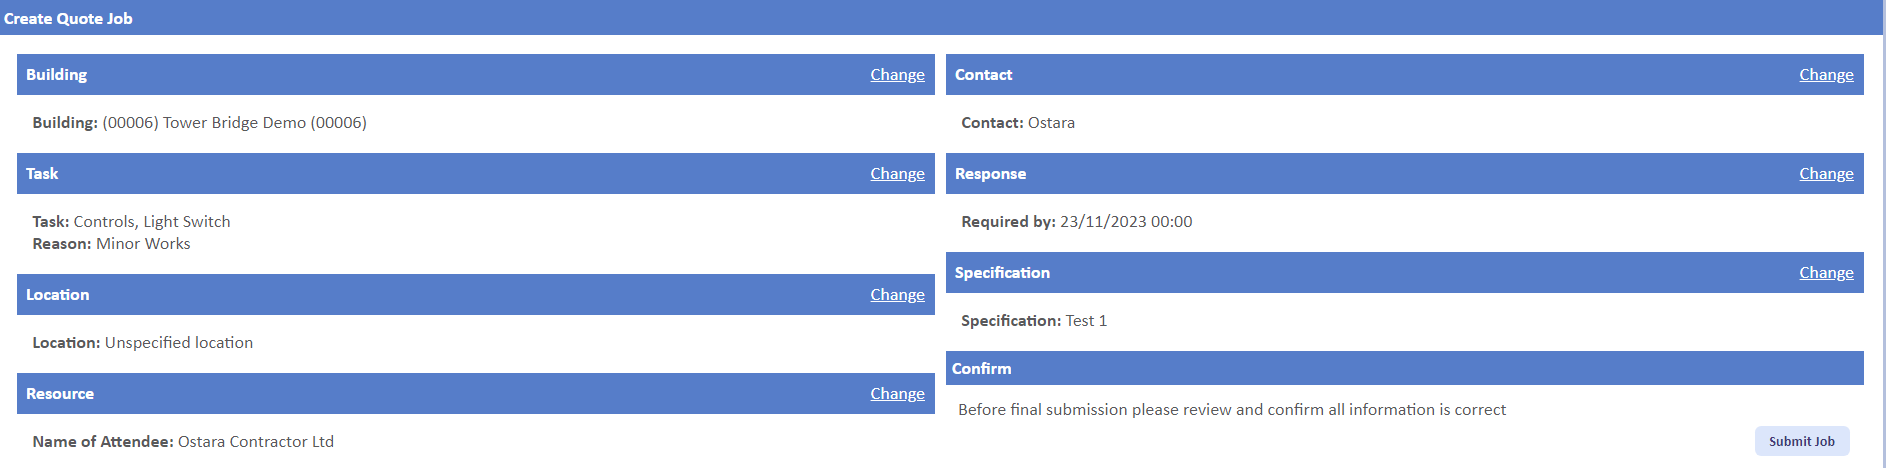
Note: If there are changes required (and if the User has the relevant permissions) to the Resource that is being assigned to the job, please check the Create Job - Resource Selection page for more details.
It is only possible for this process to be used if the User has the permission "Can Use Single Screen Work Order Creation" turned on against their Profile. With the permission off, the usual tabbed creation process will be used.