Buildings Tab
The Buildings tab allows Users to create Quick Response (QR) Codes and Attendance Codes for specific Buildings. These codes are used by Mobile Users in which they will scan the code to log into the Building to allow them to start jobs at the particular site. The Buildings tab is controlled by permissions and to create and print a QR/Attendance Code for a Building, select the Buildings tab and follow these steps. Note: Depending on your system settings, only specific fields will be displayed. For example only the Scan Code section may appear and the Attendance Code section may not be present:
QR Code Creation
1. Selecting the Buildings tab will display two drop downs: the "Building" field and the "Client" field. To create a QR Code, select a Building from the Buildings field. This can be done by either typing the Building in the text box or choosing the desired Building from the drop down. Once the Building is selected, click the "Select" button.

2. The "Scan Code History" table is displayed along with the "Create" button. Click the "Create" button to create the QR Code. The newly created QR Code will then be shown.
If any codes previously existed, this table will also show the previous codes and when they are valid to along with the current code.
If any codes previously existed, this table will also show the previous codes and when they are valid to along with the current code.
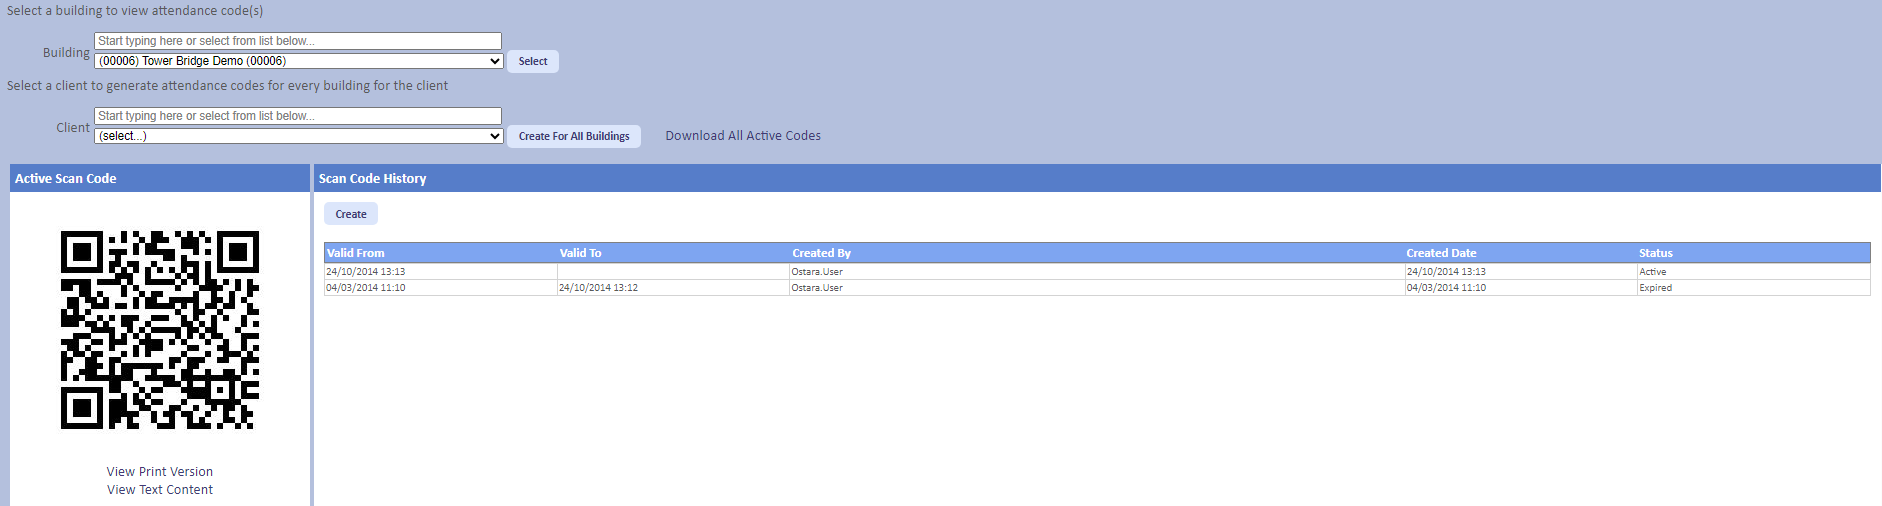
3. Once the QR Code has been created, click the "View Print Version" button. This will display the QR Code with a title explaining what it is along with the name of the Building it is for. This page can then be printed.
Note: It is also possible to add a grace period to allow new codes and old codes to work at the same time. This is to allow Resources to continue to start jobs using the old code until the new code is distributed. This is only possible to be set in the back end.
Note: It is also possible to add a grace period to allow new codes and old codes to work at the same time. This is to allow Resources to continue to start jobs using the old code until the new code is distributed. This is only possible to be set in the back end.
Attendance Code Creation
1. Selecting the Buildings tab will display two drop downs: the "Building" field and the "Client" field. To create an Attendance Code, select a Building from the Buildings field. This can be done by either typing the Building in the text box or choosing the desired Building from the drop down. Once the Building is selected, click the "Select" button.
The "Attendance Code History" table is displayed along with the "Create" button. Click the "Create" button to create the Attendance Code. The newly created Attendance Code will then be shown.
If any codes previously exist, this table will also show the previous codes and when they are valid to along with the current code.
If any codes previously exist, this table will also show the previous codes and when they are valid to along with the current code.
3. Once the Attendance Code has been created, click the "View Print Version" button. This will display the Attendance Code with a title explaining what it is along with the name of the Building it is for. This page can then be printed.
Note: It is also possible to add a grace period to allow new codes and old codes to work at the same time. This is to allow Resources to continue to start jobs using the old code until the new code is distributed. This is only possible to be set in the back end.
Note: It is also possible to add a grace period to allow new codes and old codes to work at the same time. This is to allow Resources to continue to start jobs using the old code until the new code is distributed. This is only possible to be set in the back end.
The second field on the Buildings tab is the "Client". From here, it is possible to generate all codes for the selected Client. To do this, do the following:
1. Select the Client from the "Client" drop down and click the "Create For All Buildings" button. A message with then be displayed stating that creating All Building codes will replace any existing codes for all Buildings. Click "OK" to confirm the code creation.
2. Once completed, a message will be displayed stating they have been created. To display the codes, click the "Download All Active Codes" button to display all the codes in a PDF file.
Note: In some cases, a separate drop down will be shown called "Code Type". From here the User can choose which type of code they wish to create in bulk. The User can also choose to create all types of codes in bulk rather than just one.