Receipting to Asset
In some cases, depending on the settings of the system, the User may be able to receipt a Purchase Item and turn it into an Asset. The same process is followed as regular receipting except there is an extra step at the end of the process. Once the items, that can be receipted to Asset, have been ticked for receipting and the quantity has been entered, clicking "Save Receipt" will display another section. This section will show the Assets that will be created. To edit the Asset data, click "Edit Details".
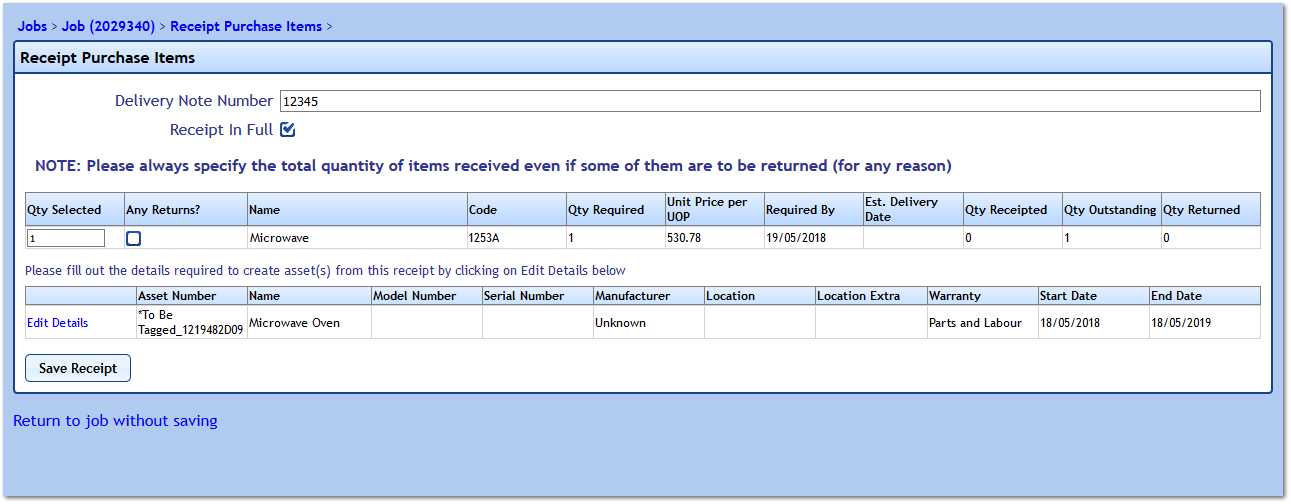
This displays a screen where the details of the Asset are entered, from the Asset Number to the Warranty Information (if applicable). Each Asset will have an Asset Number that starts with "*To Be Tagged_" followed by a number of different numbers and letters. If the Asset Number is not known at this point, leave this as the Asset Number so it's easy to recognise it in the system to be renamed later. Once the information has been entered, click "Save" to save the details and return to Receipt Purchase Items screen. Clicking "Save Receipt" here will continue to follow the regular receipting process.
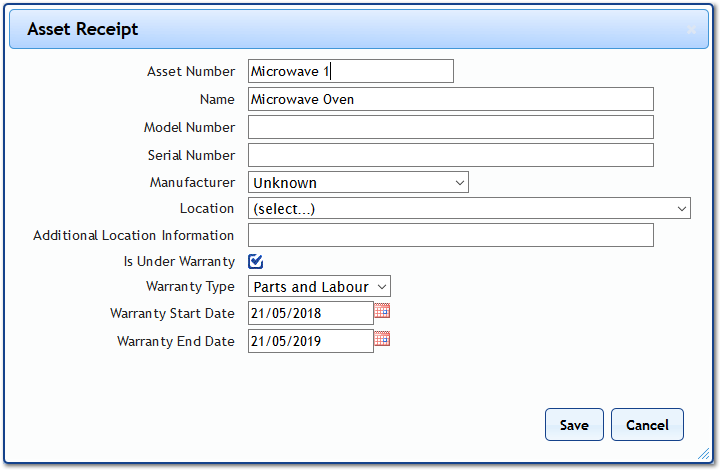
Note: There maybe cases where the User does not have the Warranty Information for the Asset they are receipting. To help this, the system will populate the Warranty dates and type information as per the requirements of the system (for example: automatically making the Warranty Type Parts and Labour and the Warranty Date 12 months).