Job Detail Page Introduction
Once a job has been selected, the Job Detail page is displayed. This page displays all details concerning the selected job such as the job description, the Resource undertaking the job, the agreed attendance time and the job history. If logged in as a Resource, the User will only be able to see jobs assigned to that Resource (this also accounts for any jobs assigned to the Resource that no longer have the Work Order Type associated to them). The Job Detail page differs depending on the type of job and the Users permission. Here is a typical example of a Job Detail page:
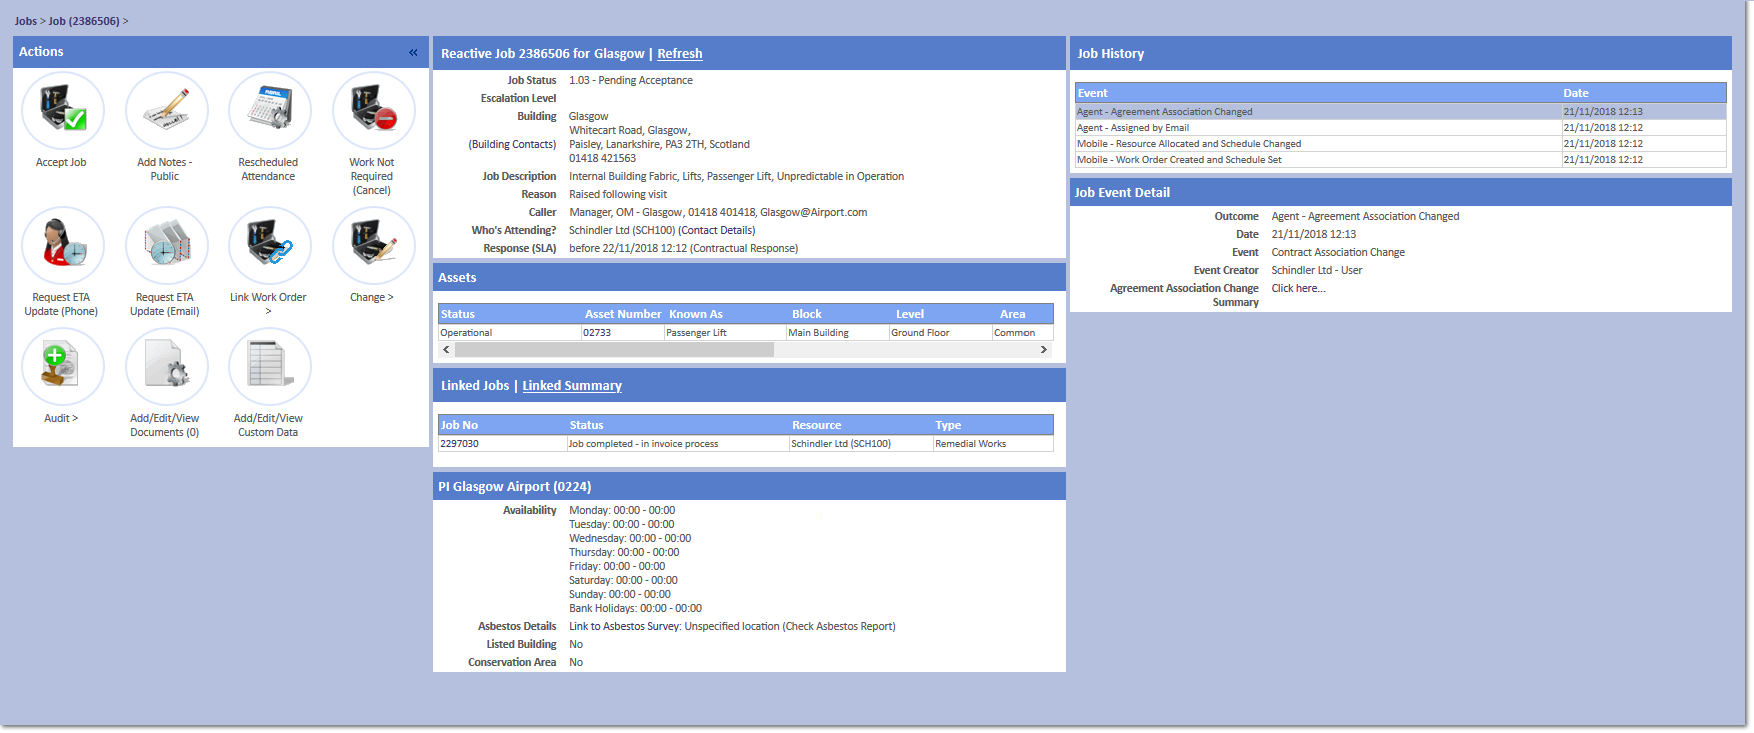
The Job Detail page is split up into different areas which contain different information about the particular job and to make the details easier to comprehend. The main Job Details section displays a number of details such as the Building address details, the Caller/Contact for the Work Order, the Agreed SLA time, who Authorised the Job, Job Status and Description and who will be attending the job (Resource) amount other details.
If the Job is a PPM, the Visit Frequency of the PPM will be displayed next to the Job Description (Annual, Monthly etc.). The Visit Window (i.e. the start and end dates between which the Resource should be attending) and the Financial Window (i.e. the start and end dates between which the Resource will be invoicing for) is also present on this screen.
Next to the Resource is the "Contact Details" button which, once selected, displays the contacts for this particular Resource. The contact that is chosen for the job is determined by the Contact Priority set at Resource level (See Prioritise Contacts page). The contact that has the highest priority is selected as the contact for the job. There is also a "Refresh" button which refreshes the job with any changes that may have occurred whilst the User was viewing the job.
It is also possible to view the history of Notes that have occured on the Work Order from here too. This is possible through the use of the "History" button. For more information on Notes History, see the View Notes History page.
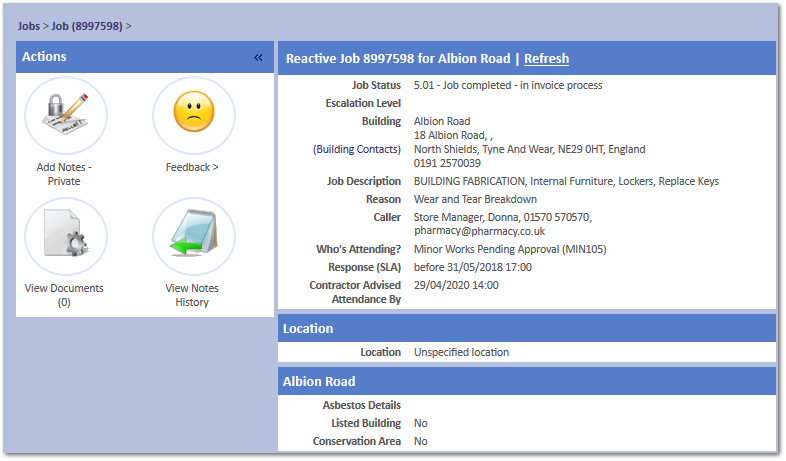
The Location section (as shown in the example) displays the location within the Building where the job is to take place. However, if there are Assets associated to the job then this section is replaced with the Assets section. Each Asset has a number of fields explaining what the Asset is and where it is located such as the Asset Number, Known As name, Location and Equipment type.

The Job History section displays all the events that have occurred on the job from the point of creation to its current state. By default, this section displays the latest 3 events that have occurred on the job but by clicking the "Show all" button, all events are displayed. Selecting an event will populate the Job Event Detail field with the details of the selected event.
The "Actions" section on the left hand side of the screen contains actions that can be performed on the job but these are all permission based. If the User doesn't have the required permission selected, then the action will not appear. This is an example of some actions that are available:
Note: If the below message appears when viewing a Job, it means that Jobs cannot be started or stopped via the Portal. The Contractors will be required to start and stop Jobs via the systems specified by their respective Help Desks/Administrators. This could be either via the ATAS system or the Mobile Application.

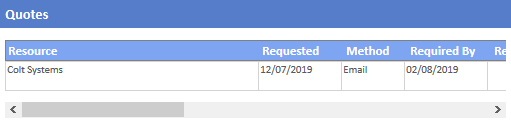
If the Job that the User is viewing is a Quote job, whether it is a pending quote or a quote request, a new section should be available to view on the Job Details Page. This section is called the "Quotes" section. This section will function the same as the "Add/Amend Quotes" table with one difference. If the User is a contractor they will be able to see only quote requests / items applicable to them.
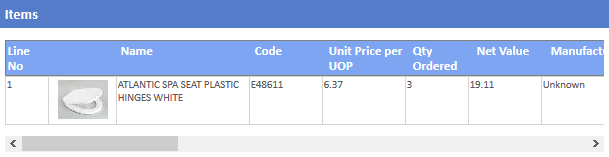
If the User is viewing a Purchase Order, a different section appears on the Job Details Page. This section is called the "Items" section and this section displays the items that have been added to the Purchase Order along with the details of each line item such as the required amount and the value of the item.