Filtering the Jobs List
If there are too many items on the Jobs List or the desired jobs are a few pages in on the list then it is possible to filter the list down by using the "Filter..." option. The "Filter..." option provides a variety of ways for the User to narrow down the list to find exactly what is required. The "Filter..." option can be found on all Job Lists and to filter the Jobs List, follow these steps:
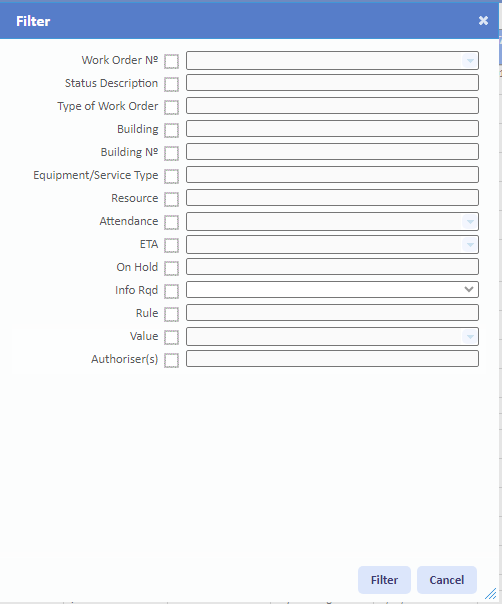
1. Select the "Filter..." on any list of jobs to display the Filter screen. Ticking the required fields will enable the User to provide criteria in which to filter the list by. Each of the fields (once they are ticked) are described below:

Building No. provides a text field in which the User will enter the desired Building Number.
Building provides a drop down in which the User can scroll through the list or use a text field that, once text has been entered, brings back results that include the text entered.
Description displays a drop down in which the User can scroll through the list or use a text field that, once text has been entered, brings back results that include the text entered.
ETA shows two date fields "from" & "to" in which the User enters the ETA dates where jobs, with an ETA between those dates, are likely fall in.
Status displays a drop down in which the User can scroll through the list or use a text field that, once text has been entered, brings back results that include the text entered.
Response displays a drop down in which the User can scroll through the list or use a text field that, once text has been entered, brings back results that include the text entered.
Batch? shows a drop with the options "Yes" & "No". Selecting "Yes" will show jobs that have been batched together whilst selecting "No" will disregard batched jobs.
Once the desired filters have been set, click "Filter" to apply the filters. If there is no longer a need to run the filters, click the "Cancel" button to close the Filter screen and not apply any filters.
2. The list is returned and now only show jobs matching the criteria specified in the Filter screen. Once a filter is applied, the Filters header appears and in it is a list of all the filters that have been applied. Adding more filters will also display them in the Filters header.
If a the list still needs to be filtered but a certain filter is no longer required, click the "(Remove)" button next to the desired filter to remove it. If all filters need to be removed, click "(Remove all filters)".
If a the list still needs to be filtered but a certain filter is no longer required, click the "(Remove)" button next to the desired filter to remove it. If all filters need to be removed, click "(Remove all filters)".
