Stopping a Job Introduction
Resources will require the ability to stop their jobs from the Portal. Depending on whether the machine location has been set, this can be done using two actions: "Stop Job" and "Stop Job - Admin".
Stop Job - Field Team
1. On the Job Detail screen, select the "Stop Job" button to display the Start Job pop up.
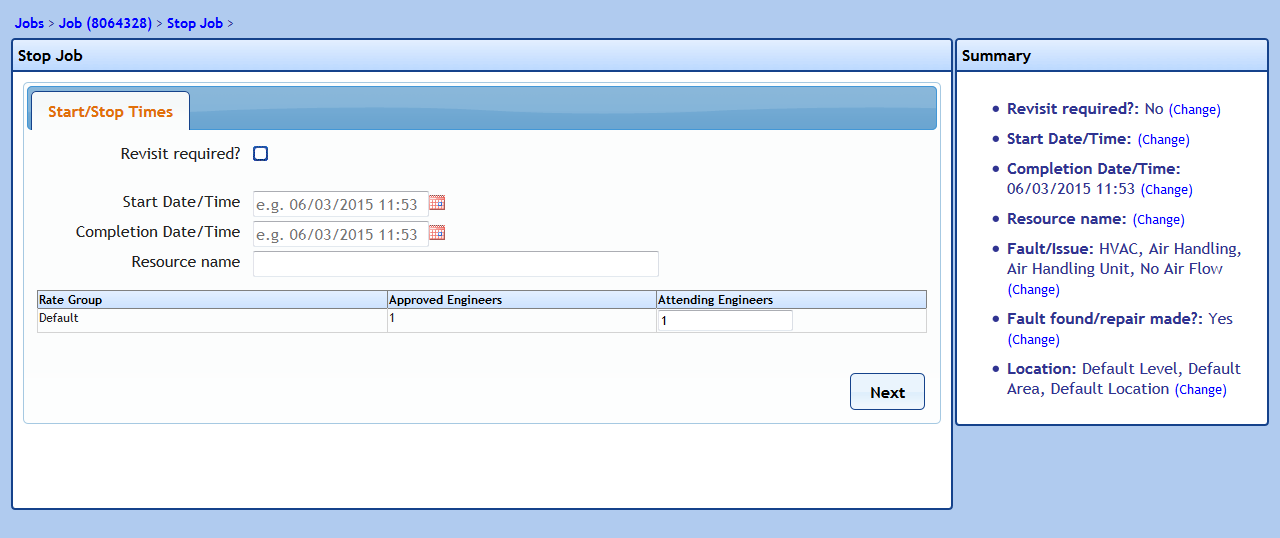
2. Upon selecting "Stop Job", the Start/Stop Times tab is displayed along with some job details. These details are:
· Start Date/Time - This shows the date and time the job was started.
· Completed Date/Time - This shows the date and time the job was completed.
· Resource Name - This shows the name of the Resource that performed the job.
· Start Date/Time - This shows the date and time the job was started.
· Completed Date/Time - This shows the date and time the job was completed.
· Resource Name - This shows the name of the Resource that performed the job.
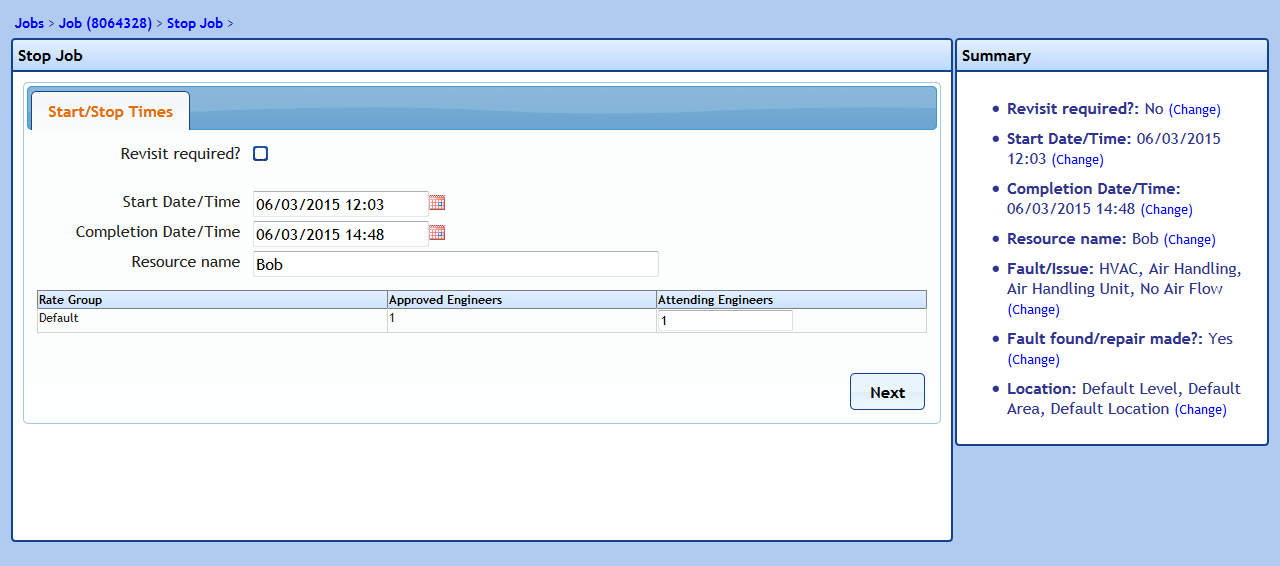
The User is also required here to determine whether a revisit is required or not by ticking the "Revisit required?" box. Tick the box to state a revisit is required, otherwise leave it blank if the job is completed.
Once ready, click "Next" to proceed.
Note: It is not possible for the number of Attending Engineers to exceed the number of Approved Engineers.
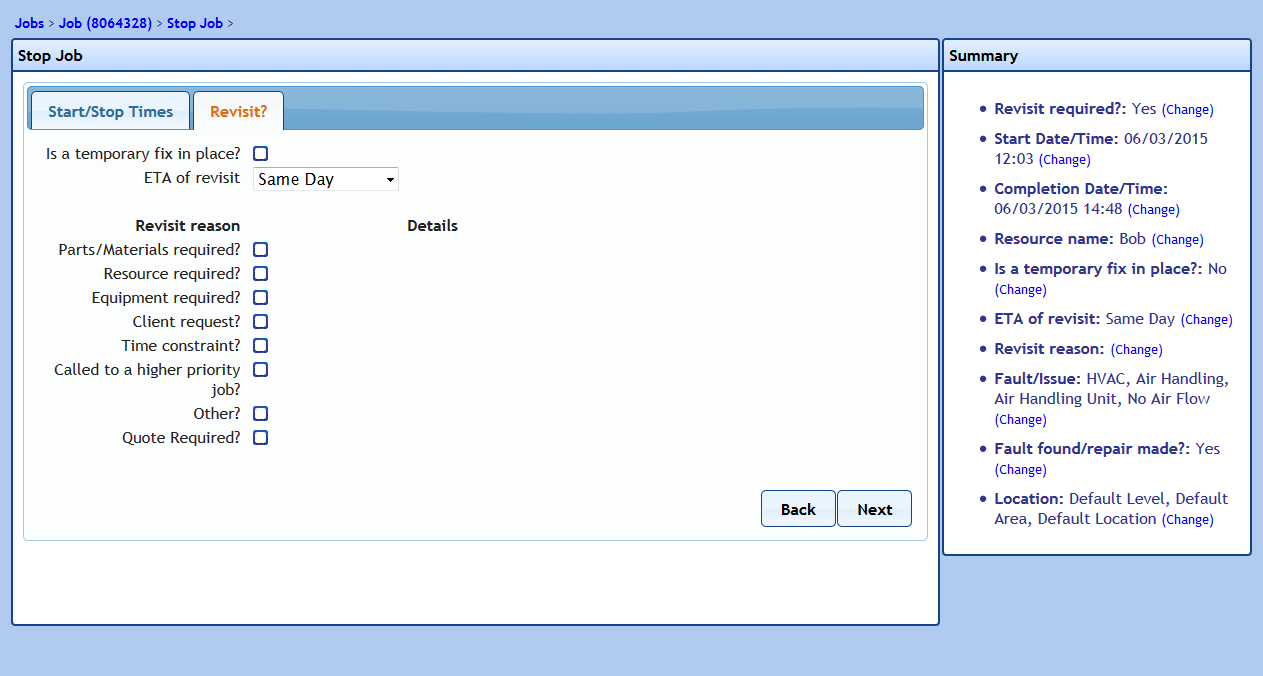
3. Next is the Revisit? tab. This tab only appears if "Revisit required?" was ticked on the previous tab. This is where the revisit information is entered. The User will be required to state whether a temporary fix is in place (by ticking the tick box), the ETA of the revisit (from the drop down menu) and the Revisit Reason(s). After ticking a Revisit Reason, the User will need to provide some details on what is required for the revisit. If "Parts/Materials required?" is ticked, a "Cost" field will also appear in which the cost of the parts/materials required is entered.
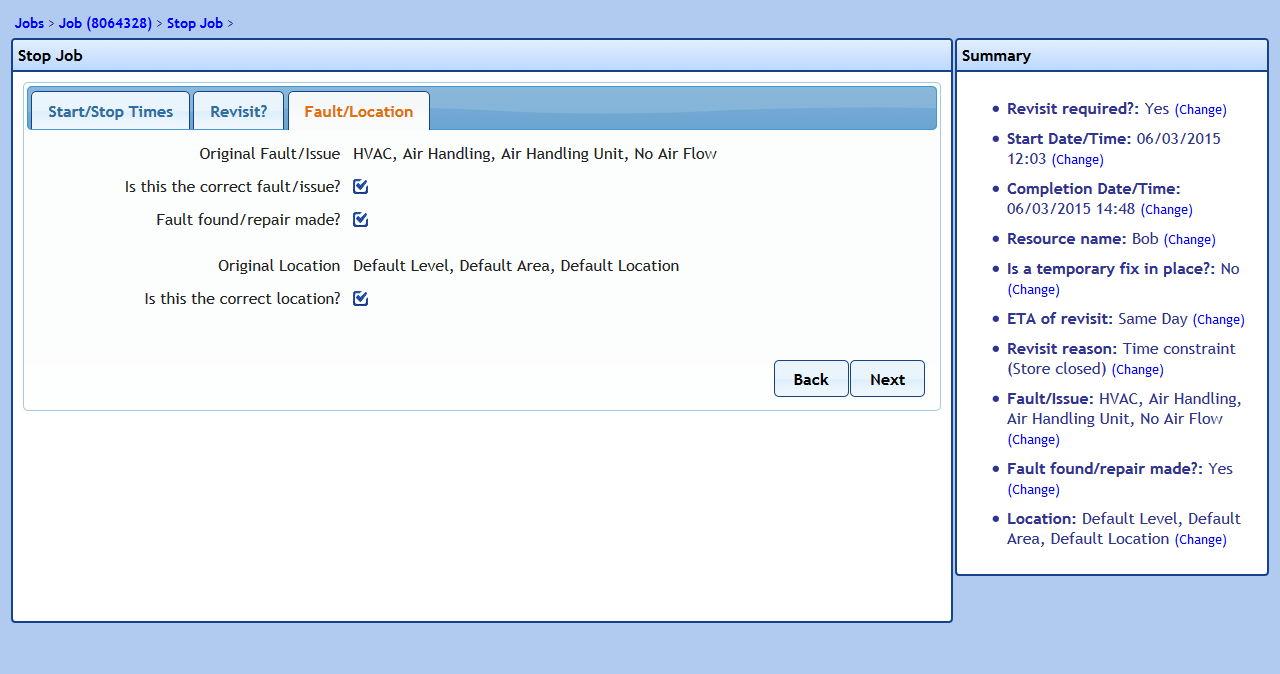
4. The next step is the Fault/Location tab. If Location Mappings do not exist, this tab is skipped. The "Original Fault/Issue" field displays the fault that was originally chosen when the job was created. If this fault is incorrect, untick the "Is this the correct fault/issue?" tick box and the "Fault/Issue Search" field will appear. This works in the same way as the Create Job process up until the "Fault/Issue" drop down field. The "Fault found/repair made" tick box is used to determine whether a fault was found or a repair was made. If something was found or repaired, leave it ticked otherwise untick it.
The "Original Location" field displays the location that was originally chosen when the job was located. If this location isn't the actual location of the issue, untick the "Is this the correct location?" tick box and the "Actual Location" field will appear in which the actual fix location is selected. Add any additional information is any exists.
The "Original Location" field displays the location that was originally chosen when the job was located. If this location isn't the actual location of the issue, untick the "Is this the correct location?" tick box and the "Actual Location" field will appear in which the actual fix location is selected. Add any additional information is any exists.
Note: If there are Assets in the system that relate to the Equipment Type on the Work Order, the Location of Work screen will display the Assets section. This is to allow the User to select Assets if Assets were worked on instead of the work being Location based. Go to "Stopping a Job with Assets" for more information on Assets during Stop Job. If the work was Location based then just click "Next" to proceed without selecting any available Assets.
5. Next is the Repair tab where a list of Part Types applicable to the job are shown. This tab is only displayed if "Fault found/repair made" was left ticked. Select the Part Types relating to the job by ticking the "Applicable?" tick box next to each of the related Part Types. Next, provide a Fix Type for each of the selected Part Types by choosing one from the "Fix Type" drop down.
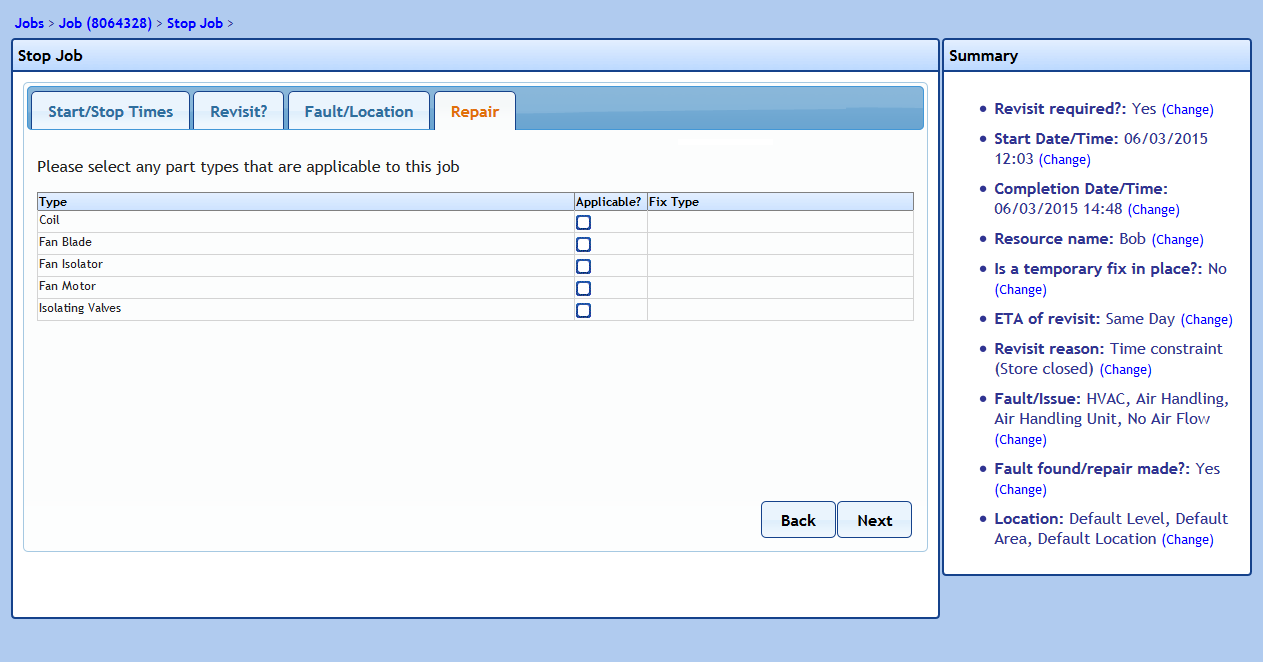
Once all the relevant Part Types and Fix Types have been selected, click "Next" to proceed.
Note: This tab will only be displayed if the "Fault found/repair made?" tick box was ticked during the Revisit? tab.
Note: This tab will only be displayed if the "Fault found/repair made?" tick box was ticked during the Revisit? tab.
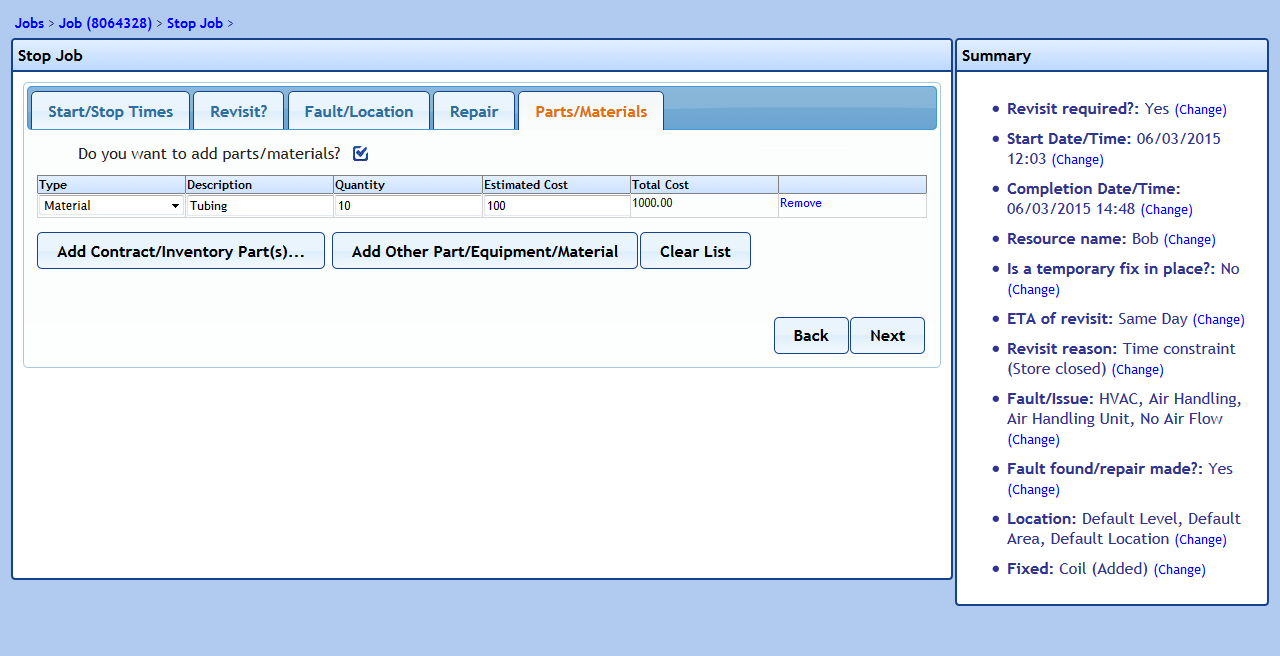
6. If there were some Part Types selected, the next tab displayed is the Parts/Materials tab. There is only one question asked on this page: Do you want to add parts/materials? If there are no parts/materials to add then leave the the tick box unticked and proceed with the "Next" button.
If there are parts/materials to add however, tick the tick box to display the "Add Manual Part/Equipment/Material" button. Click this button to add in a part/equipment/material and provide the "Type", "Description", "Quantity" and "Estimated Cost". In the "Type" field, select whether the item being added is a part, material or piece of equipment. In the "Description" field, enter a short description of what the item being added is. Enter the amount required in the "Quantity" field and the cost of the part/equipment/material in the "Estimated Cost" field. The "Total Cost" field is entered automatically and is the sum of the "Quantity" and "Estimated Cost" fields.
If there are existing Parts in the system that relate to the Fix Types selected and "Added" or "Replaced" was selected against a Fix Type, any existing Parts will be displayed in which the User can choose from.
Note: When stopping a PPM with Parts (and "Allow Critical Remedial Works" is ticked), the system will create a remedial Reactive with Parts added to it and will complete it to allow the user to Invoice for the works taken place.
Once all the necessary parts/equipment/materials have been entered, click the "Next" button.
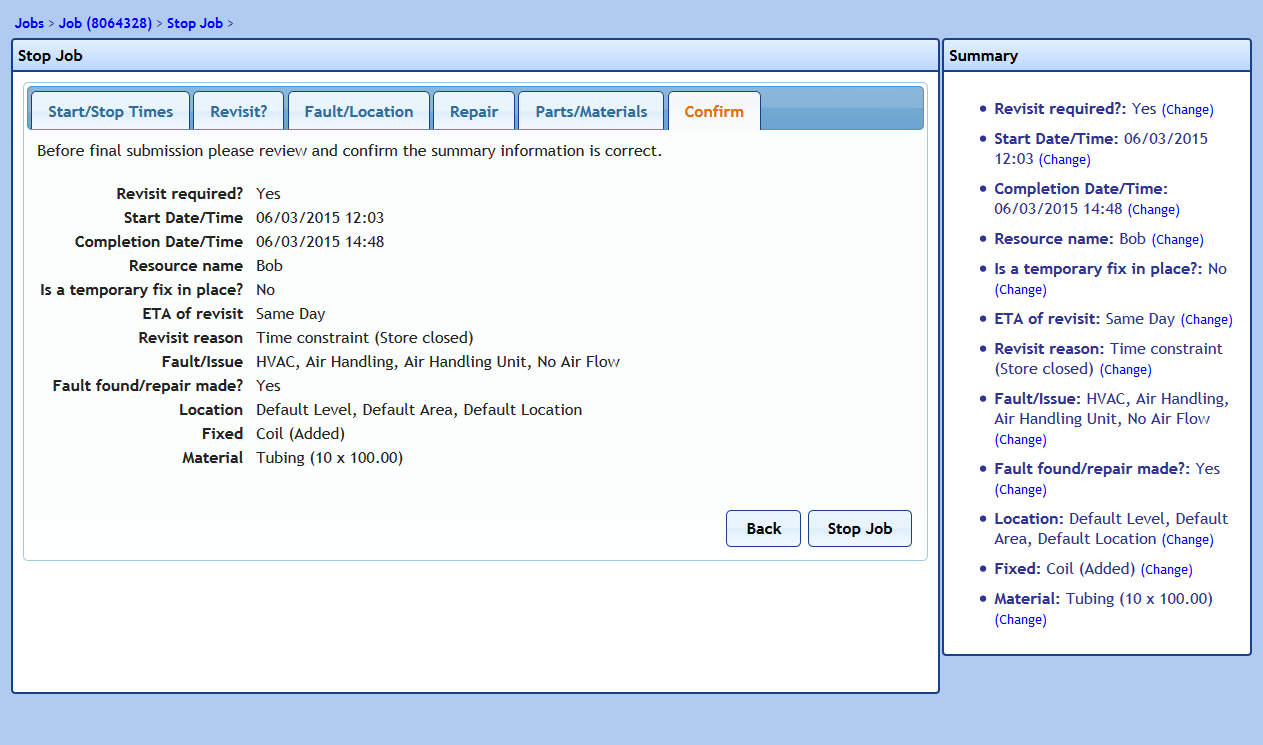
7. The last tab shown is the Confirm tab. This tab shows a summary of the details entered when performing the "Stop Job" action. If any changes need to be made then either click the relevant tab or the "Change" button next to the relevant item in the Summary section. If no changes are required, click the "Stop Job" button to stop the job.
The last tab shown is the Confirm tab. This tab shows a summary of the details entered when performing the "Stop Job" action. If any changes need to be made then either click the relevant tab or the "Change" button next to the relevant item in the Summary section. If no changes are required, click the "Stop Job" button to stop the job.

Note: If there are any RFIs that trigger during Stop Job then these will appear just before the Confirm tab. (See the "Questions on Jobs" page for more information).
Note: If there are any RFIs that trigger during Stop Job then these will appear just before the Confirm tab. (See the "Questions on Jobs" page for more information).
Stop Job - Admin
1. On the Job Detail screen, select the "Stop Job" button to display the Start Job pop up.
2. The only difference with the "Stop Job - Admin" process is that the User is required to enter the start and/or stop times of the job, whether a revisit is required or not along with the "Resource Name". After clicking "Next" the same process for "Stop Job - Field Team" is followed.