Adding a New Inventory Item
Parts are consumed when stopping a Work Order and can be added to the Inventory. To add an Inventory Item to the system, begin by clicking the "Create New Inventory Item" button.
1. Clicking "Create New Inventory Item" displays the Inventory Item Detail screen. This is where all the information required for the Item is entered. Each field is explained below:
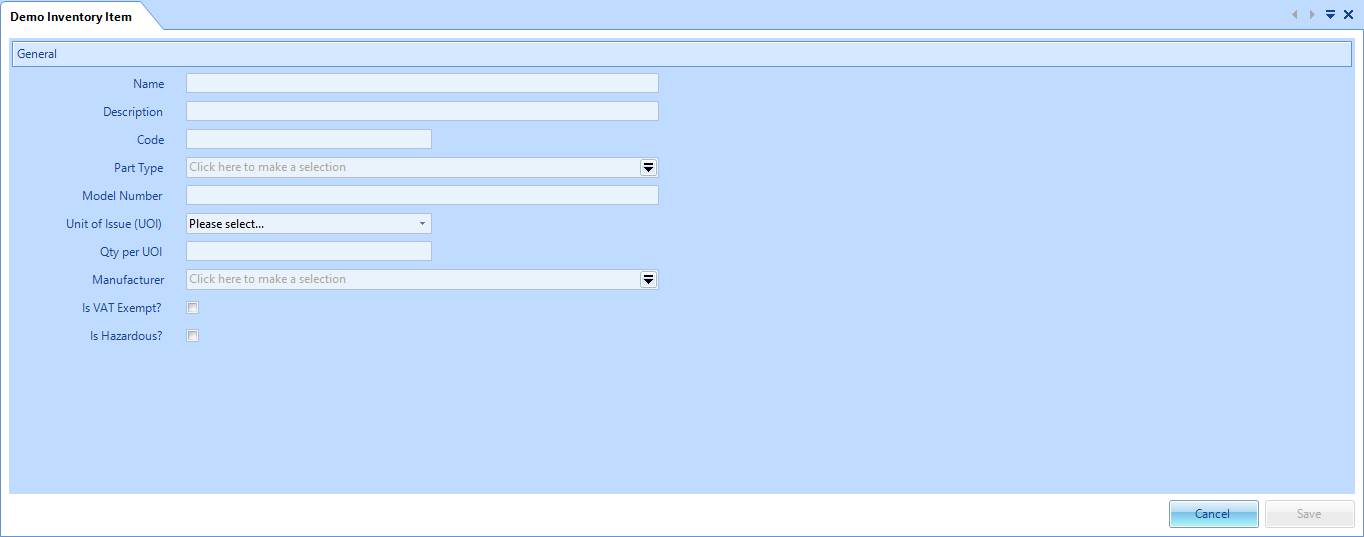
Name is a freeform field where the name of the Item is entered
Description is a freeform field where the description of what the Item is is entered
Code is a freeform field where the name of the Item is entered
Part Type is a pop up selection field in which a list of Part Types is displayed. The User must then select the Part Type and click "OK" button
Model Number is a freeform field. This can be numbers and letters
Unit of Issue (UOI) is a drop down field in which the type of unit the Item is issued out for use in is selected. For example, Each, Box, Pack.
Qty per UOI is a numeric field where the number of Items that are contained within a Unit of Issue is entered
Manufacturer is a pop up selection screen to choose the manufacturer of the Item
Is VAT Exempt? is a tick box. Ticking this box signifies that this Item is exempt of VAT and the VAT Code field is greyed out
Is Hazardous? is a tick box. Ticking this box signifies that this Item is potentially hazardous.
2. Once all the necessary fields have been entered, click "Save" to create the Item.
3. A confirmation message asking the User if they would like to associate this Part to all Stock Locations will appear. If so, then click "Yes" and all Stock Locations will be associated. Otherwise, click "No". Associating Parts to Stock Locations allows for those Parts to be stored at those Stock Locations when receipting Parts.