Creating Internal Resources
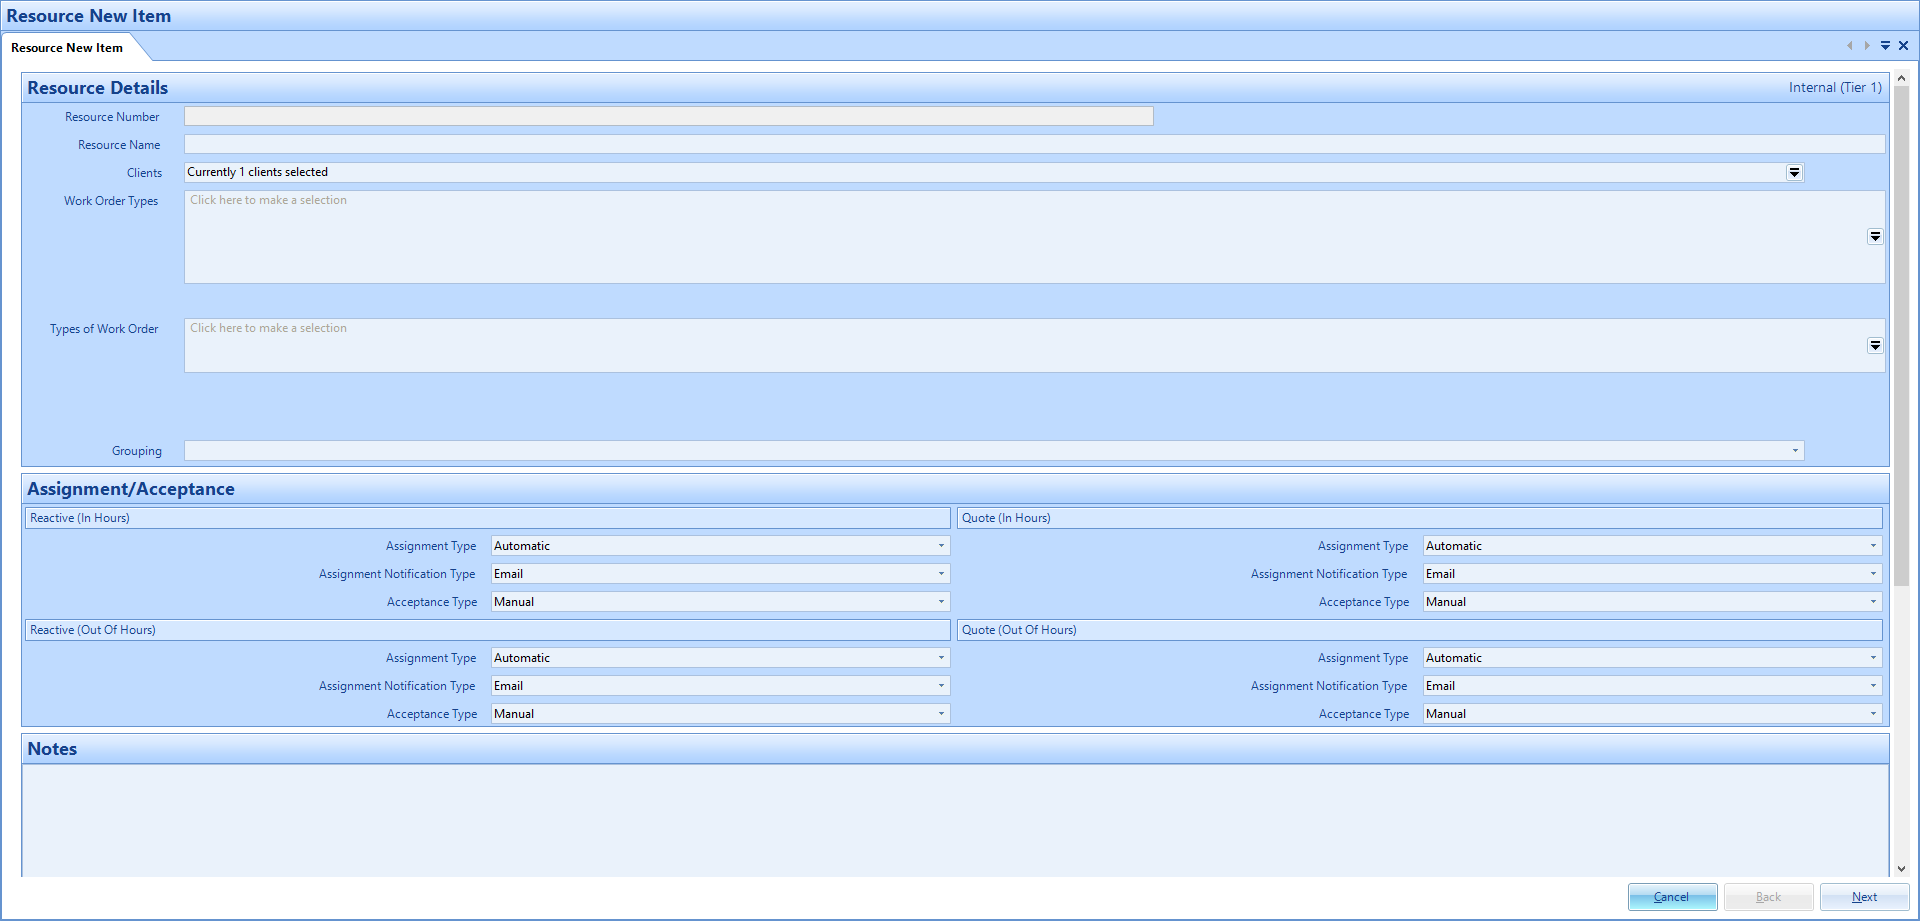
Resource Number is a system generated field, which ensures that each Resource record has a unique number.
Resource Name is a freeform field which should be used to enter the name of the Resource.
Clients is a pop up selection of all of the Clients that the User has access to view. Select all of the Clients which the Resource could work for.
Note: When clicking on the down arrow, Users will initially be shown an Information box that states ‘Changing the clients for the resource will result in obsolete work order types being removed.’ Click the OK button to get the pop up box where it's possible to add/remove Clients. For information on how to select a Client, see the Client Selection page.
Work Order Types is a pop up selection of all of the Work Order Types which are common across the Clients selected. The Work Order Types selected should correspond with what the Resource can work on.
Note: If a Resource is NOT associated with a Work Order Type such as Building Fabrication, selecting that particular Resource to carry out any work that is grouped under Building fabrication will not be allowed.
Types of Work Order is a pop up selection of all of the Types of Work Order (e.g. Reactive, PPM, etc). The Types of Work Order selected should correspond with what the Resource can work on.
Note: If a Resource is NOT associated with a Type of Work Order such as Reactive, attempting to select that particular Resource to carry out any Reactive work will not be allowed.
Grouping is a drop down selection to choose the Resource Grouping. Please see the Resource Grouping detail in Core Data for more information.
Assignment/Acceptance section contains four areas in which the User can decide the preferable assignment method for different Types of Work Orders, in or out of hours. The different areas are as follows:
· Reactive (In Hours) - This determines the assignment and acceptance methods for Reactive Work Orders assigned within the Resource's working hours.
· Reactive (Out of Hours) - This determines the assignment and acceptance methods for Reactive Work Orders assigned outside of the Resource's working hours.
· Quote (In Hours) - This determines the assignment and acceptance methods for Quote Work Orders assigned within the Resource's working hours.
· Quote (Out of Hours) - This determines the assignment and acceptance methods for Quote Work Orders assigned outside of the Resource's working hours.
Each area contains three drop downs:
· Assignment Type - This determines whether the assignment method for the Resource will be either "Manual" or "Automatic". If "Manual" is selected, the Work Order will need to be assigned manually by the Agent. If "Automatic" is selected, the Work order will be assigned as soon as the Resource is allocated.
· Assignment Notification Type - This determines how the Resource will be notified of their assignment on the Work Order. The options "None", "Email" or "Phone" are present.
· Acceptance Type - This determines whether the acceptance method for the Resource will be either "Manual" or "Automatic". If "Manual" is selected, the Resource will need to be accept the Work Order themselves. If "Automatic" is selected, the Work order will be accepted automatically once it has been assigned.
It is important that the method selected (for the relevant Type of Work Order and hours) has been agreed with the Resource, as this will impact the workload and effectiveness of the Helpdesk on both the Client and Resource side e.g. if Phone (Manual) is selected, jobs will have to be called through to the Resource whereas if Email (Automatic) is selected, the jobs will be automatically assigned to the Resource saving time and increasing efficiency on the Client side. This will only be effective if the Resource is monitoring and progressing jobs assigned to them by email in a timely manner however.
Note: In order for Work Orders to be assigned automatically, the User who performed the last task on the Work Order (that caused the assignment email to be sent) is required to have the permission "Can Set Assigned By Email" selected against their profile as well as the Resource having "Email (Automatic)" set against the Type of Work Order.
For example: if a Resource has an assignment method of "Email (Automatic)" for Quote Work Orders and an Authoriser authorises a Quote Work Order for that Resource, the email will only be sent if the Authoriser has the "Can Set Assigned By Email" selected. Otherwise, an agent will need to perform the assignment.
Notes is a freeform field for any additional information that is to be included on the specific Resource.