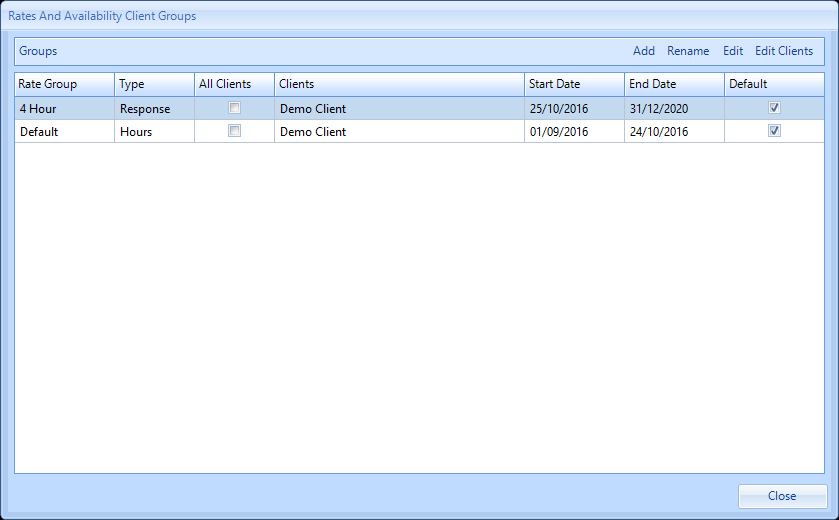
Adding Rate Groups
To apply Rates and Availability, Client Rates Groups are required. To Add a new Client Rates Group to a Resource, perform the following:
1. Select a Resource from the Resource List and click the "Rates and Availability" button in the Ribbon Menu. This displays the Rates and Availability Client Groups screen. Here, it is possible to add, edit and rename Client Rates Groups that have been created for the selected Resource. To create a new Client Rates Group, click the "Add" button.
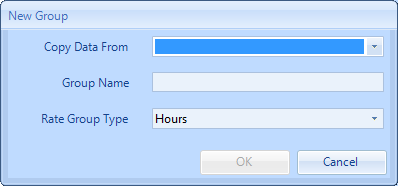
2. The New Group screen will have two fields: Copy Data From and Group Name. The Copy Data From field is a drop down that displays the Client Rates Groups that have already been created for the Resource and by selecting one from the drop down, the new group will copy the data from the selected group once it's created. Leave this blank to not copy any data from any group. The Group Name field is just where the name of the new group is entered. Click "OK" once the name has been entered to create the group.
4. There must be a Client Group ticked as the Default for any one date range - otherwise, the system will not know which rate group to select. The Default tick box can only be ticked once a date range is present against the Client Group.