Branches and Tier 2s
There may be occasions when a tiered structure for certain Resources is required. A tiered structure is where a Head Office or Tier 1 has one or more Branches or Tier 2s underneath it. External Resources are split into to Head Offices and Branches whereas Internal Resources are split into Tiers 1s and Tier 2s.
To set up a Branch, select an External Resource from the Resource List and click the "Create Branch" button.
1. The New Branch screen is displayed once "Create Branch" has been selected. The main differences between this and the Head Office Resource screen is that the majority of information on this screen is inherited from the Head Office Resource. This is shown below:

Some of the populated fields can still be changed, such as VAT information and the Assignment Method, whilst others cannot be changed as they are reliant on the Head Office. The Work Order Types field only contains the WO Types that the Head Office has assigned to it, meaning that Branch will only ever be able to perform the same work. However, if the Head Office has multiple WO Types, the Branch does not necessarily have to include all those types. The Branch could only perform one of the Work Order Types if that is what the branch will be used for. There is also a button that links to the branches Head Office in case Users need to access the Resource information.
Once all information has been entered, click "Next" to proceed.
Once all information has been entered, click "Next" to proceed.
2. As with the Head Office Resource, enter the Address details of where the Branch is located. Once done, click "Next" once again to proceed.
3. Lastly is the Resource Contacts screen. This is where all information on the contacts for the Resource are stored. Resource contacts are displayed by their Contact Name, Job Title, Type, State and Login Type. Contacts for Resources are added within the People section and cannot be modified through the Resources page. For more information, see the People and Profiles page.
4. When ready, click "Finish" to create the Resource Branch.
To set up a Tier 2, select an Internal Resource from the Resource List and click the "Create Tier 2" button.
1. The New Tier 2 screen is displayed once "Create Tier 2" has been selected. The main differences between this and the Tier 1 Resource screen is that the majority of information on this screen is inherited from the Tier 1 Resource. This is shown below:
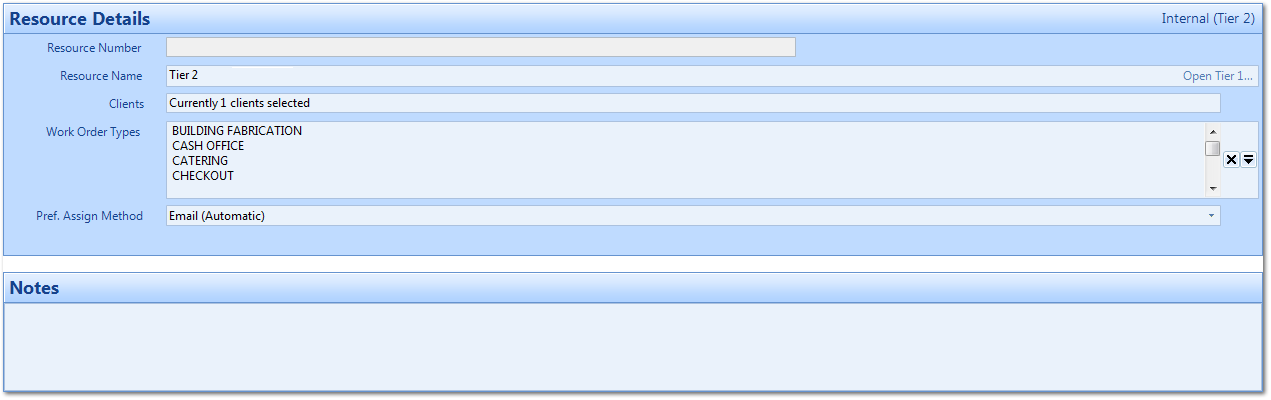
Once all information has been entered, click "Next" to proceed.
2. As with the Tier 1 Resource, enter the Address details of where the Tier 2 is located. Once done, click "Next" once again to proceed.
3. Lastly is the Resource Contacts screen. This is where all information on the contacts for the Resource are stored. Resource contacts are displayed by their Contact Name, Job Title, Type, State and Login Type. Contacts for Resources are added within the People section and cannot be modified through the Resources page. For more information, see the People and Profiles Introductionpage.
4. When ready, click "Finish" to create the Tier 2 Resource.