Editing Rates and Availability - Hours

Rate Actions is a drop down in which different rate groups can be selected. There are three Rate Actions that can be selected and they are "Reactive Attendance" - these rates are used on the scheduler and in the calculation of the Total Calculated Cost field upon stop job on a reactive work order, "Remote Fix" - these rates will apply when using the Agent Action of Remote Fix on a reactive work order and "Day Rates" - will apply when selecting "use day rate" on the scheduler. Each of these contain different sets of rates.
Update all days is a tick box that, when selected, tells the system to update all the days with the value that is entered. This reduces the need to duplicate data across multiple days.
Day is a non-editable column that display the days on the week (and a Bank Holiday field) in separate rows.
In Call Out Fee is a numerical column where the cost of calling out the Resource is entered. This can be different for each Day if applicable and applies to In Hours only.
In Inc. Hours is a numerical selection column where the number of included In Hours hours is entered. Select the amount of hours by using the increase and decrease arrows.
In Hourly Rate is a numerical column where the In Hours hourly rate is entered.
Out Call Out Fee is a numerical column where the cost of calling out the Resource is entered. This can be different for each Day if applicable and applies to Out of Hours only.
Out Inc. Hours is a numerical selection column where the number of included Out of Hours hours is entered. Select the amount of hours by using the increase and decrease arrows.
Out Hourly Rate is a numerical column where the Out of Hours hourly rate is entered.
Day Rate is a numerical column where the rates for working for whole days is entered.
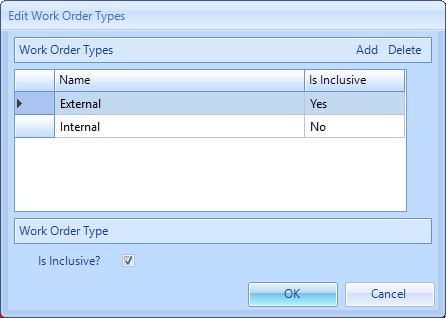
Work Order Type Group clicking this option will present the user with the screen above, where the user can rename the work order type group
Work Order Types clicking this will allow the user to specify the work order types to be included in the rates set.
Sub Work Order Types clicking this will allow the user to specify the sub work order types to be included in the rates set. (This can only be selected if Work Order Types have been added)
Click "OK" to confirm the changes.
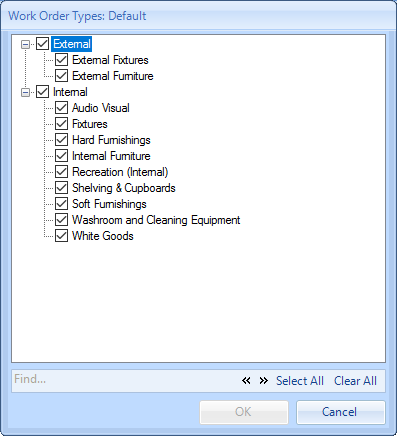
Here, the User can select which Sub Work Order Types are applicable to this Rate Group. Tick the box against the required Sub Work Order Types to make sure they are added. If all Sub Work Order Types under a Work Order Type are applicable then ticking the Work Order Type will select all Sub Work Order Types under it. The User can also use the Select All and Clear All buttons to select all or clear the selection if needed. Once all the necessary Sub Work Order Types have been ticked, click "OK" to add them.
Note: If the "Is Inclusive?" tick box was ticked then the User will be shown this message when clicking "Edit" then "Sub Work Order Types":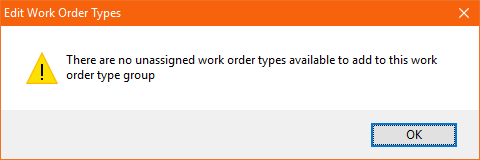
7. Select the Work Order Types that these rates apply to and click "OK". The user can set up many rate groups that have differing rates applied down to Work Order Type. See the screen shots below for examples:
Rates for Lifts: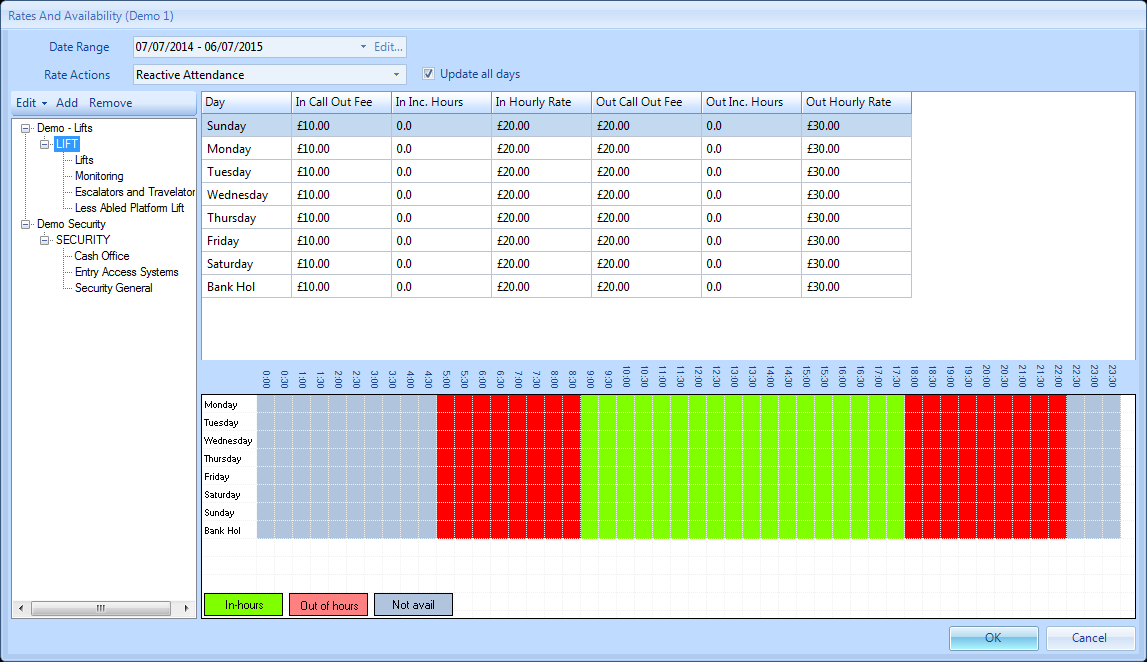
Rates for Security: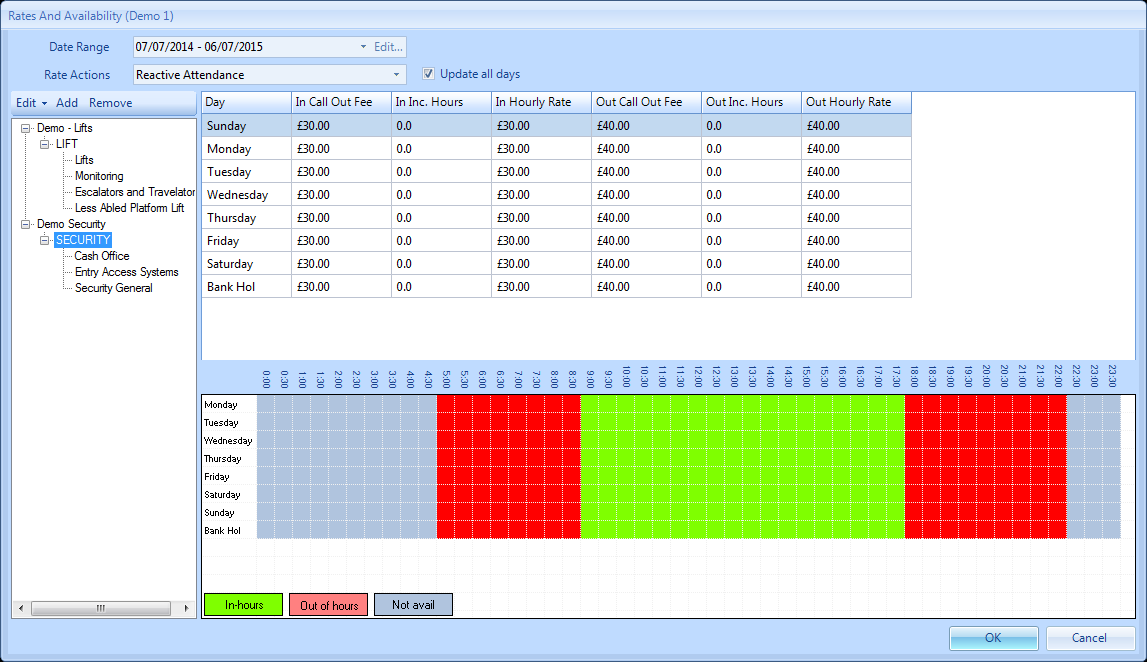
8. If the user wishes to remove a rate group as it is no longer relevant, this can be done by highlighting the group on the left hand side of the screen and clicking the "Remove" button.
9. The user will then receive this message: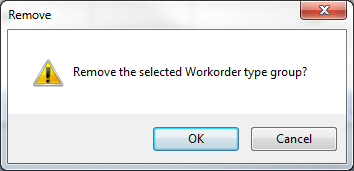
10. Clicking "OK" will remove the highlighted rate group. Clicking "Cancel" will return the user to the previous screen.
11. Any of the above can be amended. Once any changes have been made click "OK" to save these changes. This message will be displayed: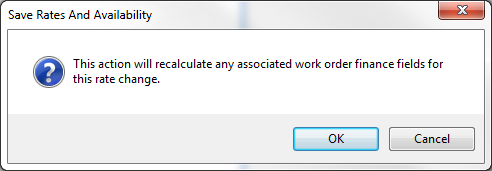
12. Clicking "Cancel" will take the User back to the previous screen with no changes being saved. Clicking "OK" will recalculate any affected work orders.
Note: This will only apply to Reactive Work Orders that have had a Stop Job event.