Template Configuration Introduction
Different emails and SMS messages are used throughout the system and provide information to a variety of Users. If, however, the details in these emails is not quite correct or needs modifying then this can be done using the Template Configuration menu.
From the Template Configuration menu, there are three main areas that house the different the emails/SMS':
- Email - Contains all emails used in the system
- Email XML - Contains all emails that are sent with an XML attachment
- SMS - Contains all areas where an SMS message is sent
To configure a template, Ostara uses it's own HTML Editor.
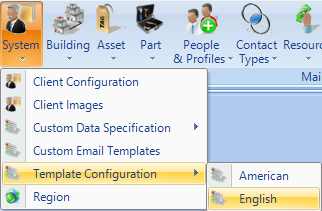
Using the Core Data > System > Template Configuration Menu, choose the language you wish to edit templates for:
This will open the Template Configuration screen:
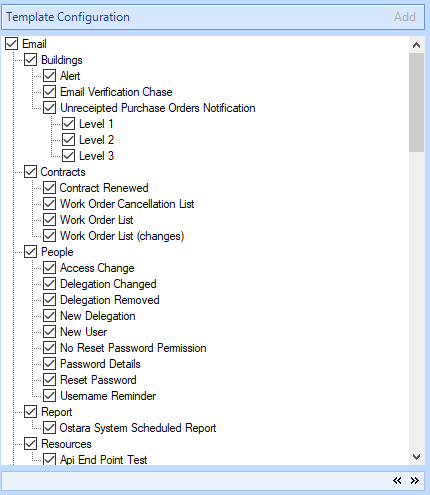
Select the Template you wish to update, and click the Edit button in the top right of this window:
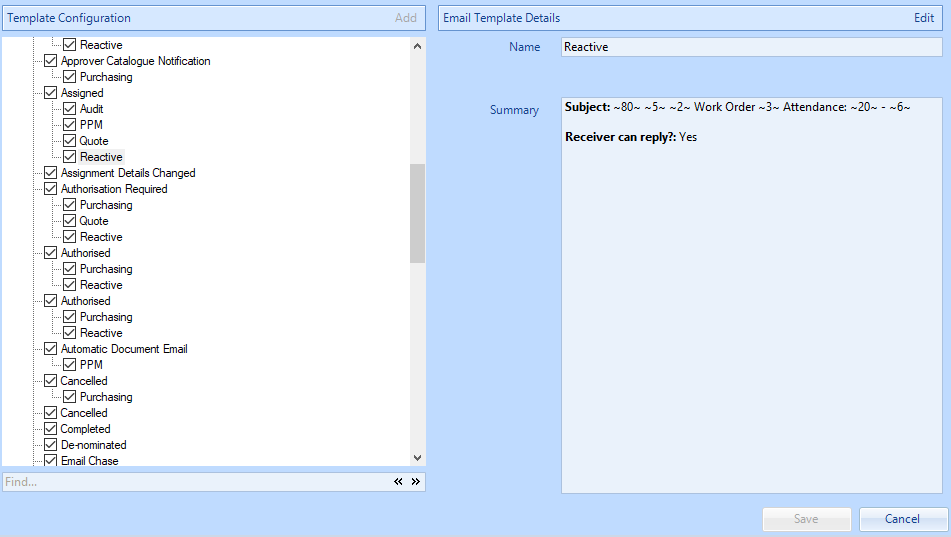
The Edit Email Template Dialog box will appear. From here you can edit the Subject of the email - and to add placeholders in the subject refer to the "Subject Fields" section. By adding the relevant number inbetween two ~ symbols, the subject will dynamically update with the relevant field. For example, entering ~3~ in the Subject line will insert the Work Order Number into the Subject when the email is sent.
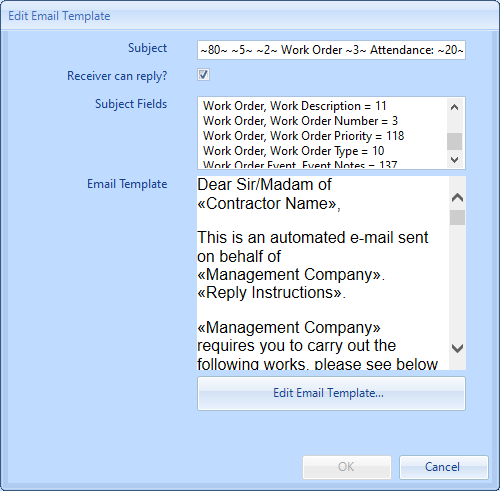
To edit the body of the email, click the "Edit Email Template..." button. This will bring up the main Email editor screen:
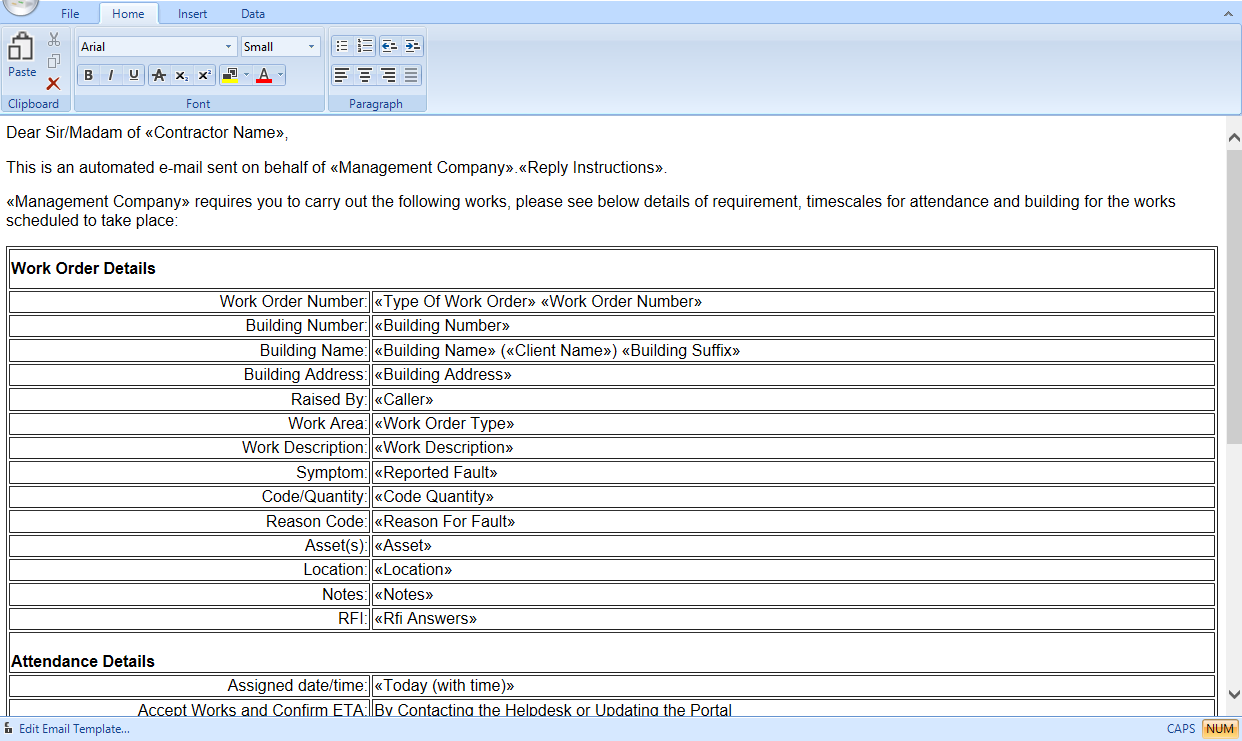
From here, you can edit the text and layout of the email. If you want to edit the tables in the email, some knowledge of HTML may be required, but changing wording and adding text before and after tables is possible in this view.
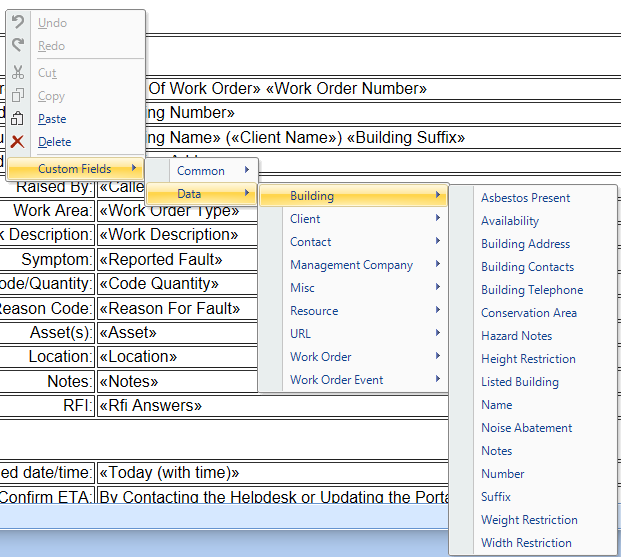
If you want to add placeholders from fields in the system, right click on the email at the position you'd like to add the placeholder and under "Custom Fields" choose the relevant field. This will be input in double angle brackets as can be seen above.
Once all the necessary changes have been made, close the Email editor window, ensuring you click all prompts to save the updates, then click OK, and Save to commit the changes to the template. All changes will be effective immediately.