Planning work across Branches/Tier 2’s
To plan Work Orders across Branches/Tier 2's using the Planner, follow these steps:
-
Open the Planner by selecting the appropriate Head Office/ Tier 1 Resource from the Resource List and clicking "Planner". The Work Order Planning screen is displayed.
-
At the bottom of the screen is the Work Order Types, Unplanned Work Orders and Actions section. The Resources section to the left is also populated. This section will include any Branches/Tier 2's associated to the selected Head Office/Tier 1.
-
Selecting a Resource from the Resource section will display the calendar of that Resource alongside the currently selected Resource. Selecting more Resources will also display them but only 10 can be selected at any one point.
-
Select the Types of Work Orders from the Work Order Types section. Once a type has been selected, the Unplanned Work Orders section is populated with Work Orders of the type selected as well as the calendars (if any of the selected Resources already have jobs assigned to them).
Note: The Work Orders that are displayed in the Unplanned Work Orders section have all been accepted by the Head Office/Tier 1 but have not had an ETA set. Any that have already had an ETA set will appear on the calendar.
-
Click and drag a Work Order from the Unplanned Work Orders section to the desired date and time on the calendar of the Resource that this work is being assigned to.
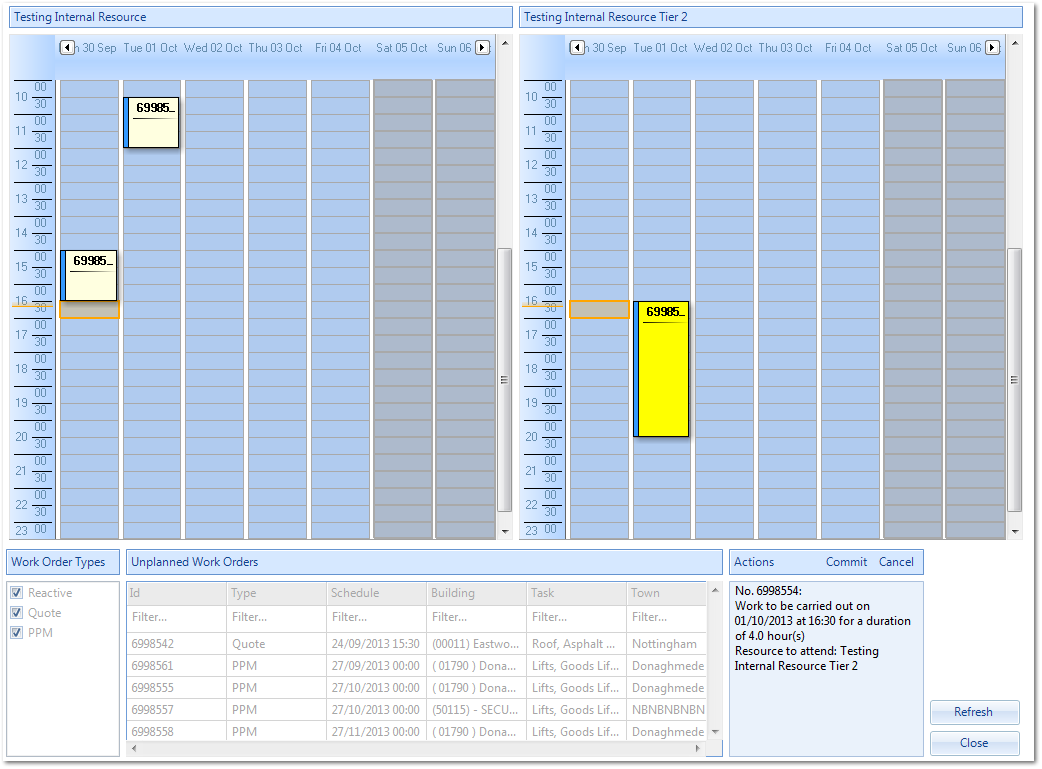
This populates the Actions table with the actions that will occur by planning the Work Order as well as enabling the "Commit" and "Cancel" buttons. When planning a Work Order, it will be highlighted in yellow with an "*" next to it to signify that it is being changed.
Note: If an External Head Office Resource pays the Invoices for Work Orders, including the Branches, Work Orders cannot be assigned to its Branch Resources.
Note: When planning Quote Work Orders: if the Work Order went into Authorisation previously, once it is allocated to a child Resource the Work Order will go back into Authorisation.
-
When the Work Order is in the correct place on the calendar, click "Commit" to commit the change and to update the ETA on the Work Order. Doing this will update the Event Log in the Work Order as well. Alternatively, if the wrong Work Order is being planned then click the "Cancel" button to cancel the planning of the Work Order.
Note: If a Work Order has a Work Order type on it that a Branch/Tier 2 Resource does not have associated to them, a message will be displayed saying that the Work Order cannot be assigned to this Resource.
-
When committed, an email is sent to the selected Resource notifying them of the Work Order assignment.
-
Once all planning has been completed, click "Close" to close down the Planner.