Planner Introduction
Resources may be required to plan any Work Orders that they have for the week or may need to hand out trade-specific jobs to any of their Branches/Tier 2 Resources. This can be done using the Planner tool. To access the Planner, select the Resource from the Resource List and click the "Planner" button.
-
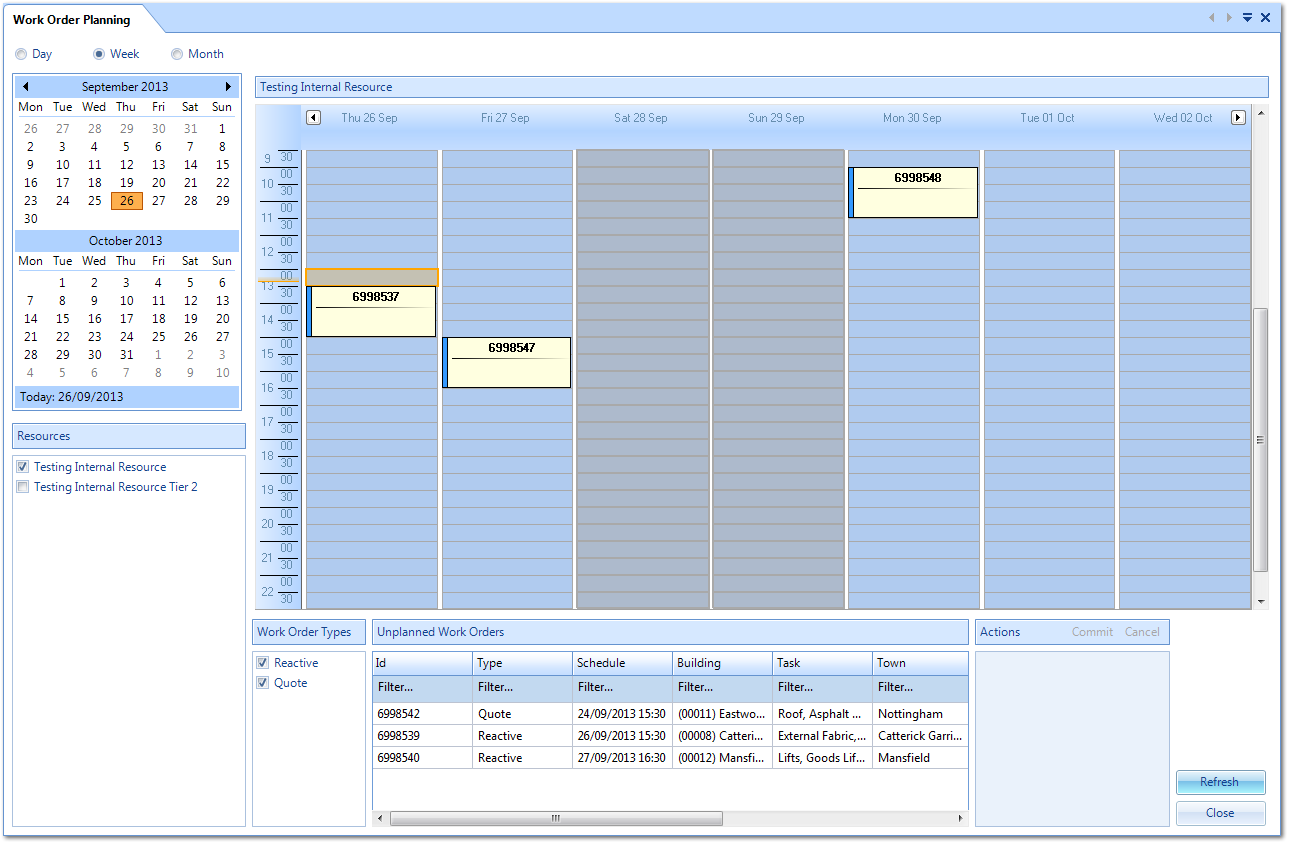
Clicking the "Planner" button, after selecting a Resource (Tier 1 or Head Office only), displays the Work Order Planning screen. This screen will show a calendar ranging from today to 7 days in the future along with any Work Orders that are currently assigned to the selected Resource shown on the calendar. Hovering over a Work Order on the calendar will display some details about the Work Order which helps in determining who should take the job. To the left of the calendar are two smaller calendars displaying the current month and the next month with arrows either side of it to allow the user go back to previous months or to go forward to subsequent months. The arrows on the main calendar progress/regress the view by one week each time it is clicked.
-
The view of the Planner can be changed using the three view options:- Day View- Week View (Selected by default as the User opens the Planner)- Month ViewSelect the desired view from the options above the calendar.
-
The Resources section on the left displays all Resources associated to the current Resource. These would normally be the children of the Parent Resource. Selecting a Resource from this list will display the calendar for that Resource alongside any previously selected Resources and will be populated with any Work Orders that they have assigned to them.
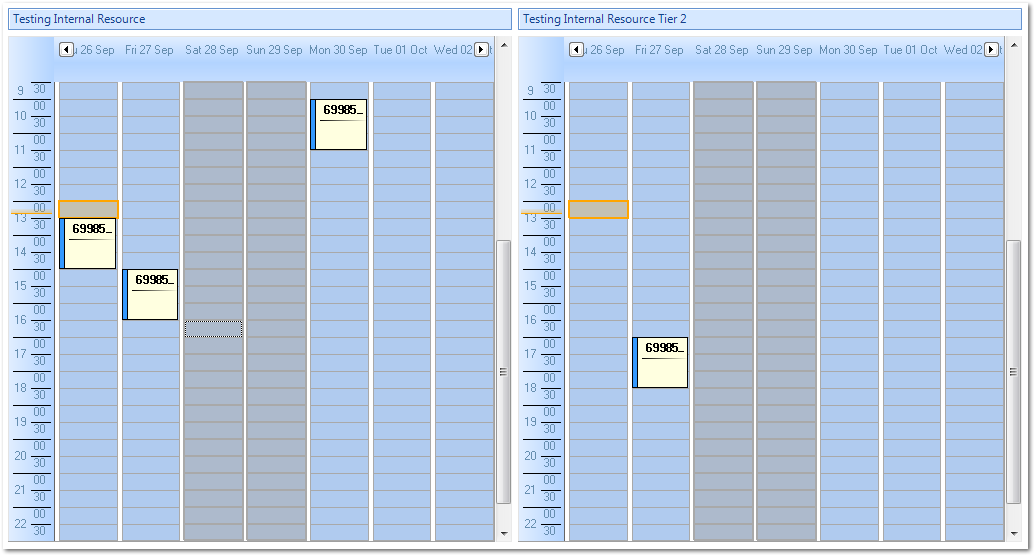 Once 5 Resources have been selected, the calendar switched to Day view. This makes it a lot clearer to see each of the Resources and easier to compare the times each of these resource are available. Once the number of Resources selected goes back to 1, the calendar switches back to Week view.
 Note: A maximum of 10 calendars can be selected at once.
 -
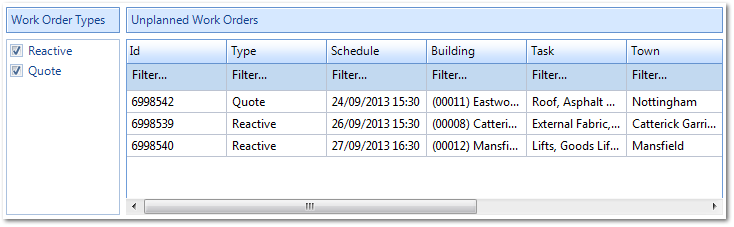
The Work Order Types section displays a list of the Types of Work Orders that the Resource currently has as outstanding Work Orders. For example: if Reactive is shown in the list then that means that the Resource has Reactive Work Orders assigned to it. Selecting an item from the list will display that Type of Work Order on the calendar(s) and in the Unplanned Work Orders section. Selecting other Types of Work Orders will populate the calendar and Unplanned Work Orders areas accordingly.
-
In the Unplanned Work Orders section, all Work Orders that have been accepted by the Resource but have not had an ETA set on them. The Work Orders that are shown here depend on what has been selected in the Work Order Types section. Each Work Order in this section is displayed with information concerning the Work Order such as the ID, the Type of Work Order and the Building. These Work Orders can be dragged onto the calendar at the required time.
-
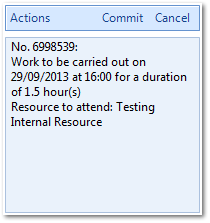
The Actions section only becomes active once a Work Order is placed on the calendar. The action that is going to be performed, when a Work Order is being planned, is shown here. This also enables the "Commit" and "Cancel" buttons which determine whether the change that is made on the calendar is actually committed or whether it is cancelled.
-
If any changes have been made involving Work Order changes associated to the selected Resource, during the time the User has been using the Planner, then clicking the "Refresh" button will update the Planner so that the User is looking at the most up to date data. Once planning is complete, the "Close" button exits the Planner.