Allocating Resource and Setting the Schedule for Attendance - Audit
Once an Audit has been created, it will then need a Resource allocating to it and a schedule set on it.
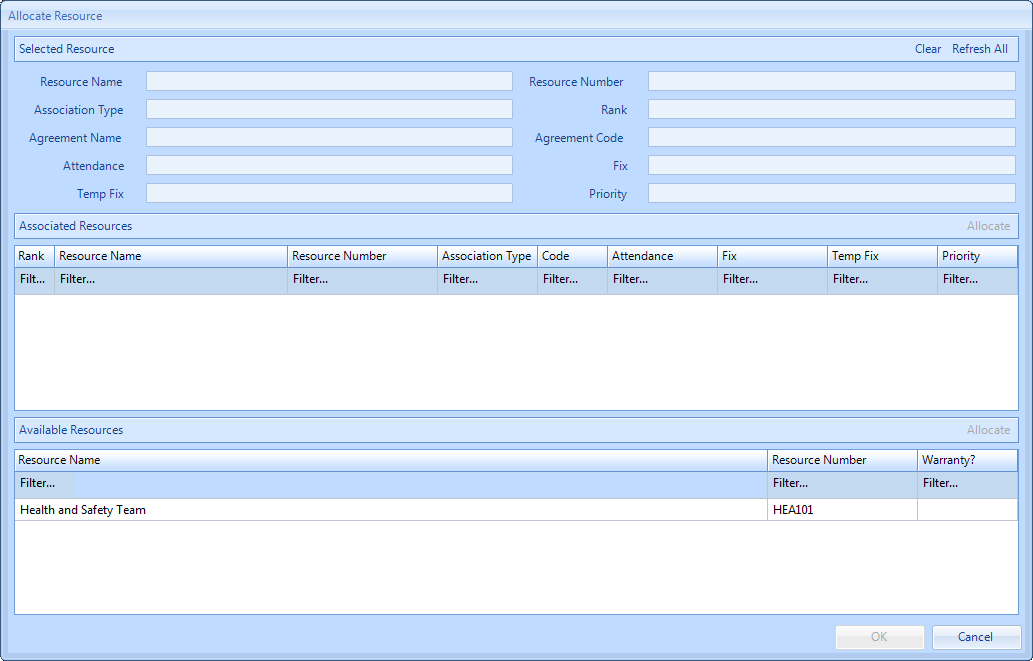
1. After the Audit has been created, the Allocate Resource screen is displayed. This screen displays a list of available Resources that can be allocated to the Work Order. To select the Resource, either double click it or select it and click the "Allocate" button. Once selected, click "OK".
The SLA is automatically set based on the SRA or Contract. Remember that this is primarily applicable to Reactive Work Orders and as such this is the 'best' response time for a Reactive Work Order that is unlikely (but still possible) to be applicable to the Audit Work Order.
To be more specific, drag and drop any of the time stamps required for attendance.
Up To - advises the Resource that they are to arrive on site any time up to the end of the time allotted.
Exact - denotes the exact time the Resource is required to be on site for.
Start & Finish - should be used together to denote the specific start and finish times of the work required.
ETA - this is available as an Agent Action or Call In Action and cannot be set at this point.
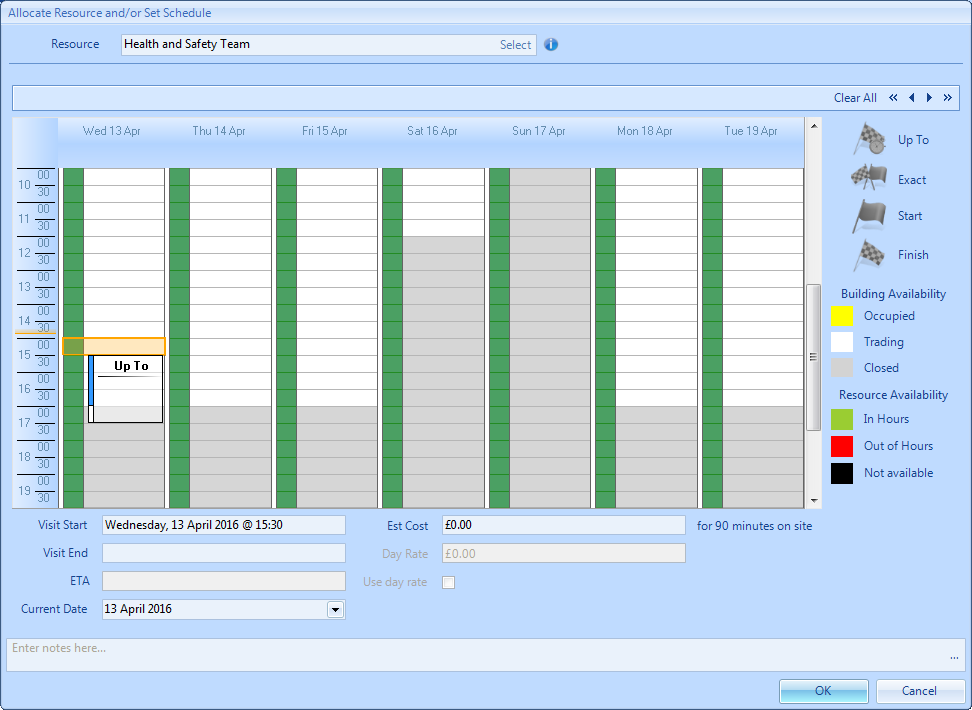
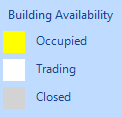
3. The availability of the Building that the Work Order has been created for will be shown on the calendar using the colour coding below:
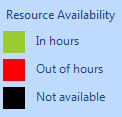
4. The availability of the Resource that has been allocated to the Work Order will be shown on the calendar using the colour coding below:
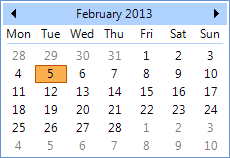
5. Use the drop down date picker from the Current Date field to choose the date you want to see on the calendar. The Visit Start Date field will show the current Start Date/Time selected on the scheduler. The Visit End will show the current Stop Date/Time selected on the scheduler. The ETA field will be set based on the 'Up To' time and the call out costs have been calculated using the Rates set up against the Resource selected.
6. To reset the schedule at any time click the "Clear All" button at the top. This will keep the selected Resource but will remove any dates/times set and allow the user to select new dates.
7. Once the Resource and schedule has been set click the "OK" button. Once a Resource has been selected and the schedule is set, the Work Order will be automatically assigned and accepted (depending on the Resource settings).