Adding a Stock Location
Stock Locations are the locations in Buildings that are associated to a Inventory Item. Each Stock Location belongs to a specific Building but multiple Stock Locations can be associated to one Building. To add a new Stock Location click the "Create New Stock Location" button.
1. The first step is to select the Client that will be used. For information on how to do this, see the Client Selection page.
2. The Stock Location Detail screen is then displayed. The Detail tab is shown first and this is where all the information regarding the Stock Location is entered. Each field is explained below:
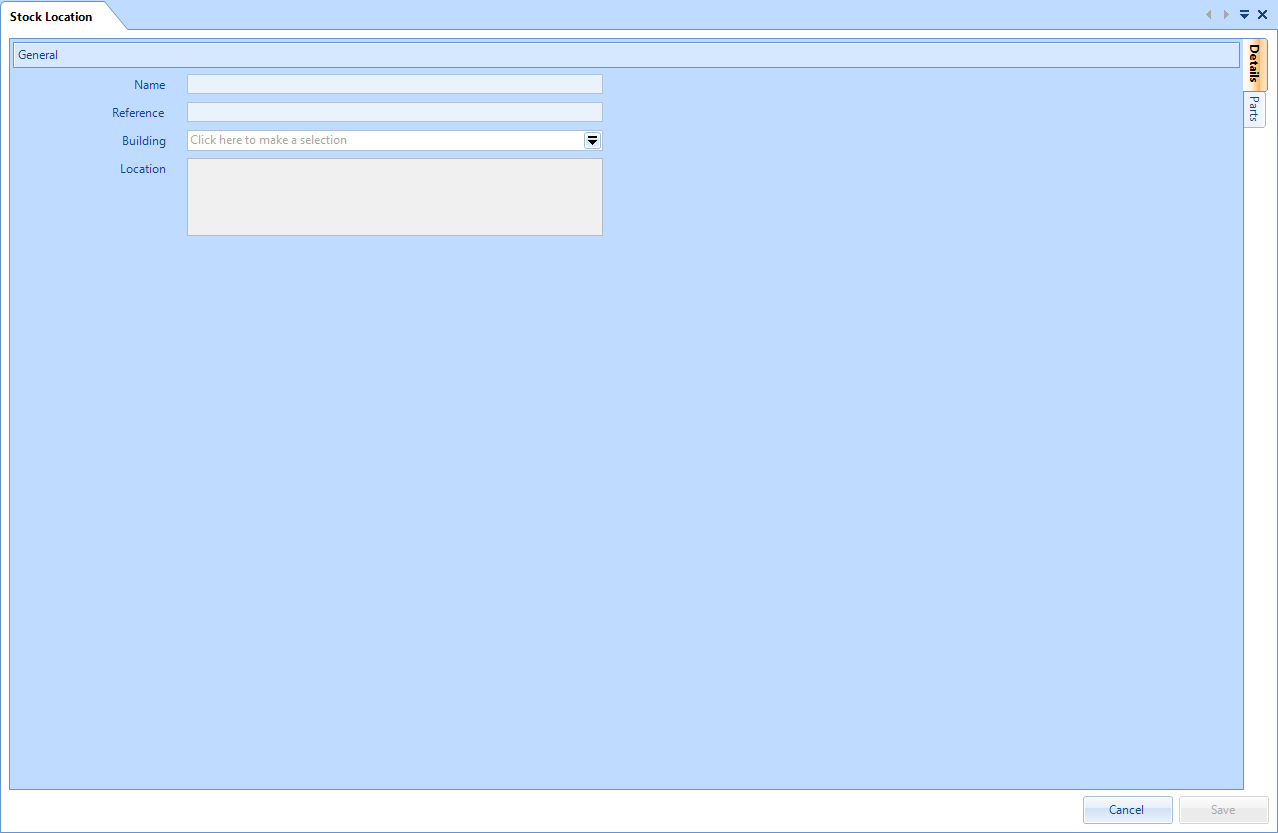
Name is a freeform field to enter the name of the Stock Location
Reference is a freeform field in which a reference to the Stock Location can be entered
Building is a pop up screen which displays all Buildings for the selected Client. To select a Building, either double-click it or highlight it and click the "OK" button. Selecting a Building enables the Location field
Location is a pop up screen which shows all locations stored against the chosen Building
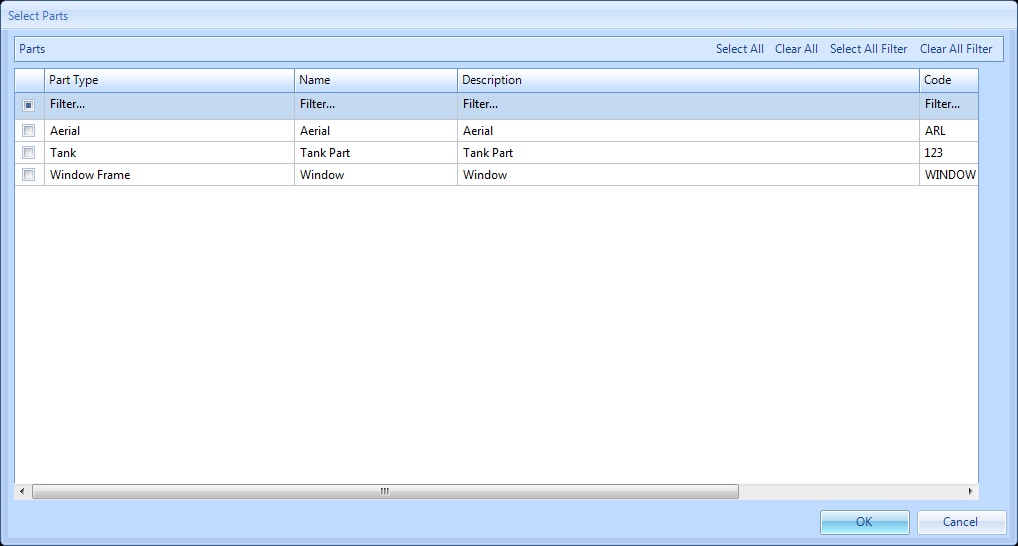
3. On the Parts tab, it is possible to add the Parts this Stock Location will associate to. To add a Part, select "Add" to display the Select Parts screen.

4. On the Select Parts screen, select the Parts to be added by ticking the relevant tick boxes. Once selected, click "OK" to add them.
6. Once everything has been completed, click "Save" to create the Stock Location and it's associations.
Note: After "Save" is clicked, the following message is displayed:
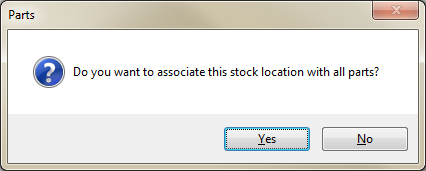
If User wishes to associate the Stock Location to all Parts, click "Yes". Otherwise click "No" and it will be associated to the selected Parts.