Pre-Qualification
Should Pre-Qualification be enabled for the system, administration of Pre-Qualification will be required. This can be done by clicking the "Pre-Qualification" button.
-
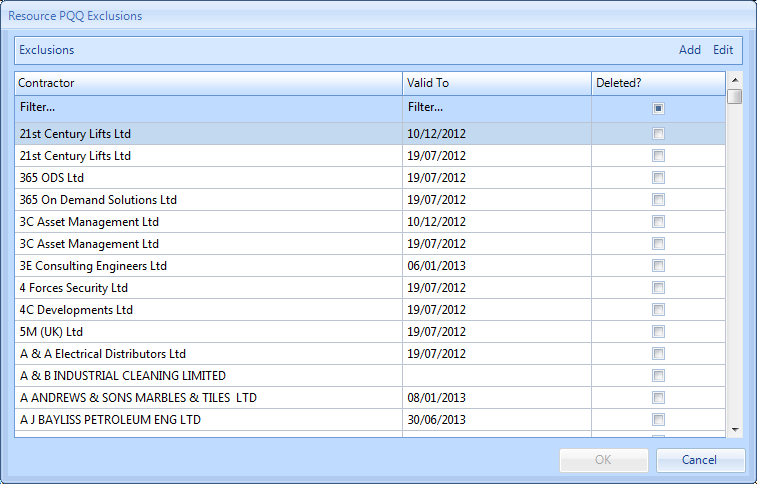
Clicking the "Pre-Qualification" button, displays the Resource PQQ Exclusions screen. Here, a list of all the current Resources that have PQQ Records are shown and it's possible to add new ones to the list.
-
After clicking "Add", choose a Client from the list. For information on how to select a Client, see the Client Selection page.
-
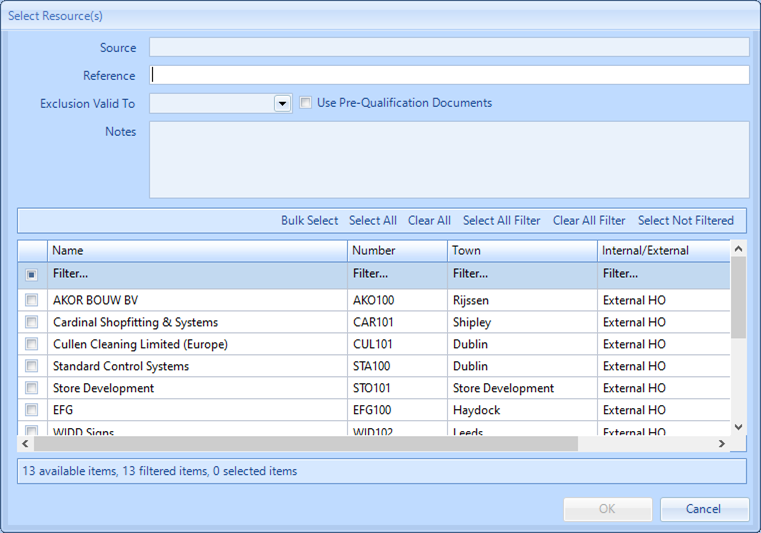
Next, the Select Resource(s) screen is displayed. Provide a Source and Reference to define the exclusion and an Exclusion Valid To date to state how long the exclusion will last and then select the Resource to exclude. The User can enter any notes regarding the exclusion in the Notes field. If the requirement exists in the system, the Resource will also need to provide certificate as proof of their Pre-Qualification. This can be done ticking the "Use Pre-Qualification Documents" and adding the documents from here. It is actually possible to set more than one Resource as PQQ excluded, just tick the appropriate Resource(s) from the list and click "OK" to add them.
-
To edit a Resource exclusion, click "Edit" after selecting the Resource and enter the new details in the respective fields that appears. To delete a Resource from the PQQ Exclusion List, tick the box in the column "Deleted?" against the Resource that is to be removed.
-
Once all the necessary changes have been made, click "OK" to apply them.