Creating an Questionnaire Introduction
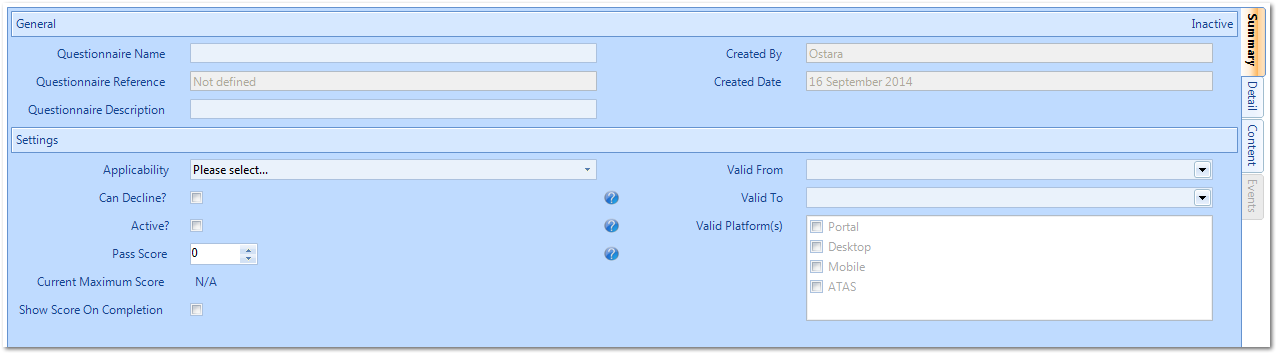
Questionnaire Name is a freeform field and should be used to Name the Questionnaire. The name can be bespoke to management company protocol or style (e.g. Daily Cleaning Specification).
Questionnaire Description is a freeform field and should be used to provide an overview or a brief description of service requirements for the Questionnaire that is being created; for example “Security Key Holding" or "Coffee Machine Maintenance".
Questionnaire Reference will always default to ‘Not defined’ however once the Questionnaire is created, the application will automatically assign it a unique Questionnaire reference number.
Created By will automatically default to the User name of the person who creates the Questionnaire.
Created Date will automatically default to the date that the Questionnaire is created.
Applicability is a drop down selection. This selection determines at what point the Questionnaire will be take place. The options are:
- Login
- Reactive, Quote, PPM
- Audit
- Verification
- Desktop Audit
Note: By selecting Audit type, the Placement in Workflow field is automatically greyed out. This is also the case for the Valid Platform(s) field as Audit Questionnaires will occur regardless of Platform.
Can Decline? If this is ticked it means that the Questionnaire is not a mandatory requirement and the User has the option to refuse to answer it.
Active? If this is ticked then it means that this is an active Questionnaire. To make the Questionnaire inactive, simply un-tick this field.
Pass Score is the overall pass score for the Questionnaire. This has to be between the minimum and maximum scores of all the questions.
Current Maximum Score is a read only field that shows the User the current total maximum score possible for the Questionnaire.
Show Score On Completion If this is ticked then on completion of the Questionnaire, the User will be presented with a summary scoresheet of their scores for the Questionnaire Completion
Valid From is the date which this Questionnaire becomes applicable and will start appearing to Users.
Valid To is the date which this Questionnaire is applicable to and will stop appearing to Users.
Valid Platform(s) are the areas where the Questionnaire will be applicable to and will occur. The platforms are the different ways the User can access the system. These are:
- Portal
- Desktop
- Mobile
- ATAS
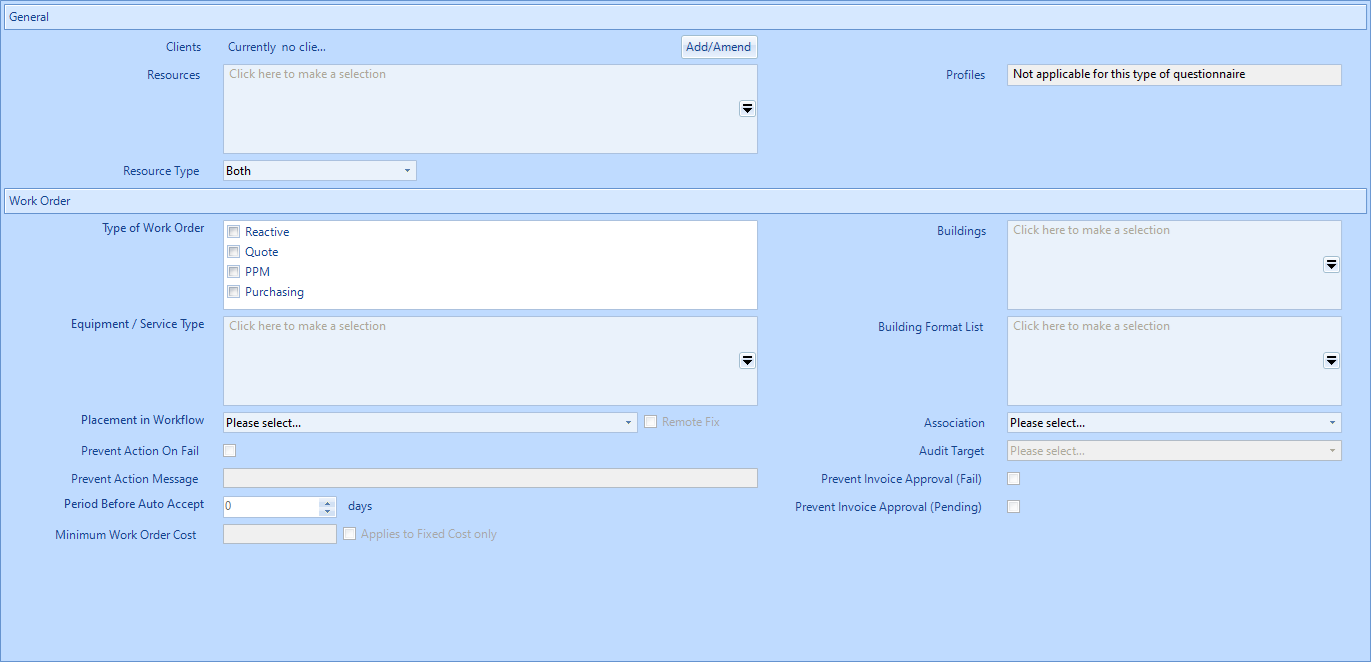
Clients is a pop up screen which provides the ability to select which clients the Questionnaire is relevant to. Use the quick search box to narrow the search or use the "select all" for quick selection of all Clients.
Resources is a pop up screen which is used to select the Resources that the Questionnaire is applicable to. See Selecting a Resource for more information.
Resource Type allows for the specification of whether this particular Questionnaire should be presented to Internal Resources, External Resources, or both.
Profiles is a tick selection screen that displays a list of all the Profiles related to the Clients that the User has access to. Users can select the Profiles they wish to apply to the Questionnaire by ticking the relevant items.
Type of Work Order is a tick selection screen of the Types of Work Order that the Questionnaire is applicable to. Multiple Types of Work Order can be selected if required (and if possible). The field will display "Not applicable for this type of questionnaire" if none are applicable.
Equipment/Service Type is a pop screen of the Equipment/Service Types that the Questionnaire is applicable to (due to the Resources selected). All equipment/service types which are common across the Clients that have been selected are shown and multiple items can be selected as required.
Buildings is a tick selection screen of Buildings associated with the Clients that have been selected. This list can be sorted and filtered to make finding the Buildings required easier.
Building Format List is a pop up screen that displays of all Building Formats applicable to the Clients selected. This list can be sorted and filtered to make finding the Building Formats required easier.
Placement in Workflow this is the point that the Questionnaire is to take place i.e. at "Start Job" or "Stop Job". This is automatically greyed out if Audit was selected in Step 1.
Remote Fix is a tick box that allows for the Questionnaire to be ignored should a Work Order be completed via the Remote Fix action. This is automatically greyed out if Audit was selected in Step 1.
Association is the choice of whether the Questionnaire is associated to a Work Order in general or whether it is applicable to different Locations or Assets within the Work Order. If the Questionnaire is for different Locations/Assets then the Questionnaire will be asked for each of the Locations/Assets on the Work Order in question. If the Questionnaire is for the Work Order in general then it will only be asked once.
Prevent Action On Fail is a tick box that, when ticked, prevents the User from starting the Work Order if they fail the Questionnaire.
Prevent Action Message is a text field in which the User enters a message that is shown when the Questionnaire fails and the Start/Stop Job is prevented.
Audit Target is a drop down field in which the User chooses the type of Desktop Audit this Questionnaire will be for. This will only appear for Desktop Audit Questionnaires.
Period Before Auto Accept is a numeric field in which the User selects how many days, after completing the Work Order, will it be automatically completed. This only relates to Verification Questionnaires.
Prevent Invoice Approval (Fail) is a tick box in that when ticked, will prevent any Invoices from being Approved if the answered Questionnaire results in a fail. This only relates to Verification Questionnaires.
Prevent Invoice Approval (Pending) is a tick box in that when ticked, will prevent any Invoices from being Approved if the Questionnaire has yet to be answered. This only relates to Verification Questionnaires.
Minimum Work Order Cost is a currency field in which the User enters the minimum WO cost that this Questionnaire will trigger on. This means that any WO that has a cost under this value will not trigger this Questionnaire. The "Applied to Fixed Cost only" tick will make this only apply to Fixed Costs, and not Calculated Costs, if ticked. This only relates to Verification Questionnaires.
Once all the fields have been populated, move onto the Content tab.
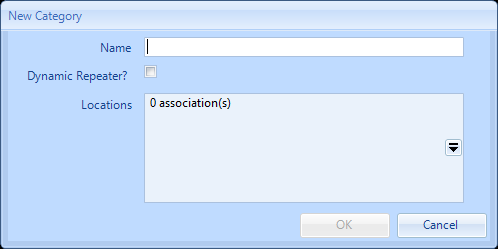
Name is the name of the Category
Dynamic Repeater? allows for this category to be repeated so that the questions contained within the Category will be asked multiple times until the person completing the Questionnaire stops adding new groups of questions. If a Category is a Repeater Category then it cannot be dependent upon by any other Category. However, within Category dependencies are allowed. A question within a Repeating Category can itself be dependent upon a previous non-repeating Category.
Locations allows for the specification of a set of Building Locations. The Category being created will only therefore be asked if the Building the Questionnaire is for has any of the listed Locations in this field. This allows for the creation of bespoke sets of questions that can be Location specific.

Edit will allow Users to edit the name of the selected Category.
Delete will completely remove the Category and all Questions within it from the Questionnaire. Only do this if the Category (and any questions within it) is no longer required as they cannot be recovered.
Edit Instructions will allow the User to add instructions to the selected Category. For more information, see the Category Instructions page.
Deactivate which will deactivate the selected Category. This is done if the selected Category and Questions are not relevant at that point in time but where the User may wish to Reactivate at a later date.
Also, once there is more than one Category available, the "ordering" arrow buttons will become available. These allow Users to reorganise the order in which these Categories, and therefore the Questions, will be presented. In the Questions section, the "Add" button, in the "Actions" drop down, is also enabled.
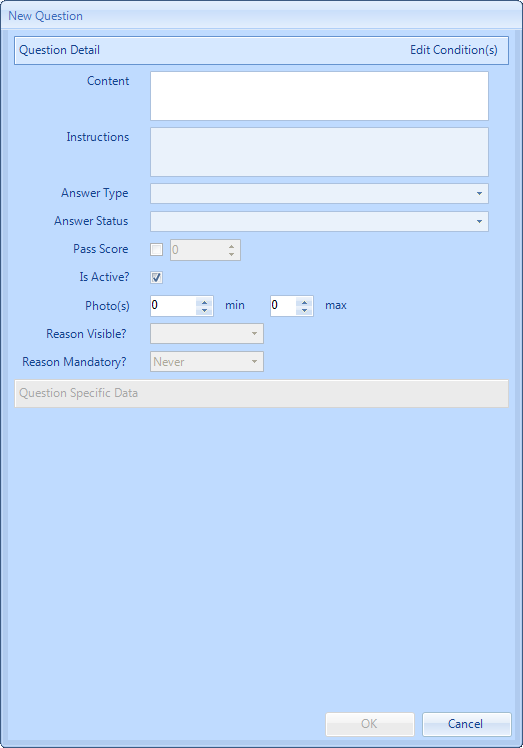
Content is a freeform field which forms the actual question that the User completing the Questionnaire will answer. This field requires at least 3 characters in before it can be accepted.
Instructions is a freeform field which provides the ability to add any additional detail to help clarify to the person completing the Questionnaire what they are expected to do for the question.
Answer Type is a drop down selection of items which define what the answer type for the question will be. Depending on what item is selected here depends on what will appear in the Question Specific Data section.
Answer Status is a drop down selection which allows Users to state whether this is a "mandatory" or "optional" question.
Pass Score is the pass score for the question. If this score isn't achieved, then it will result in a fail.
Is Active? If this is ticked then it means that the question is an active question. To make the question inactive, then simply un-tick this field.
Photo(s) is used to determine if any photos are required when answering the Question. This area contains two fields: min and max. Entering a number in the "min" field determines the minimum number of photos required and entering a number in the "max" field determines the maximum number of photos allowed.
Reason Visible? is a drop down selection which allows Users to determine if the Reason field is visible or not.
Reason Mandatory? is a drop down selection which allows Users to determine if the Reason field is mandatory or not.
Answer Types
The Answer Types field will impact the next section (Question Specific Data) depending upon the selection. The Answer Types available are:
- Currency
- Date
- Date Range
- Multiple choice multiple selection
- Multiple choice single selection
- Numeric
- Percentage
- Staple Scale
- Text
- Yes/No
- Yes/No/NA
Each type that is selected changes what is displayed at the bottom in the Question Specific Data section. This section can range from having tick boxes and scales to being able to provide multiple choices for a single question. These are all described below:
Maximum is a number field which provides the ability to enter the maximum figure allowed as the answer to the question.
Negatives Allowed? If this is ticked then it means that negative figures can be used to answer the question. Leave this tick box un-ticked if negative answers will not be allowed.
Weighting Level this is the pass score that the question has been assigned.
Options is a freeform field which provides the ability to enter the multiple choice answers for the User to choose from.
Weightings this is the score attributed to the answer given.
Minimum Selection this is the minimum number of choices which the User must select when answering this question.
Decimal Places is a number field which provides the ability to enter the maximum number of decimal places that are allowed as the answer to this question.
Length is for a number field where the maximum number of characters allowed for the answer to this question is entered.
Upper Case? If this is ticked then it means that uppercase letters are allowed to be entered in this answer. Leave this tick box un-ticked if uppercase letters are not allowed.
Yes Weighting this is the pass value which will be assigned for a Yes answer.
No Weighting this is the pass value which will be assigned for a No answer.
N/A Weighting this is the pass value which will be assigned for a N/A answer.
Click "OK" to apply the changes.
Note: All questions default to Active when created. It is possible to have a total of 30 Questions per Category.
- Yes/No
- Yes/No/NA
- Multiple Choice Single Selection
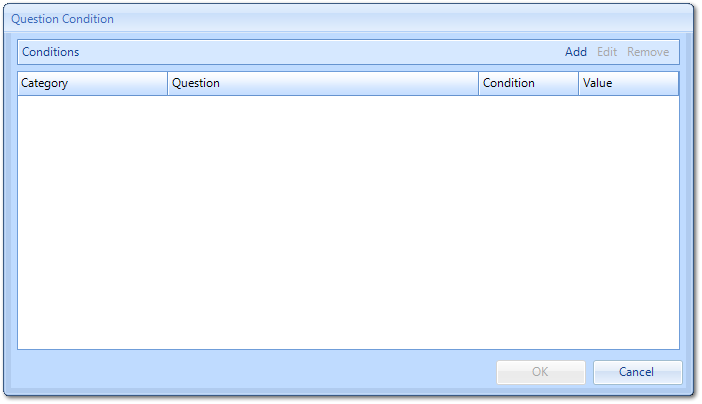
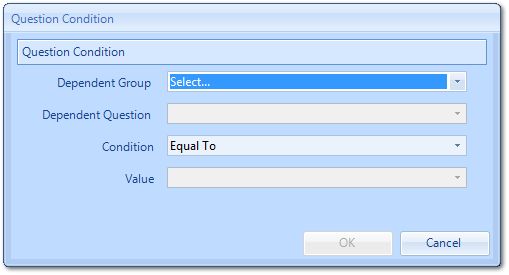
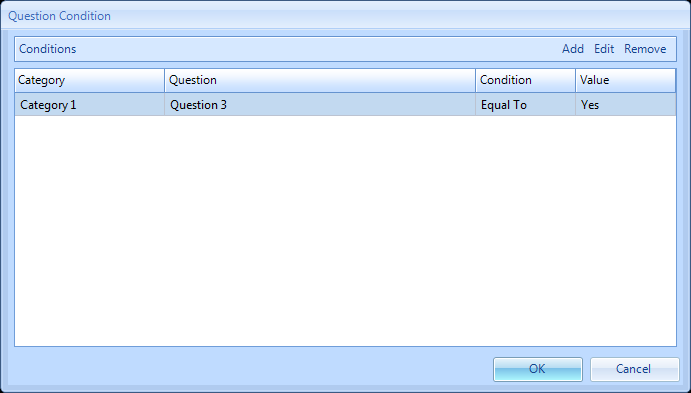
- the Category/Group this Question is dependent on. The Dependent Category can be any Category that has appeared before this one, including this one. E.g. Question 3 in Category 2 can be dependent on Question 1 in Category 1
- the Question this Question has a dependency on. The Dependent Question can be any Question that has appeared before this one. E.g. Question 2 can be dependent on Question 1 whereas Question 4 can be dependent on 1, 2 and 3.
- the Condition to be met. This can be either "Equal To" or "Not Equal To"
- the Value will trigger the Question to be displayed. The values to choose from all depend on the Dependent Question. For example, if the Question is dependent on a Yes/No Question, then only the option "Yes" or "No" can be selected from this field.