Change Task Type SLR’s
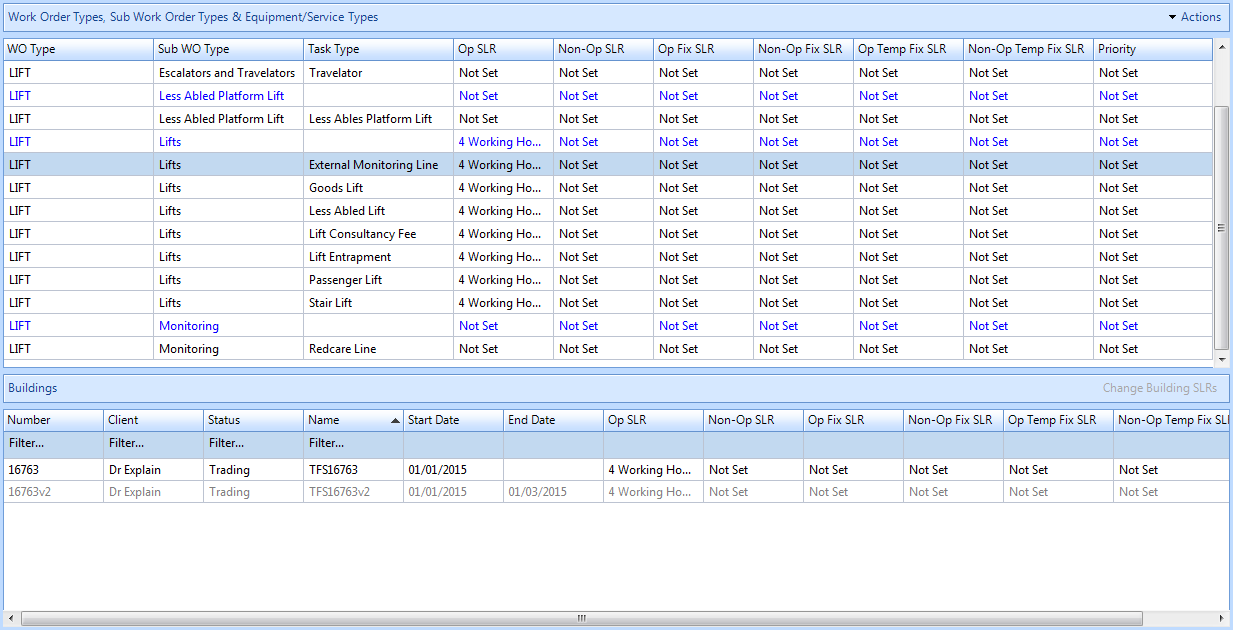
Once the Equipment/Service Types have been committed, the main SRA - Pending Creation Screen will be displayed, and the Equipment/Service Types will now be visible. The Service Level Requirements for each of the task lines can now be set. If the SRA has been set for PPM Purposes Only the SLR's will not be able to be set as this will not apply to the SRA.
What is an SLR?
The SLR or Service Level Requirement is a pre-defined timeframe which represents the Clients’ expectations for attendance and/or work completion. For example, if the Client has specified that all call outs for intruder alarm activations need to be responded to within 4hrs that would be the SLR. Within the SRA it is possible to define the SLR for Operational, Non Operational, Fix and Temp Fix down to each Equipment/Service Type if required as well as making it specific to each Building managed. Once the SLR criteria has been set and in the absence of a Contract this will filter through to the Work Order creation so the Helpdesk Work Page will be aware of the expectation as soon as a Work Order number is raised.
Example: Set an Op SLR to 4 hours, Op Fix SLR to 6 hours and Op Temp Fix SLR to 5 hours. If a Work Order is raised at 09:00 then the Attendance by will be 13:00, Fix By will be 6 hours after the Attendance time and the Temp Fix will be 5 hours after the Attendance time.
Example: Set an Op SLR to 4 hours, Op Fix SLR to 6 hours and Op Temp Fix SLR to 5 hours. If a Work Order is raised at 09:00 then the Attendance by will be 13:00, Fix By will be 6 hours after the Attendance time and the Temp Fix will be 5 hours after the Attendance time.
Why are SLR fields blue and black?
The SLR is always ultimately set at Equipment and Service Type level so the colour coding is there to make an immediate distinction between the Work Order/Sub Work Order Types and the tasks. All Work Order and Sub Work Order Types are highlighted in blue and the User will be informed that once a Work Order or Sub Work Order Type SLR has been set, it automatically filters down to all subordinate Equipment/Service Types in the list; don’t worry if different SLR's are needed for each one, it's possible to go back and change any individual Equipment/Service Type.
Why do I need to add Work Order Types and Buildings?
By defining each Equipment/Service Type and Building any work order created, which meets the criteria, will automatically prompt to use the SLR's which have been set. This enables automatic awareness of the Client expectation for resolving this fault. These SLR's will be overridden by a Contract if that is subsequently associated to the SRA. These SLRs can also be overridden within the Helpdesk Work Page by the Agent. Once the SRA has been fully created, Users will also be advised within the Helpdesk Work Page which Resource this job should be allocated to.
To change the SLR's please use the following steps:
1. After adding the task to the SRA (the SLR's will all default to "Not Set"). The User will now need to set the SLR's. These can be set at Work Order Type level or Sub Work Order and Task Type level.
2. Highlight the Task line that is going to be changed.
3. Click the Actions button. This menu will be displayed:
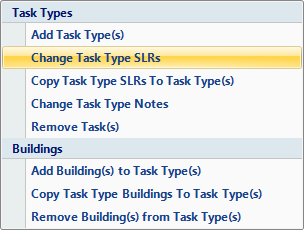
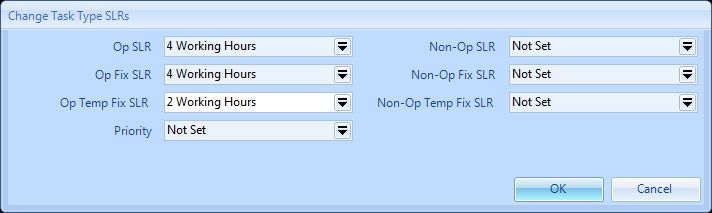
4. Click on Change Task Type SLR's this window will then open:

5. From here the different SLR's can be set by clicking on the drop down arrows. This window will then open:
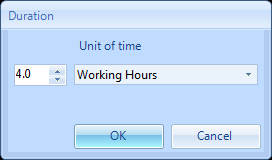
6. Use the up and down arrows to increase/decrease the time frame. The User can also double click in this field and simply overtype. Use the dropdown to choose whether the time frame is Not Set, Hours, Working Hours, Days, Working Days, Weeks or Months. The use of "Working" instead of hours/days means that this SLR will take into account the hours of availability set against the Resource. Clicking on "OK" will bring the User back to the previous screen in order to make any other changes to SLR's.
7. Once all changes have been made. Click on OK. The User will then be presented with an "Are you Sure" Message. Clicking Yes will save any changes, clicking No will return to the previous screen.
8. The SRA will then be populated with the times set.
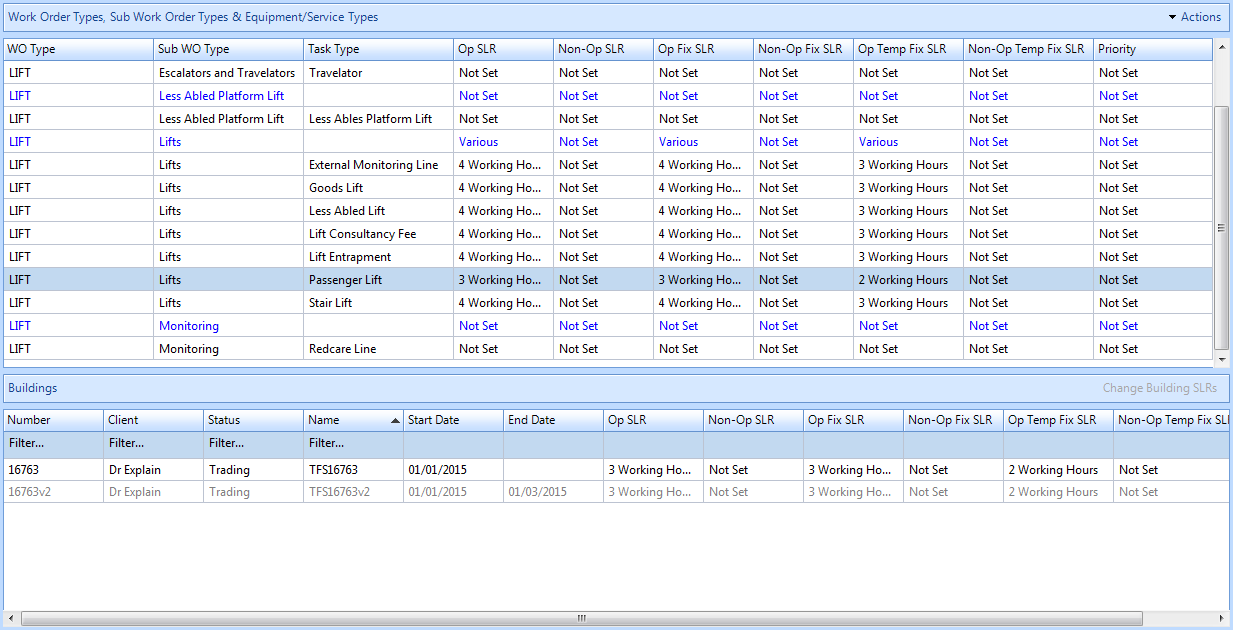
9. The above screenshot shows times set against the Work Order Type level (blue) and different times set for Sub Work Order and Task Type levels.
10. If it is required to copy this to other tasks, use the Copy SLR’s functionality.