Parts Tab - Adding Parts to a Contract
If the Contract is PPM Only, then the Parts tab will be disabled and not selectable on the Contract. However, if the Contract is not PPM only, this can be done in the following way:
1. Click on the Parts tab. Any parts already added to the contract will be visible from here.
2. Click on the Actions > Change Parts button and this screen will be displayed:
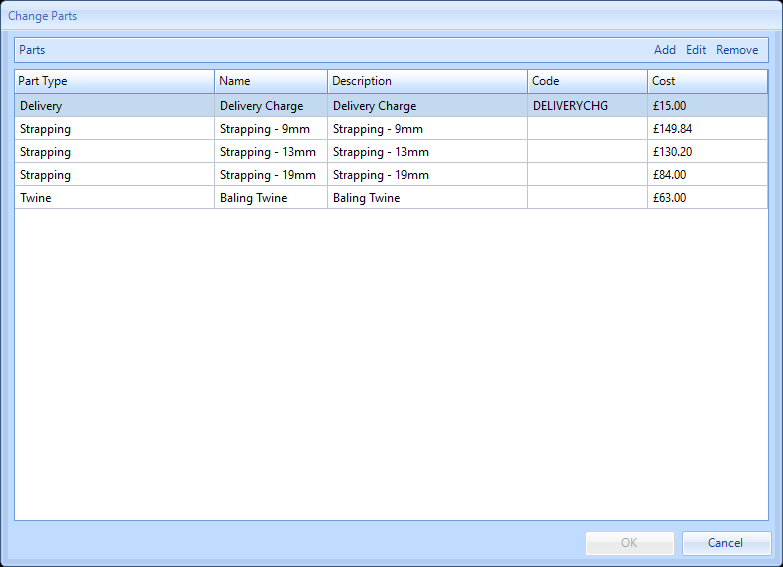
Note: If any parts have already been added to the contract then these will be visible/deleted from here.
3. Click on the Add Button and this screen will be displayed:
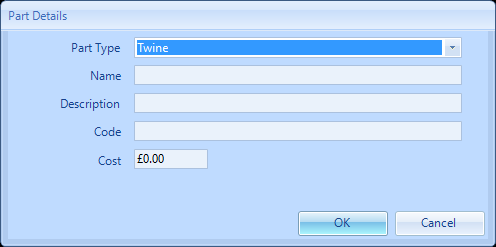
Note: The list of available Part Types is constrained by the Part Types ticked against the Equipment Types in Core Data and selected in the Reactive Task tab.
4. From here populate the individual fields on the screen and click OK when complete.
5. Clicking OK will take the User back to the previous screen but with the new parts now visible. From here costs can be updated. To do this simply click on the cost column and enter the agreed cost.
6. Once all relevant cost have been entered click on the OK button and complete the Reason for Contract Change screen.
7. It is also possible to upload Parts against a Contract in Bulk. This is achieved using the Actions > Bulk Import Parts button.
8. This action will open up an Excel spread sheet, pre-populated with any existing Parts on the Contract and at the same time, open this window:
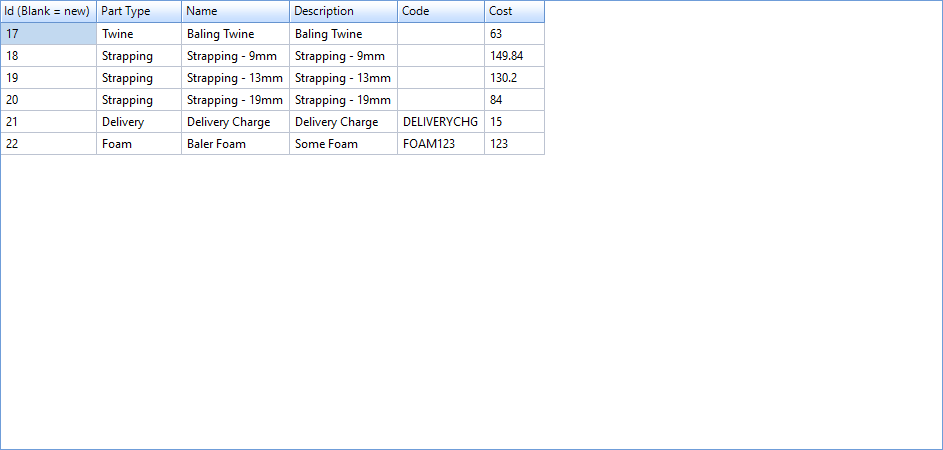
9. By editing the spread sheet, and either adding new lines or amending existing ones, once the spread sheet is saved, the above view will automatically refresh. Once the user is happy with the data, on clicking "Run Import" the Parts list will be uploaded against the Contract. If there are any errors or unexpected values on the supplied spreadsheet, the User will be notified on clicking "Run Import" and will have the opportunity to correct the spreadsheet and attempt the import of the data again.