Locations
Locations are used to create individual Level/Area/Location Mappings on a per Building basis. Therefore, Locations is split into 3 different sections: Levels, Areas and Locations.
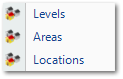
1. Click the "Locations" icon and a drop down list will appear allowing the to choice of either “Levels”, “Areas” or “Locations". Choose the desired option.
2. The next step is to select the Client that will be used. For information on how to do this, see the Client Selection page.
3. Each option brings up a screen showing a list of items that exist in the system (depending on the choice made, either see a list of Levels, Areas or Locations will be shown). The details of the item can viewed just by clicking it. The information will be displayed on the right under "Level Details".

4. It is possible to add or edit an item in the list by clicking “Add” or “Edit” respectively. The Add and Edit screens work in the same way. Just enter the required information into each field displayed (e.g. Name, Description etc.). Click "OK" once all information has been entered. The following is the Level pop up:

Name is a freeform field to input the short name of the Level, Area or Location.
Description is a freeform field to provide further detail about the Level, Area or Location.
Level Type is a single-select field to choose the type of Level - denoting whether the Level is at Roof level ('Roof'), Standard level ('Level') or underground ('Sub-Level') .
Level Number is a numeric field to enter the position of this level in the Building. For example, the second floor of a Building would typically be Level Number 2.0. This field can accept halves, so 1.5 is an acceptable Level number and could be used to denote a Mezzanine. Important: The combination of Level Type and Level Number must be unique per Client.
Cost Code is a freeform field to enter the financial Cost Code of the Level, Area or Location.
Sub Cost Code is a freeform field to enter the financial Sub Cost Code of the Level, Area or Location.
Auto-association? is a tick box that allows the User to specify whether this Level, Area or Location should be associated to all newly created Buildings for that Client.
Building Format is a multi-selection that allows the User to specify which Building Formats this Level, Area or Location should apply to. If the User has created a Building with a Format not added to this Level, Area or Location, then it will not be visible to map to the Building in the Location Mappings action against the Building.
5. The following screen is the Location pop up:

Cost Code is a freeform field to enter the financial Cost Code of the Level, Area or Location.
Sub Cost Code is a freeform field to enter the financial Sub Cost Code of the Level, Area or Location.
Auto-association? is a tick box that allows the User to specify whether this Level, Area or Location should be associated to all newly created Buildings for that Client.
Operational Status is a tick box that allows the User to specify whether the question is asked when Reactive Work Orders are created whether the location is operational or not.