Capital Budgets
Capital Budgets are used to monitor the expenditure of Capital Work Orders. This is done by creating Capital Codes which can then be applied to Work Orders to monitor spend. To set a Capital Budget, follow these steps:
1. Click the "Capital Budgets" button and select a Client. For information on how to select a Client, see the Client Selection page.
2. Select a Finance Period from the drop down menu and click "OK" to display the Capital Budgets screen. This screen will display all the Capital Budgets that have been created for the selected Client in the chosen Finance Period. Users can add new items, modify existing items and choose which items will be used by ticking/unticking them.
Note: Capital Budgets can only be deselected if they are currently not against any Work Orders. Once deselected, they will not appear in the list when setting a Capital Code for a Work Order.
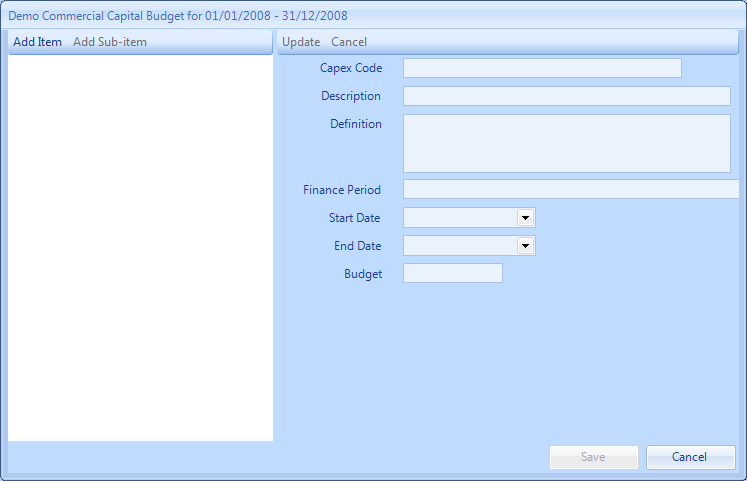
To add an item, click the "Add Item" button which then enables the details section to the right where the details for the Capital Budget will be entered. There are several different fields that require information when adding a Capital Budget:
- Capex Code, Description and Definition are freeform fields to be used to aid categorisation of the Capital Codes
- Finance Periods are a drop down selection of any Periods that have been set up for the financial years
- Start Date and End Date are the dates that the Capital Budget Code is valid from and to
- Budget is the value of the Capital Budget
Note: Capital Budgets can only be deselected if they are currently not against any Work Orders. Once deselected, they will not appear in the list when setting a Capital Code for a Work Order.
To add an item, click the "Add Item" button which then enables the details section to the right where the details for the Capital Budget will be entered. There are several different fields that require information when adding a Capital Budget:
- Capex Code, Description and Definition are freeform fields to be used to aid categorisation of the Capital Codes
- Finance Periods are a drop down selection of any Periods that have been set up for the financial years
- Start Date and End Date are the dates that the Capital Budget Code is valid from and to
- Budget is the value of the Capital Budget
Note: Finance Periods MUST exist before Capital Budgets can be entered.
3. Capital Budgets can be hierarchically created to 3 levels, that go from the 1st Level down to the 3rd Level, and these lower levels can be created by using the "Add Sub-item" button. The "Add Sub-item" function works in the same way as the "Add Item" function except that there are a couple of extra fields, depending on the level the item is being added.
At the 2nd Level, the Still Available field appears which is the total remaining of the Parent Budget once all other Child Budgets are subtracted.
At the 3rd Level, the Buildings field also appears which is where the Buildings that this Capital Code will apply to. If the code refers to all Buildings then ticking the "All Buildings" tick box will automatically select all Buildings for this code. Unticking this box will revert the Building selection back to what it was before it was ticked. It is also possible to determine whether the Capital Code is Private by using the "Private" tick box. If this is ticked then only Users with the correct permission will be able to view this Capital Code. This accounts for viewing the Capital Code on Work Orders and Authorisations.
Note: The 3rd Level's Capex Codes are visible to the User to select against Work Orders when capitalising Work Orders.
Again, click "Update" to apply the changes.
4. Once all the correct items have been added and the fields have been populated, click "Save".