Creating People
There are a variety of reasons to set up a Person. Some People access the system to perform specific tasks, some People will act as Building Contacts whilst others will act as Resource Contacts and Contractors. People can be stored within the system for reference without the need to have any access to the system whatsoever. To create a Person, click the "New Person" button.
1.Clicking the "New Person" button shows the Person Detail window. This window is where all the information concerning the new Person is entered. As shown, the screen is divided into 5 tabs: Detail, Scope, Communications, Access and Notes.
The Detail tab is where the contact details are entered and the category of the Person is selected. Each of the fields are explained below:
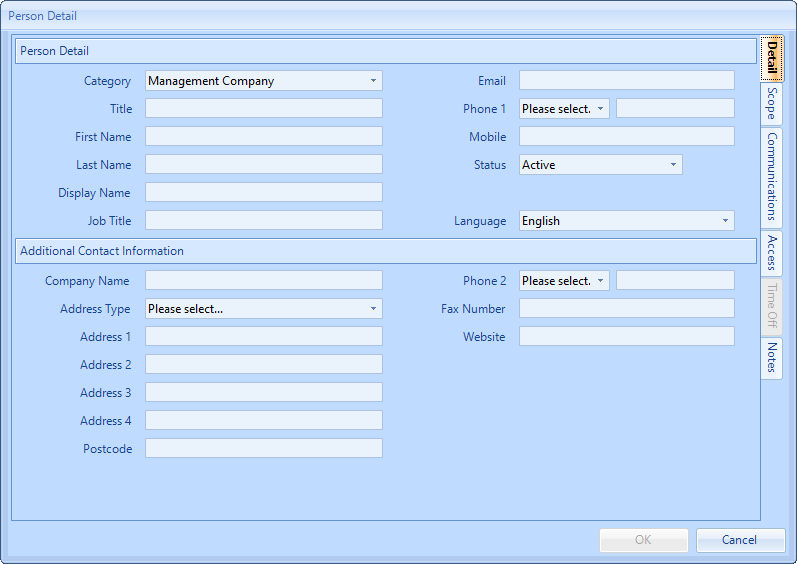
Category is a drop down menu that contains the different Person categories that a Person can be. These categories are:
- Management Company - allows multiple Clients to be selected. This category could be used for the central team, for example, Users in a Call Centre that supports a range of different Clients. Management Company People can also be setup as Building Contacts.
- Client - allows only one Client to be selected and can be setup as a Building Contact. This could be used for a User that is a contact for one or more Buildings but only for a single Client.
- Resource - allows multiple Clients to be selected and automatically selects all Buildings. This would be used for a Contractor or Supplier so that they can update Work Orders assigned to them or if someone was a contact for the Resource.
- Landlord/Tenant - used within the Leases and Lettings module, this category would indicate that the Person is a Landlord or Tenant contact.
Depending on what is selected, the information required will differ slightly. Selecting Landlord or Tenant will hide the Communications and Access tabs. The Scope tab will display different fields depending upon this Category too - this is explained in more detail below.
Title is a freeform text field in which the Person's title is entered.
First Name is a freeform text field in which the first name of the Person is entered. This is a mandatory field.
Last Name is a freeform text field in which the last name of the Person is entered. This is a mandatory field.
Display Name is a freeform text field in which the name that will be displayed when the Person performs actions throughout the system is entered. Upon creating a new Person, this field is automatically populated with the first and last names entered and separated by a space.
Job Title is a freeform text field in which the Person's job title is entered.
Email is a freeform text field in which the email address of the Person is entered and a validation check is performed to make sure the correct format has been used. This is a mandatory field.
Phone 1 is a drop down menu and freeform text field. The drop down provides a list of types to choose from to set Phone 1 as and the text field is where the phone number is entered. This is a mandatory field unless the Mobile field has been populated.
Mobile is a freeform text field where the mobile number is entered. If the Person is to receive SMS Notifications, this field must be populated with the necessary mobile number. This is a mandatory field unless the Phone 1 field has been populated.
Status is a drop down list which determines whether the Person will be Active (by selecting "Active") or Inactive (by selecting "Inactive"). An Inactive Person will not be able to log in to the system, nor will they appear as contacts in the system.
Language is a drop down list which determines the language the Person is in and is used to determine the formats of emails they will receive.
Company Name is a freeform text field where the name of the Company the Person works for is entered.
Address Type is a drop down menu that provides a list of different types of addresses. Select one from the list to set the Address Type.
Address 1 is a freeform text field where the first line of the address is entered.
Address 2 is a freeform text field where the second line of the address is entered.
Address 3 is a freeform text field where the third line of the address is entered.
Address 4 is a freeform text field where the last line of the address is entered.
Postcode is a freeform text field where the postcode of the address is entered.
Phone 2 is a drop down menu and freeform text field. The drop down provides a list of types to choose from to apply to Phone 2 and the text field is where the phone number is entered.
Fax Number is a freeform text field where the fax number is entered.
Website is a freeform text field where the website URL of the Person's Company is entered.
Once all the required information is entered, click on the Scope tab.
2. On the Scope tab, all the associations concerning the Person are chosen. This tab changes depending on what Category was selected for the person. For Management Company and Client Category People, the screen looks like this. Each field is explained below:
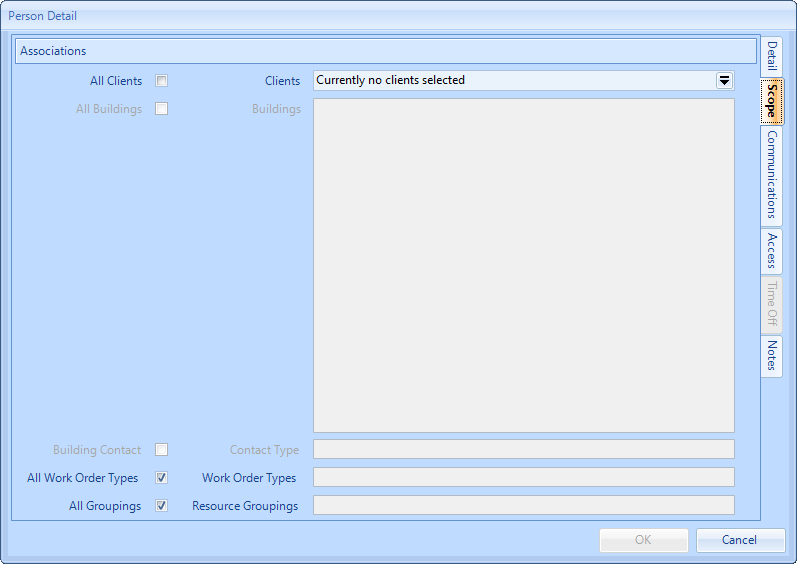
All Clients is a tick box that sets whether the Person can view all Clients or not.
Clients is a pop up menu where the Clients associated to the Person are selected, if All Clients hasn't been selected. If the category is Client then only one Client can be selected. This screen works in the same way as the Client Selection screen. When one or more Clients have been chosen an "i" will appear here and if hovered over, a hover message will display the selected Clients.
All Buildings is a tick box that sets whether the Person can view all Buildings relevant to their associated Clients.
Buildings is a pop up menu where the Buildings that the Person will be able to view are chosen. This is active if All Buildings hasn't been selected. Buildings can be selected no matter what the type of Person.
Building Contact is a tick box that determines whether or not the Person will be a Building Contact for the selected Buildings.
Building Contact Type is a pop up menu that displays the all the Contact Types of the selected Client and Buildings that can be associated to the Person.
All Work Order Types is a tick box that sets whether the Person can view all Work Order Types relevant to their associated Clients.
Work Order Types is a pop up menu where all Work Order Types are displayed and can be selected. This is active if All Work Order Types has been deselected.
All Groupings is a tick box that determines whether or not the Person has access to all Resource Groupings in the system. Unticking this enables the Resource Groupings field.
Resource Groupings is a pop up menu that displays the all the Resource Groupings that can be associated to the Person. Selecting one or more Resource Groupings will allow the Person to view the financial information (Rates and Invoices, etc) on Work Orders and Invoices, for Resources that belong to the selected Groupings.
For Resource People, the screen looks like the below. The difference with this screen is that the Resource fields are included, allowing the Person to be associated to a Resource. The Resource fields are explained below:
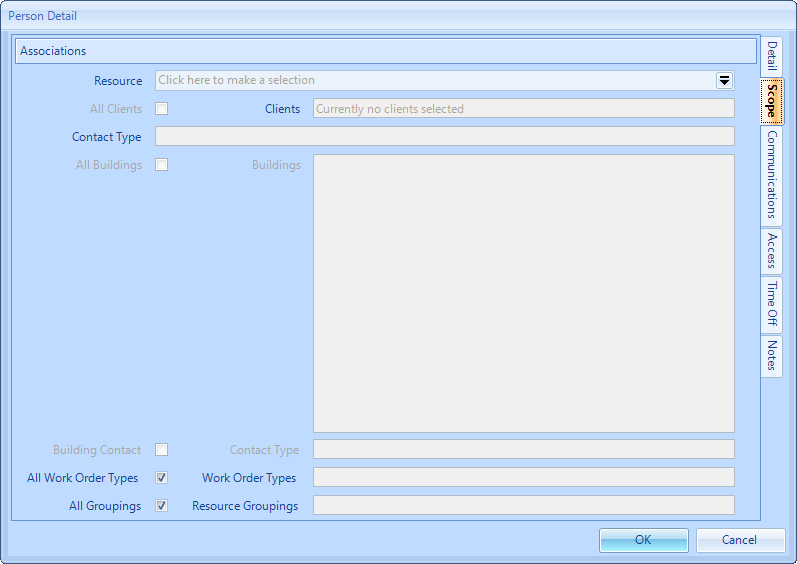
Resource is a pop up menu where the Resource that the Person will be associated to is chosen. This is greyed out if the Category of Management Company or Client has been selected. If a Resource category is selected the Clients selection is greyed out until a Resource is selected. Selecting a Resource will preset the list of clients available and default to all those available to the Resource. The Buildings selection should then be made either by ticking the All Buildings (which should be used as the default option for most Resources) or by selecting individual Buildings for this Person.
It is possible to select specific Buildings per Person against a Resource to control which Buildings individual Resource Personnel can access.
Resource Contact Type is a pop up menu that displays the all the Contact Types of the selected Client and Resource that can be associated to the Person.
Once all the information has been entered, move onto the Communications tab.
3. The Communications tab is where the Notifications and Subscriptions are set up. The Work Order Assignment is also configured on this tab. Each of the fields are explained below:
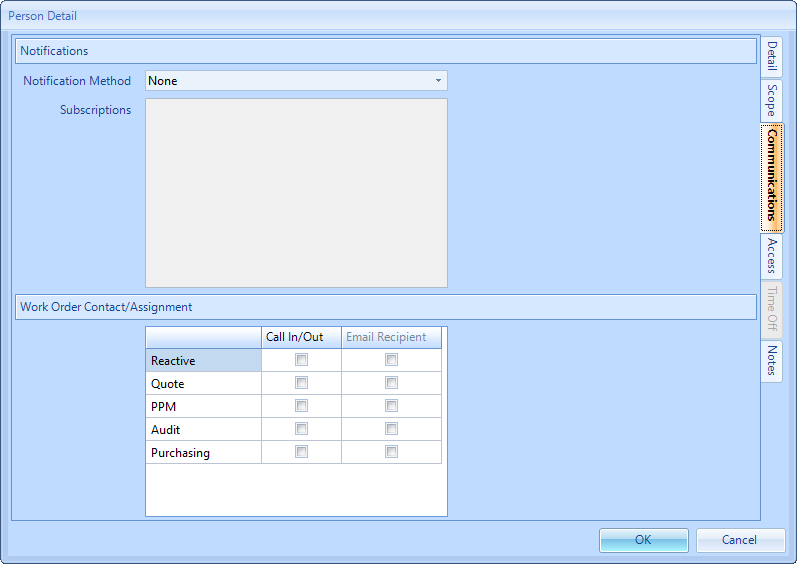
Notification Method is a drop down menu where different Notification Methods can be selected for the Person. These methods are:
- None - Choosing this method means no notifications will be required for the Person.
- SMS - Choosing this method means notifications will be sent via SMS to the Person. This option is only available if a number has been given in the Mobile field on the Detail tab.
- Email - Choosing this method means notifications will be sent via Email to the Person.
- Email and SMS - Choosing this method means notifications will be sent via Email and SMS to the Person. This option is only available if a number has been given in the Mobile field on the Detail tab.
Only one Notification Method can be associated to any one Person.
Subscriptions is a pop up menu that displays the different notification Subscriptions available to the Person. Clicking the "Select All" button selects all the Subscriptions whilst "Clear All" clears the selection. If multiple Clients have been selected then the Subscriptions will have the corresponding Client name next to their Subscriptions.
Work Order Contact/Assignment is a table containing tick boxes. This table determines whether the Person will appear in the Call In/Call Out menus for the different types of Work Order, as well as whether they are an Email Recipient for these types. Email Recipient only becomes available if the category of Resource has been chosen and this box should be selected if the Person you are configuring will be the one who receives the emails about incoming jobs. The Building allocation against the Person will also restrict what emails they can receive - so by setting specific Resource Contacts up with different Buildings, you can control who receives what emails.
Once the Subscriptions and Assignments have been made, move to the Access tab.
4. The Access tab is where it is decided what access will be given to the Person, whether it be through the application or otherwise. Each of the fields are explained below:
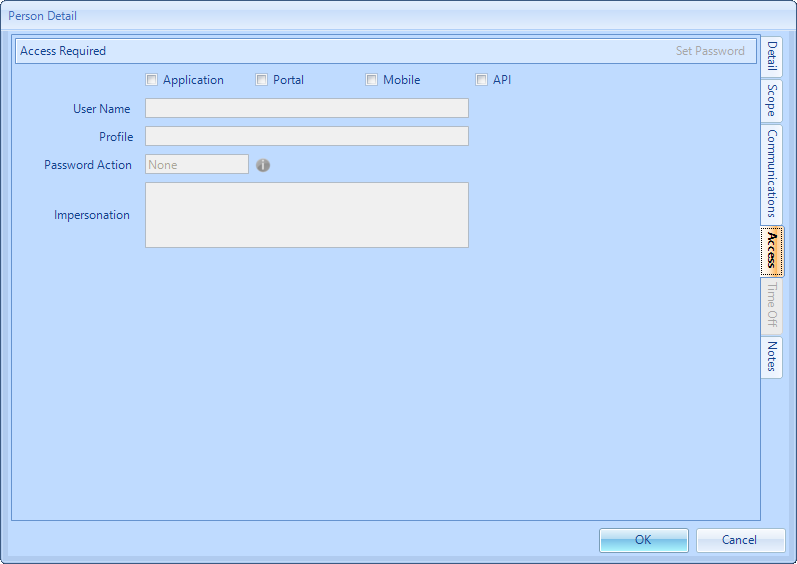
At the top of the screen are three tick boxes: Application, Portal and Mobile. These tick boxes determine what the Person will be able to access:
- Application - enables access to the Application
- Portal - enables access to the Portal
- Mobile - enables access to the Mobile Application
Multiple tick boxes can be selected if the Person requires access to more than one method of access.
User Name is a freeform text field containing the Ostara Username of the Person. Upon selecting a method of access, this field will be populated with a Username in the format of "FirstName.LastName" but this can be changed at any point. When creating the Username for a Resource person, the Username will be entered in differently depending on the type of Access selected. If Portal is selected, the Username will be in the format of "ResourceNameResourceNumber.Service". If Mobile is selected, the Username will be in the format of "ResourceNameResourceNumber.Mobile".
Profile is a pop up menu where the Profile the Person will be associated to is selected. If the person is of Category "Resource" then the system will default the Profile however, the User can override the Profile and choose a different one.
Password Action is a Read Only field that explains what Password action is going to occur. Hovering over the "i" next to it explains what the action will do.
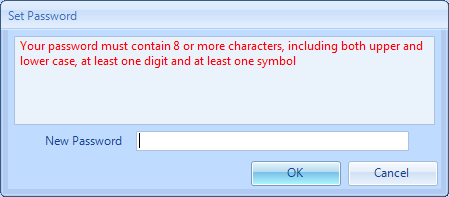
There is also the "Set Password" button which allows the User to set the password for the Person Record. Clicking this displays the Set Password screen. On this screen, a message displays stating that a password needs to be entered and what the strength of the password needs to be. Once a password has been entered, click OK to return to the Person Detail screen.
Impersonation is the ability to link a Person to another Person to allow them to Authorise Work Orders on behalf of the linked person. Please see Hierarchies and Impersonation for more information on this functionality.
Once the access information has been entered, move onto the next tab: Time Off.
5. The Time Off tab is only enabled for People with the Category of "Resource". From here it is possible to set the Availability of the Person and also manage their Working Patterns and Holidays.
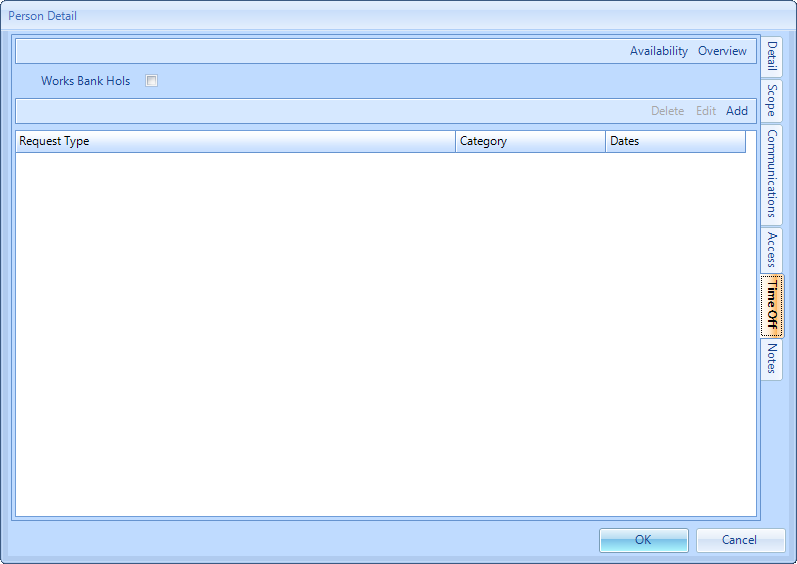
The Availability button shows the People and Profiles
Clicking 'Overview' displays a calendar view detailing the working patterns and holiday requests of the Person.
Ticking "Works Bank Hols" indicates that any Holiday and Availability calculation of this Person should include/exclude Bank Holidays.
Clicking on the Add/Edit/Delete buttons allows for the editing of request types - whether that be Holiday Requests, Training time off requests or other time off, and the Date(s) and reasons for Time off can be recorded.
6. The final tab is the Notes tab which contains a large notes field where any miscellaneous information can be stored. This tab is not mandatory.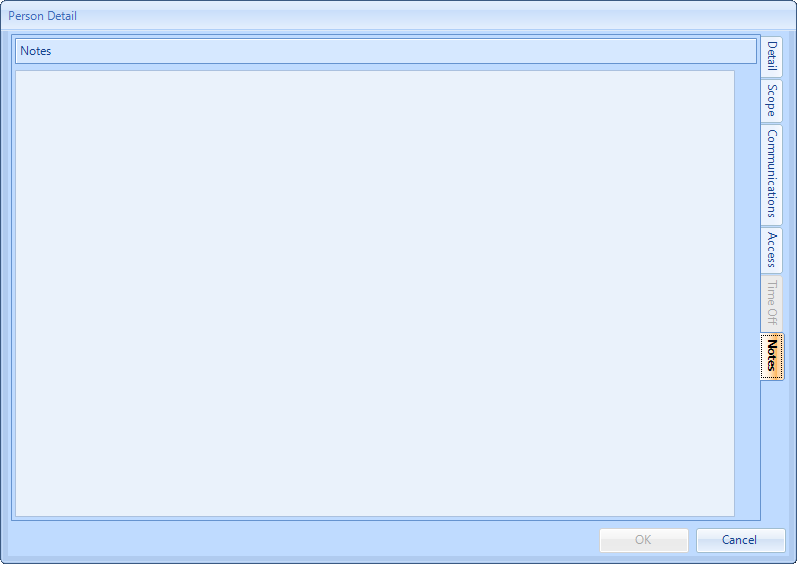
7. Once all the details have been entered, click "OK" to create the new Person. This Person will now be shown when performing a People search.
Note: When a User has the "Can Bypass Reset Password" permission, they are able to create a User without the Reset Password being sent by using the "Set Password" button. If this permission is not turned on, the new User will be sent a Reset Password to the email address against the new User.