Profiles Introduction
Every "Person" that requires access to the system is assigned a “Profile”. For more information on “People” please view the People section.
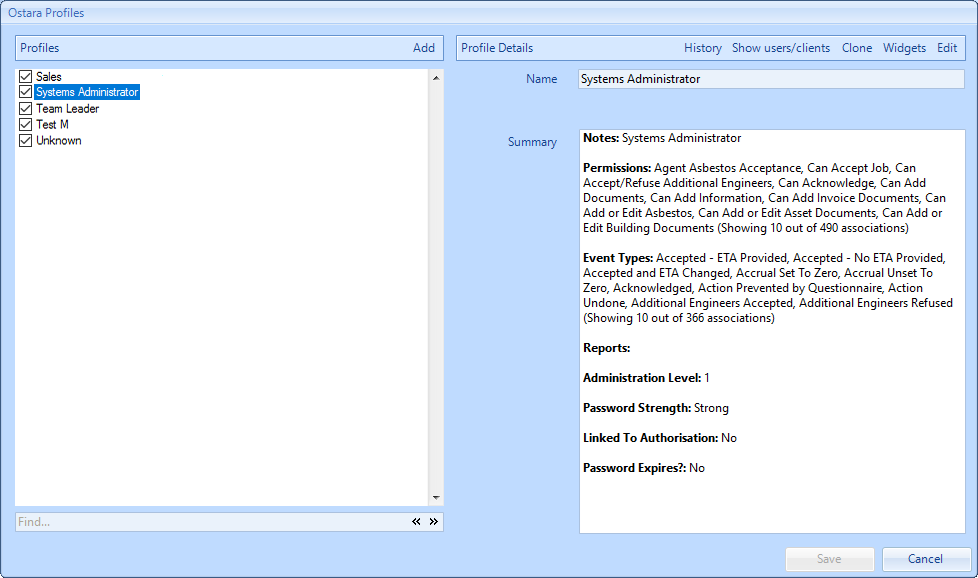
“Profiles” group Users together meaning different profiles will have different permissions assigned to them. This therefore means that the permissions of the profiles are passed onto the Users associated with that profile. Different profiles can be used to allow Users to use the system in different ways. Click the “Profiles” button to view the profiles on the system.
1. This is the Profiles screen. It shows a list profiles in the system. A profile can be ticked or unticked depending on which ones are required to be active and useable throughout the system.
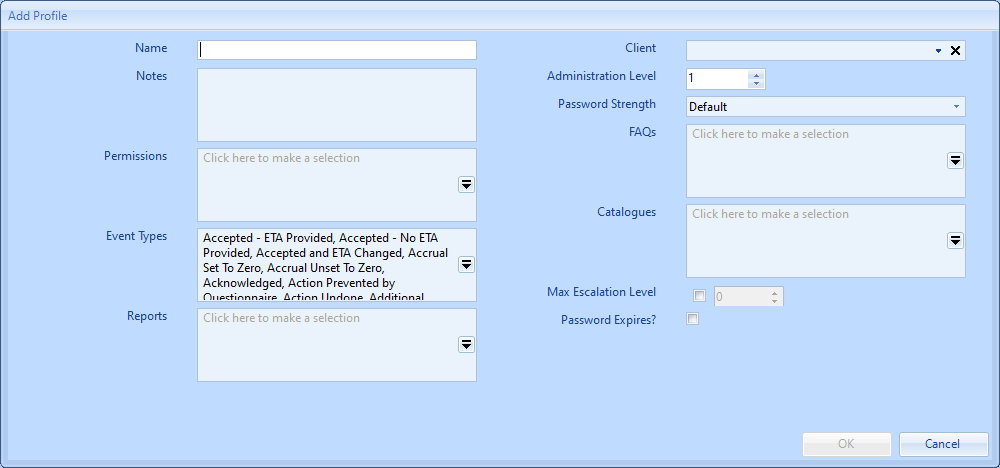
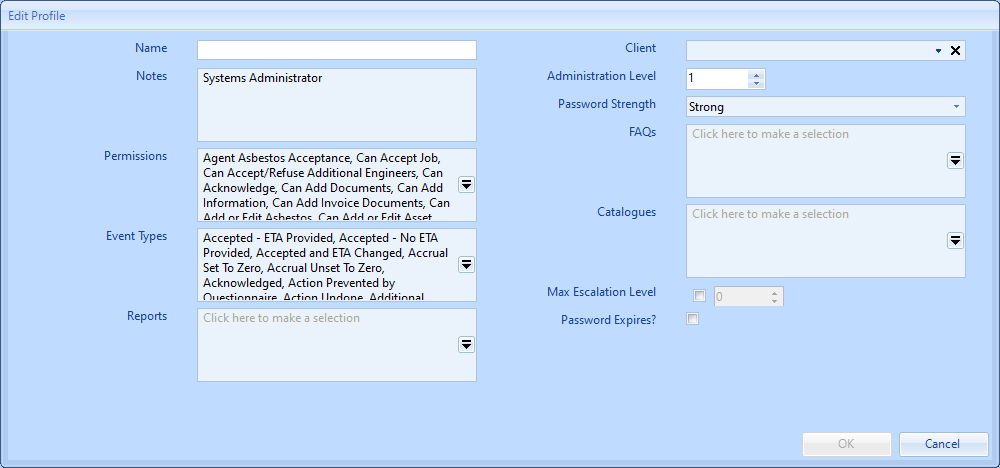
The next parts are related to the password. Ticking the "Password Expires?" tick box will ensure that the passwords of any User on this Profile will expire after a set amount of days (this is configured at Management Company level and a System Admin should be contacted for further information on how long this is). In the Password Strength field, by choosing different options, the required strength of the password for Users of the Profile can be set. There are 4 options to choose from:
- Default - This is the default setting for a password. Default passwords require 8 or more characters with a minimum of one or more of the characters having to be uppercase, lowercase, a number and one or more symbols.
- Medium - Medium passwords require 7 or more characters where at least one of them needs to be a number.
- Strong - Strong passwords are the same as Default passwords. They require 8 or more characters with one or more of the characters needs to be uppercase, one or more numbers and one or more symbols.
- Weak - Weak passwords only require 6 or more characters of any kind.
Following on from that, there is the Catalogues section. This section allows the User to specify which of the Catalogues in the system Users of this Profile have access to. Click this field and simply select the Catalogues that are applicable and click "OK".
The last two field are the Max Escalation Level and Password Expires? fields. The Max Escalation Level field is used to determine the highest escalation level for User of this Profile. This means that if a User attempts to escalate a WO to level higher than the level against their Profile, the system will not allow them to do so. If this is unticked, the Escalate action will not be present at all (see the Escalate page for more details). The Password Expires tick box is used to determine if the passwords for Users of this Profile will expire as per the system settings. If ticked, the setting will be used and the passwords will expire. If unticked, the passwords will not expire.
The last two field are the Max Escalation Level and Password Expires? fields. The Max Escalation Level field is used to determine the highest escalation level for User of this Profile. This means that if a User attempts to escalate a WO to level higher than the level against their Profile, the system will not allow them to do so. If this is unticked, the Escalate action will not be present at all (see the Escalate page for more details). The Password Expires tick box is used to determine if the passwords for Users of this Profile will expire as per the system settings. If ticked, the setting will be used and the passwords will expire. If unticked, the passwords will not expire.
Once all the necessary information has been entered, click "OK" to save the new Profile.
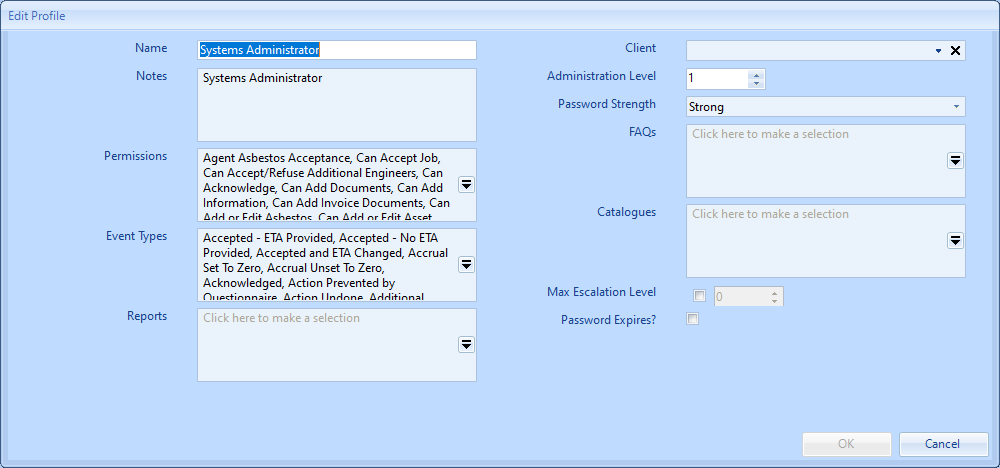
4. Once all the necessary tasks have been performed, click "Save" to save all changes.
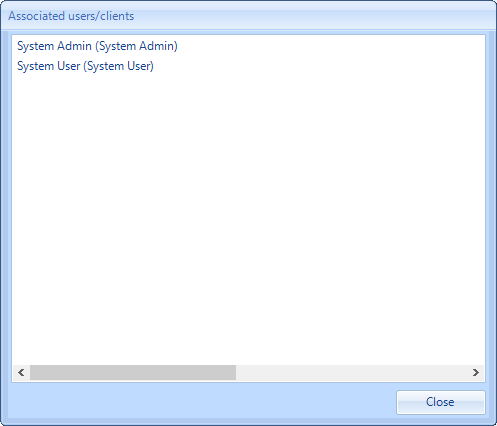
5. Additionally, on this screen you will notice a "Show users/clients" button - which will display a list of all the current Users (and their Usernames) who are associated to the highlighted Profile.
The "Clone" button will create an exact copy (with the exception of any Portal Widget association) of the highlighted Profile. The Edit Profile screen will appear and the User will be required to enter a name for the cloned Profile. There is also the option to amend other details of the cloned Profile. Click "OK" when all changes have been made.
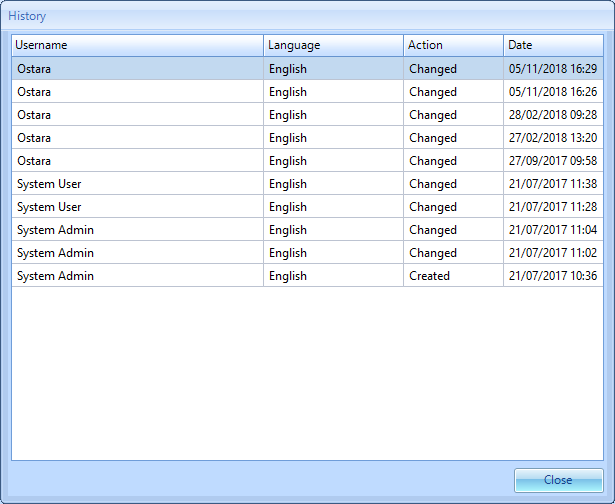
The "History" button shows the User who made a change to the Profile and when the change was made, along with the language it was changed in.
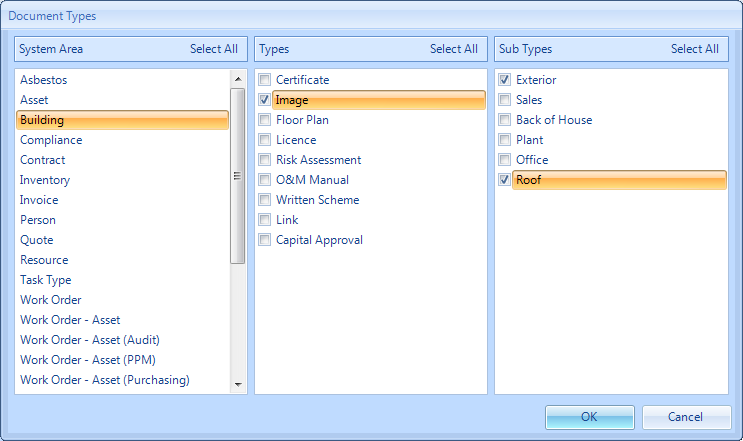
Note: The Document Types section allows the User to restrict access to specified Document Types from any Users with this Profile. The Editing of Document Types is accomplished using the following screen and ticking/unticking the available Document Types for the Profile currently being added/edited: