People subscribe to Notifications. Subscriptions are handled via the People module, and the subscription to Notifications means that those People will then receive Notifications via SMS or Email depending upon their preferences. This screen allows for the configuration of Notifications. Here, Users can decide what Notifications are used in the system and what each one is. Click the “Notification” button to view the Notifications currently in the system.
1. The first step is to select the Client that will be used. For information on how to do this, see the Client Selection page.
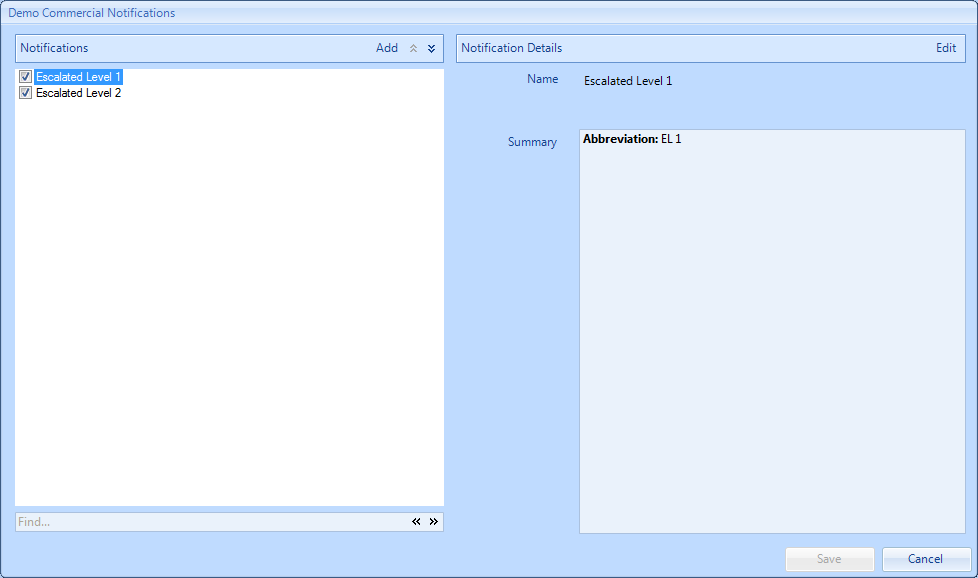
2.This is the Notifications screen. It's possible to tick and un-tick the desired Notifications depending on which types need to be available throughout the system. As with many other parts of the application, there is the ability to add items and edit items within the list using the "Add" and "Edit" buttons.
3. Click on “Add” to add a Notification. The “Add Notification” window will appear. Each of the fields on this screen are described below:
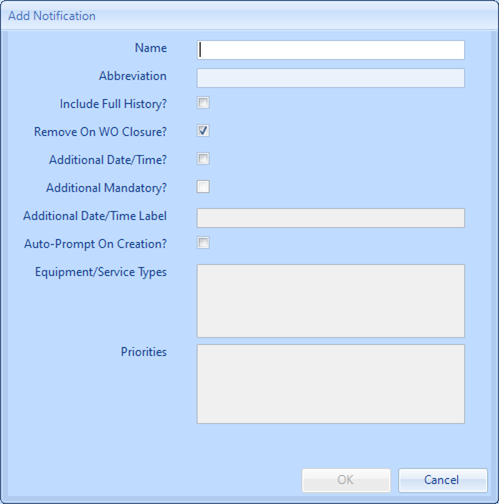
Name: The label for the notification
Abbreviation: An abbreviation for the notification label used in reporting
Include Full History? The notification that is sent will incorporate all notifications since the Work Order creation
Remove on WO Closure? When the Work Order is closed so will all open notifications
Additional Date/Time? The notification will ask for another date to be entered as part of submission e.g. building closure date
Additional Mandatory? This setting controls whether the additional date is mandatory
Additional Date/Time Label: This will prompt the user as to which date needs to be specified.
Auto-Prompt On Creation? This will automatically prompt the user to create a notification when the Work Order is raised. This will also enable the next two fields.
Equipment/Service Types: This will tie the notification to specific equipment/service type(s)
Priorities: This will tie the notification to a specific priority
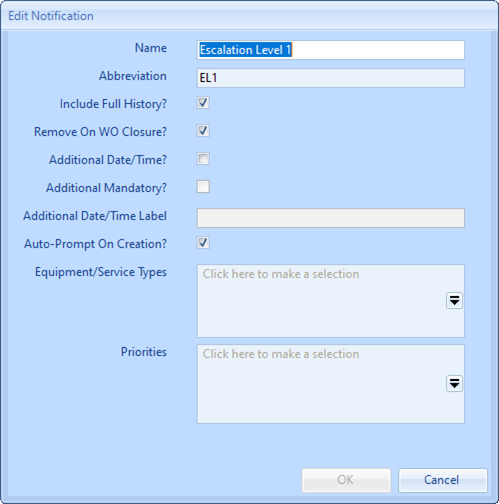
4.Notifications can also be edited in the list by selecting a Notification and clicking the “Edit” button. The “Edit Notification” screen will appear and the details of the notification can be modified. Click “OK” when the changes have been made.
5. Once all the changes have been made, click “Save” to apply them.