Rates and Availability - Hours Introduction
The Rates and Availability can only be set up from the list view as this avoids conflicts that could arise if Work Order Types were amended in the Resource at the same time as Rates and Availability being amended.
To set Resource Rates and Availability, select the Resource from the Resource List and click the "Rates and Availability" button. There are three types of groups available "Hours" - these are the standard rates that apply to the resource, "Response" - this allows the User to apply rate bands dependent on the response time of the Resource and "Service Level Achievement" - this allows the User to specify different rates depending on whether the job was started within the SLA or outside of the SLA.
This shows how to set up Rates and Availability for "Hours"
1. The first screen to appear is the Rates and Availability Client Groups screen. From here, a list of the Client Rate Groups that exist for the Resource are displayed. Each Rate Group displays the Rate Group name, Type, Clients, Start and End Dates and whether it is the default Rate Group.
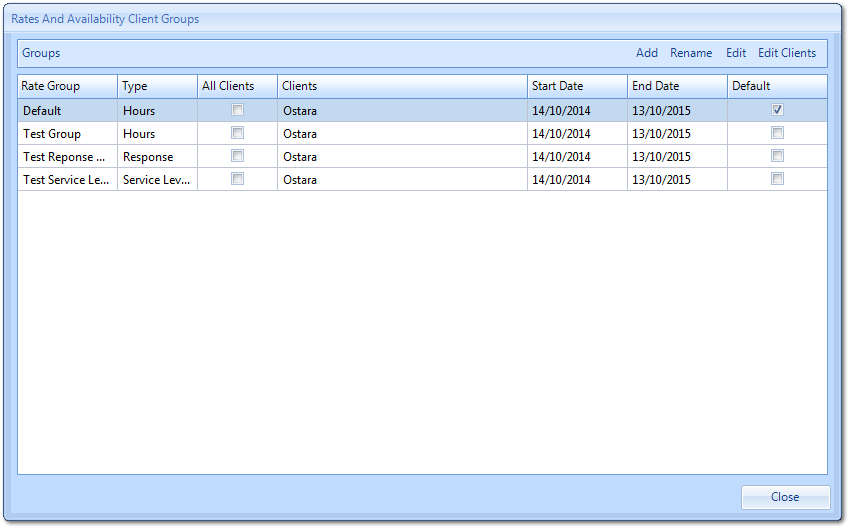
Once the Clients have been added, select the Client Rates Group for the desired Client and double click or select "Edit" to open up their rates.
2. This displays the Rates and Availability screen. This is where the rates the Resource charges and when the Resource is available to work are stored. Each of the rates fields are explained below:
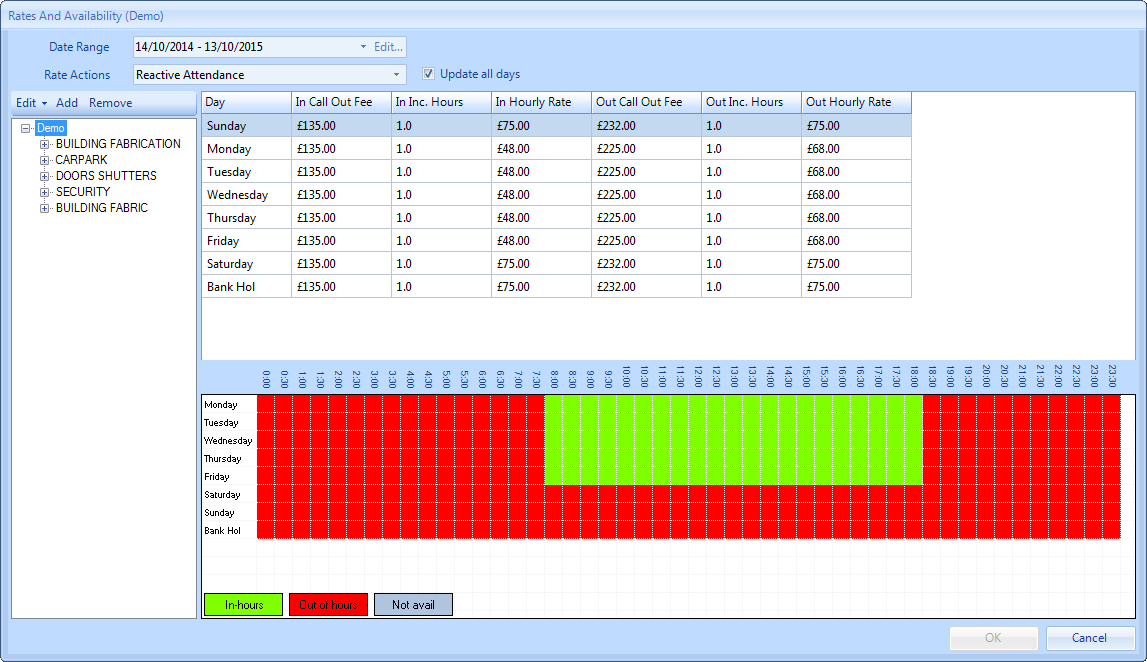
Date Range is a drop down in which different date ranges can be selected. Different ranges can have different rates and Date Ranges can be added or edited using the "Edit" button next to the field.
Note: It is possible add in Date Ranges that have no End Date. This therefore means that the rates will continue to use this Date Range indefinitely, until a new Date Range or an End Date is added.
Rate Actions is a drop down in which different rate groups can be selected. There are four Rate Actions that can be selected and they are "Reactive Attendance" - these rates are used on the scheduler and in the calculation of the Total Calculated Cost field upon stop job on a reactive work order, "Remote Fix" - these rates will apply when using the Agent Action of Remote Fix on a reactive work order, "Day Rates" - will apply when selecting "use day rate" on the scheduler, and "Reactive Reattendance" - these rates are used on the scheduler and in the calculation of the Total Calculated Cost field upon stop job on a Reactive Work Order following an initial attendance. Each of these contain different sets of rates.
Update all days is a tick box that, when selected, tells the system to update all the days with the value that is entered. This reduces the need to duplicate data across multiple days.
Day is a non-editable column that display the days on the week (and a Bank Holiday field) in separate rows.
In Call Out Fee is a numerical column where the cost of calling out the Resource is entered. This can be different for each Day if applicable and applies to In Hours only.
In Inc. Hours is a numerical selection column where the number of included In Hours hours is entered. Select the amount of hours by using the increase and decrease arrows.
In Hourly Rate is a numerical column where the In Hours hourly rate is entered.
Out Call Out Fee is a numerical column where the cost of calling out the Resource is entered. This can be different for each Day if applicable and applies to Out of Hours only.
Out Inc. Hours is a numerical selection column where the number of included Out of Hours hours is entered. Select the amount of hours by using the increase and decrease arrows.
Out Hourly Rate is a numerical column where the Out of Hours hourly rate is entered.
3. Underneath the rates is the availability section. This is where the Resource's availability is recorded. To record this information there are three buttons: In-hours, Out of hours and Not avail. Use "In-hours" to record the times of the Resource's working hours, "Out of hours" to record the times when the Resource is out of their office working hours and "Not avail" when the Resource is not available at all.
Note: Each time block on the table is half an hour and starts from the time displayed above it. E.G. the 8:00 block starts at 8:00 and finishes at 8:30, the 8:30 block starts at 8:30 and finishes at 9:00 etc. If no availability is set up, the system will automatically assume that the Resource is available 24/7.
Note: Each time block on the table is half an hour and starts from the time displayed above it. E.G. the 8:00 block starts at 8:00 and finishes at 8:30, the 8:30 block starts at 8:30 and finishes at 9:00 etc. If no availability is set up, the system will automatically assume that the Resource is available 24/7.
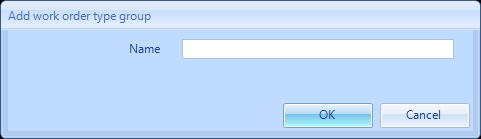
4. Next, the user will need to enter the Work Order Types the rates will apply to. To do this the user can either click the "Add" button in the left column or use the "Default" Work Order Type Group that already exists.
5. Clicking the "Add" button will open this screen:
7. Clicking the Edit button will present the user with three options:
Work Order Type Group clicking this option will present the user with the screen above, where the user can rename the work order type group
Work Order Types clicking this will allow the user to specify the work order types to be included in the rates set.
Sub Work Order Types clicking this will allow the user to specify the sub work order types to be included in the rates set. (This can only be selected once Work Order Types have been added)
8. Work Order Types can be set by clicking on the "Work Order Types" dropdown from the "Edit" menu, this screen will then open:
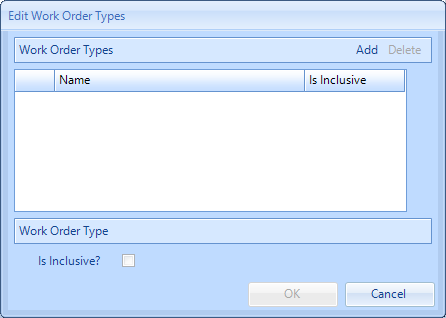
Here, the User can add the relevant Work Order Types to the Work Order Type Group. Clicking the "Add" button will display a list of Work Order Types to add that can be added to the WO Type Group. Once selected, they appear in Edit Work Order Types window where there is one more option for the user to decide: whether these are Inclusive or not. This is controlled using the "Is Inclusive?" tick box which will determine if all Sub Work Order Types under the selected Work Order Types are included in the WO Type Group. Tick this to include them.
Click "OK" to add the Work Order Types once they have been selected.
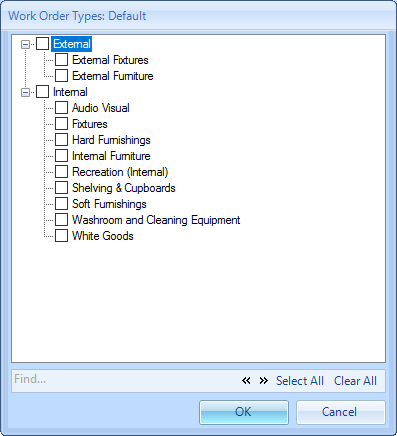
Here, the User can select which Sub Work Order Types are applicable to this Rate Group. Tick the box against the required Sub Work Order Types to make sure they are added. If all Sub Work Order Types under a Work Order Type are applicable then ticking the Work Order Type will select all Sub Work Order Types under it. The User can also use the Select All and Clear All buttons to select all or clear the selection if needed. Once all the necessary Sub Work Order Types have been ticked, click "OK" to add them.
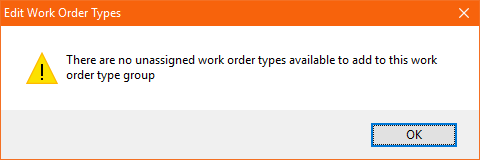
Note: If the "Is Inclusive?" tick box was ticked then the User will be shown this message when clicking "Edit" then "Sub Work Order Types":
Note: If the "Is Inclusive?" tick box was ticked then the User will be shown this message when clicking "Edit" then "Sub Work Order Types":
10. The user can set up many rate groups that have differing rates applied down to Work Order Type. See the screen shots below for examples:
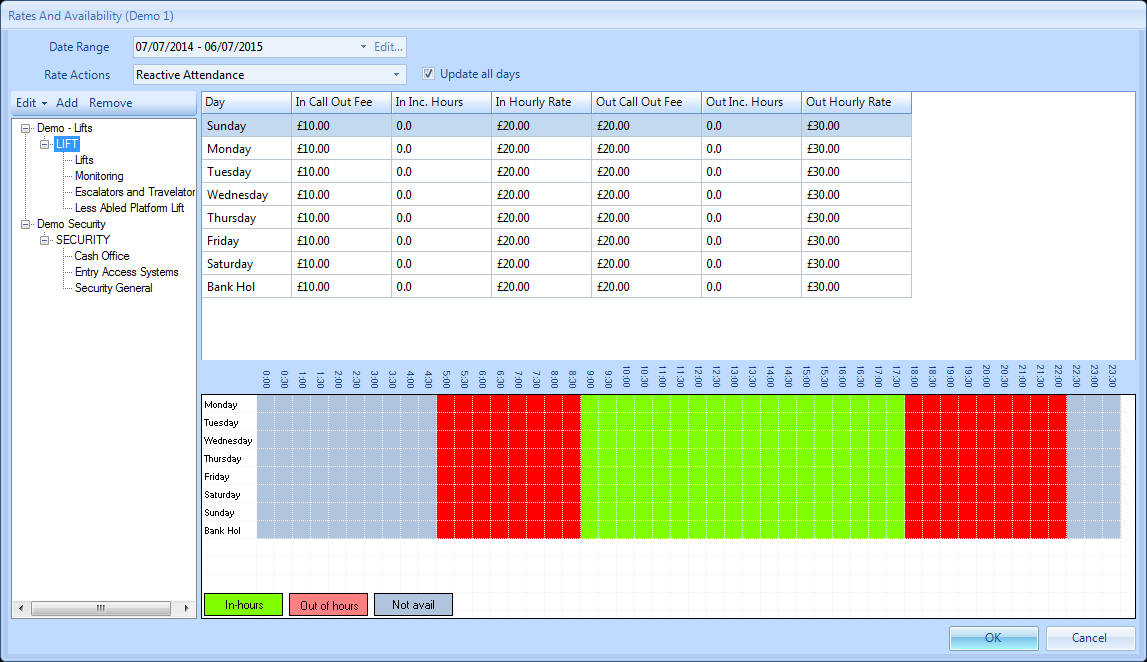
Rates for Lifts:
Rates for Lifts:
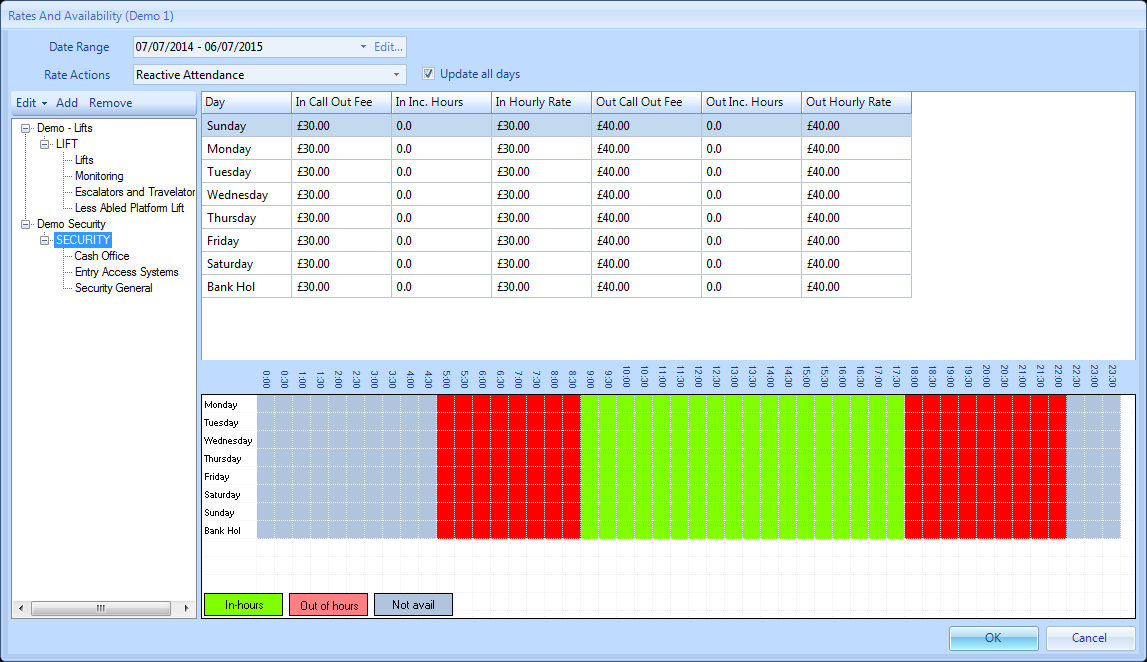
Rates for Security:
11. If the user wishes to remove a rate group as it is no longer relevant, this can be done by highlighting the group on the left hand side of the screen and clicking the "Remove" button.
12. The user will then receive this message:
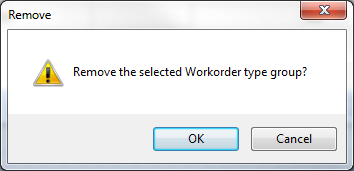
13. Clicking "OK" will remove the highlighted rate group. Clicking "Cancel" will return the user to the previous screen.
14. Finally, once all the rates and information has been entered, click "OK" to save the changes.
Editing Rates and Availability - Hours