Creating a Quote Work Order introduction
A Quote is a type of Work Order which is used to obtain one or more quotations before the Client decides what Resource will undertake the work.
To create a quoted Work Order click the "Create Quote Work Order" button.
1. The first step is to select the Client that will be used. For information on how to do this, see the Client Selection page. This will only appear if there are multiple Clients to select from. If there is only one then that Client is selected automatically.
2. The Quote Work Order screen appears after selecting a Client.
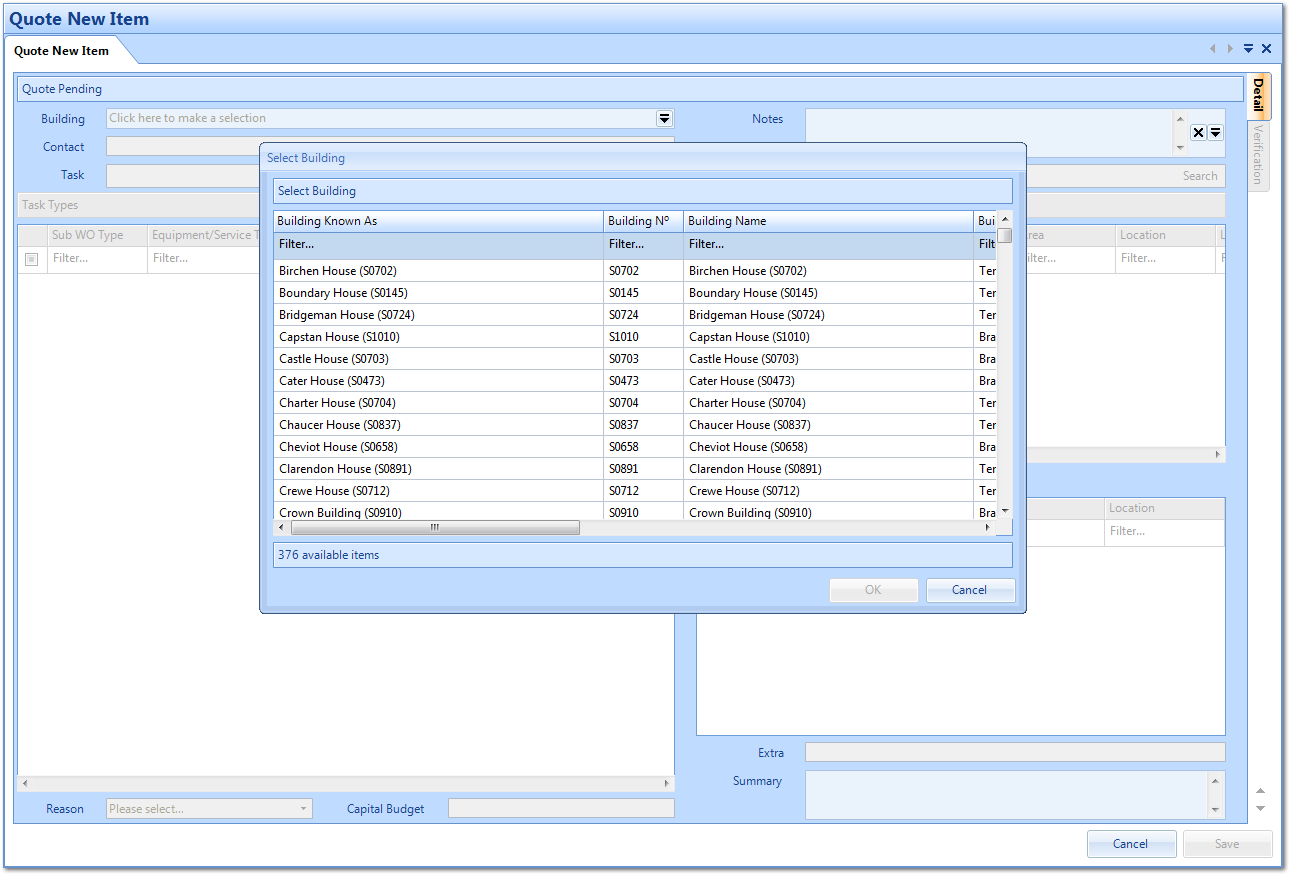
3. Select a Building by either double-clicking or by highlighting a Building and clicking "OK".
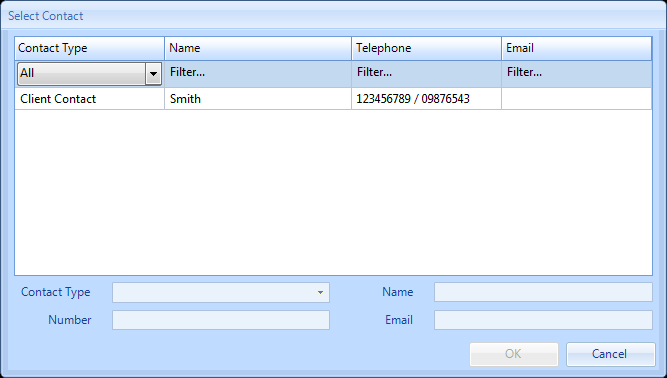
5. If the person calling is not listed in the main window, click on the Contact Type drop down box

then manually enter the name, number and email address at the bottom of the screen and click "OK". Any information automatically populated can be overwritten here, if for example a contact number has been changed, simply type in the new number and click "OK"
Task is a search field which allows you to search Core Data to find Equipment/Services types to log this work order against.
6. Enter the Task Type and click 'Search' or if you know the Asset number, enter this in the Asset field and click 'Search'.
7. Enter the Task Type and click 'Search' or if you know the Asset number, enter this in the Asset field and click 'Search'.
8. The Ostara application will bring back a list of items which meet the search criteria (based on the keywords set up in Core Data against each equipment/service type). Select the line applicable to the Task or Asset type.
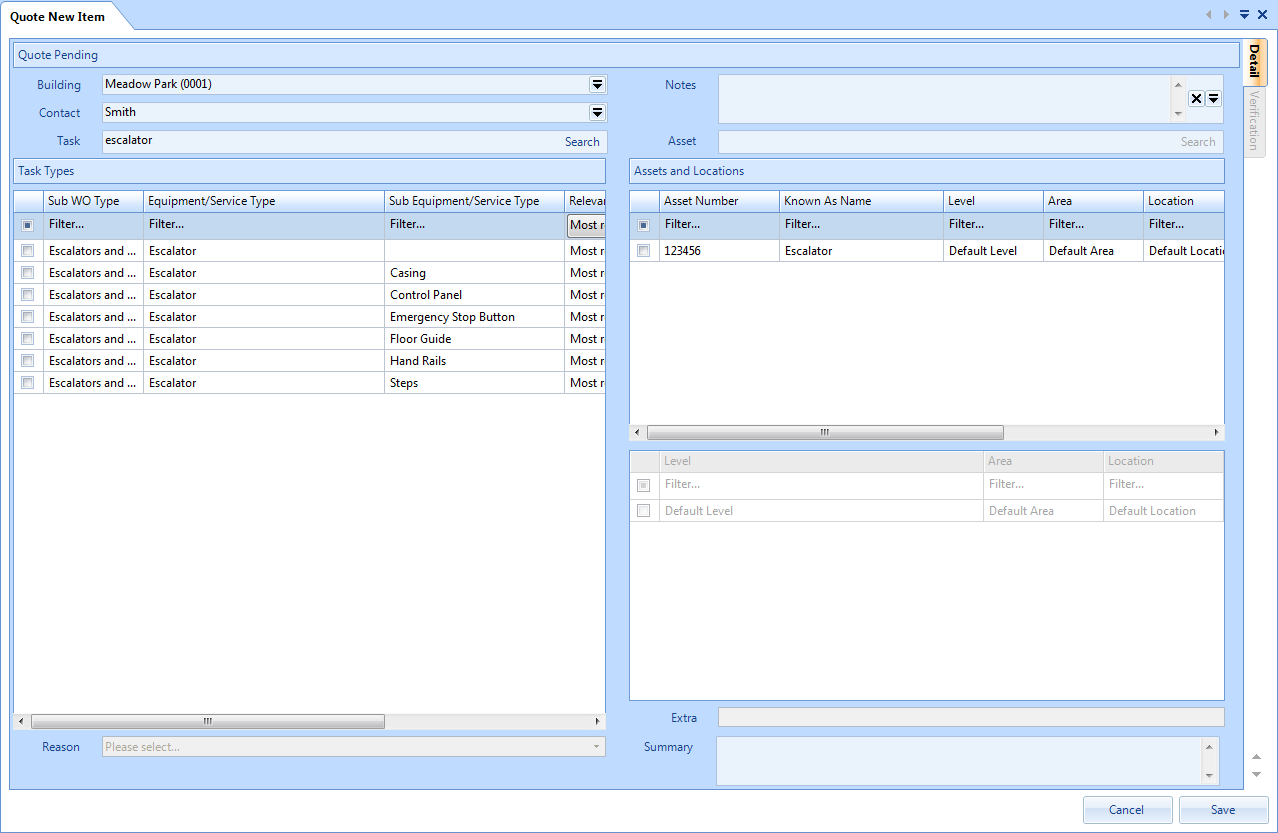
9. Once a Task Type has been selected the User will then need to choose a Location. What is shown in the Locations table depends on what is selected in the Location Type drop down. By default, Specific is selected and displays the specific Location Mappings for the Building. Selecting Whole Area displays Location Mappings that have a Level and Area and selecting Whole Level displays Location Mappings that have just a Level, all for the selected Building. The last option in the Location Type drop down is Unspecified Location and this should be chosen if the location of the work has not been specified or is unknown.
Any extra information that may be required to help locate the issue can be added in the "Extra" field.
Any extra information that may be required to help locate the issue can be added in the "Extra" field.
Note: If an Asset has been selected you do not need to select a location as this has already been set in the Asset module.
10. Notes can be added at this stage. Notes can be copied using the Ctrl+A, selects/highlights all in the notes field (text can also be highlighted using the mouse). Ctrl+C, which will copy any highlighted text and Ctrl+P, which will paste any copied text into the notes field.
Reason is a predefined drop down list of Reason codes which are listed against the Client selected. The identification of Reason Code will ensure accurate identification for reporting and trend analysis.
11. Select a Reason for the Task by clicking on the arrow and choosing one of the options from the drop down.
12. A summary of the Task and Location will be displayed in the "Summary" field.
13. Once the information has been completed click "Save". If you would like to abandon without saving click the "Cancel" button.
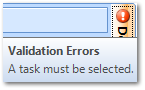
If, when clicking on "Save" the following exclamation mark is visible at the side of the screen, it will be due to missing mandatory information. Please fill in all required fields and click on the Save button again.
If, when clicking on "Save" the following exclamation mark is visible at the side of the screen, it will be due to missing mandatory information. Please fill in all required fields and click on the Save button again.
14. Ostara will now automatically check for duplications, by checking for any Work Orders which have been raised against the same Building and with the same Task Type/Asset over the past 14 days (Note: 14 days is the default, but this is can be set by Management Company). At the same time, Ostara will advise the User if Building Events exist that could be impacted by the creation of this Work Order. If there are no duplicates or Building Events present then the system will automatically raise the Work Order and proceed to the next step. If, however, there are potential duplicates found the following screen will appear:

15. Any Quoted Work Order numbers which are potential duplicates will be shown in a list. The colour coding (shown in the first column) denotes how many parts of the Work Order match one already raised. The more matches the more similar the Work Order is. If you are sure the work order that the new Work Order created is not a duplicate click on the "Save" button.
If on the other hand you think that one of the listed results is a duplicate and should be used for this work, click on the "View" button and this Work Order will open in a new tab (the one you are raising will NOT be lost). If this is the same and a duplicate Work Order will be raised then go back to the one being raised and click on the "Confirm" button. This will take the User to the Work Order previously raised and the new one will be cancelled automatically.
If on the other hand you think that one of the listed results is a duplicate and should be used for this work, click on the "View" button and this Work Order will open in a new tab (the one you are raising will NOT be lost). If this is the same and a duplicate Work Order will be raised then go back to the one being raised and click on the "Confirm" button. This will take the User to the Work Order previously raised and the new one will be cancelled automatically.
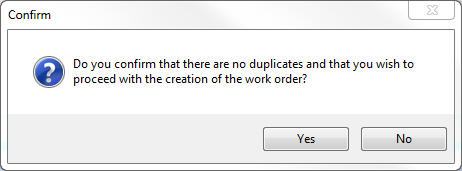
16. The application will ask for confirmation that there are no duplicates for the Quoted Work Order being raised. In order to proceed to the creation stage click "Yes". Clicking on "No" will return you back to the verification screen.
17. Once the User confirms that this is not a duplicate the Quoted Work Order has now been successfully created.
Defining the Specification and Setting the Schedule for Attendance